The goal of this page is to explain how the Percentage Rent (PR) feature works. It will explain the step-by-step process we take to calculate the Percentage Rent charge for a given lease.
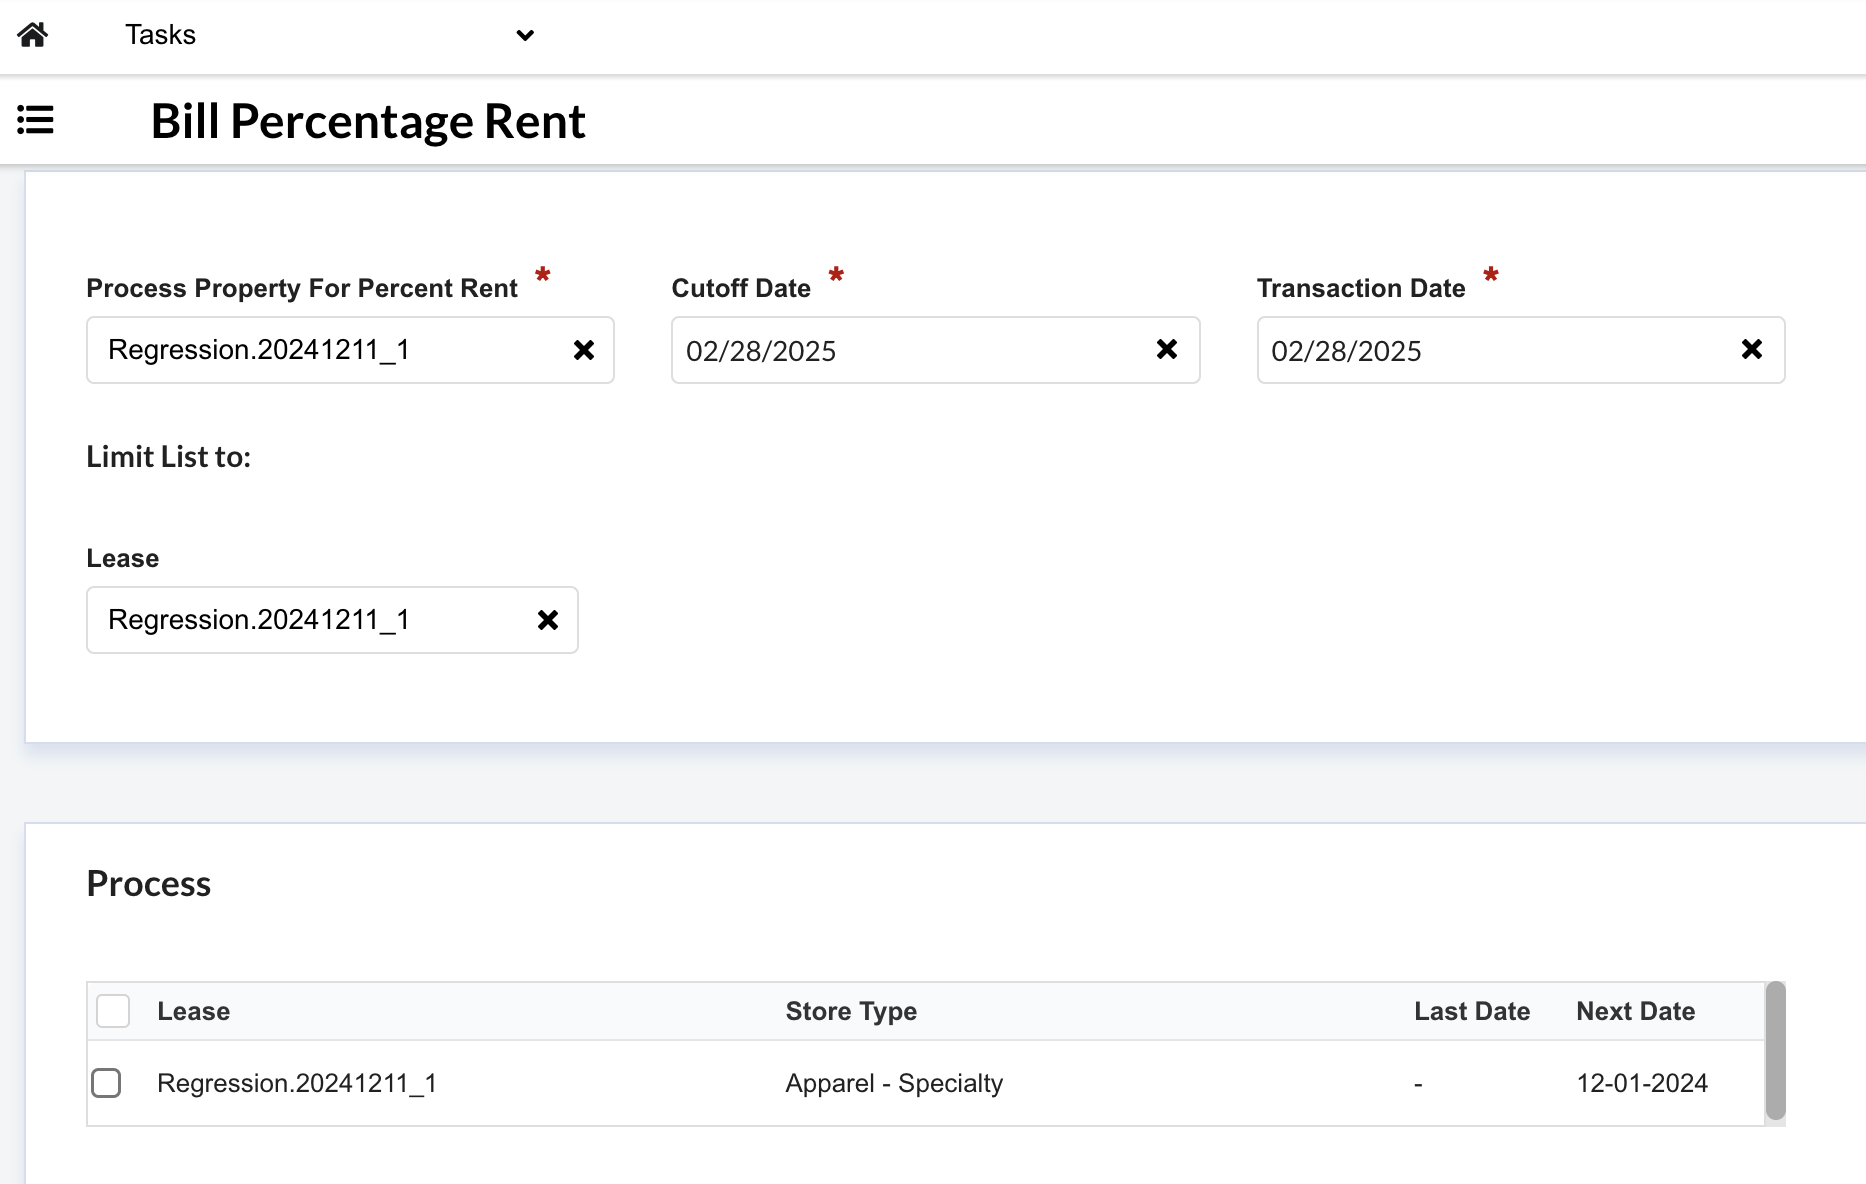
To start this process, the user selects the Leases they want to run PR for, along with a Cut Off Date and a Transaction Date. The input then is as follows:
-
List of lease IDs
-
Cut Off Date, which we will use for filtering which Percentage Rent qualifies to be calculated, and optionally to calculate a sales base amount.
-
Transaction Date, which we will use as the transaction date of the invoice we create at the end of this process
With these input fields, we proceed to calculate the PR charge. The detailed process is explained below, but the step-by-step process is as follows:
-
Check which lease of the ones in the input qualifies to be calculated
-
Pick up sales entries for each lease that passed the previous filter
-
Filter these sales entries based on sales type and sales date
-
Calculate the sales base amount of the PR
-
Calculate overage based on PR configuration and sales entries from Step 3
-
Given the overage calculated in Step 5, the sales base amount of Step 4, and the cap amount configured at the PR level, calculate the final charge amount for the invoice.e
-
Create the invoice with the amount from Step 6
-
Advance billing next date of PR
Step-by-Step Process
Now we will see how each step works in detail. Given that the input is a collection of lease IDs for which we want to calculate PR, each step below is performed on one lease at a time, iteratively.
Step 1 - Check if the lease qualifies
Before we do any calculation, we make sure that the lease qualifies to have its PR charged. To do this, we check the following conditions, using the Cut Off Date the user entered as input:
-
Billing Next Date must be the same or before the Cut Off Date
-
Overage dates must be valid by:
-
Overage Start Date must be the same or before the Cut Off Date
-
Cut Off Date must be the same or before the Overage End Date, or the Overage End Date must be empty
-
If these conditions are met, then the lease qualifies to be processed.
Step 2 - Get sales entries for lease
In this step, we simply fetch from the database all sales entries for the given lease. The filtering is done in the next step.
If we find no sales entries for this lease, even before filtering, then we have nothing to calculate and simply return an empty journal informing the user there were no sales entries found for this lease.
Step 3 - Filter sales entries
Here we want to filter the sales entries from step 2 by using the dates configured at the lease level.
We pass each sales entry by two filters:
-
Sales type of the sales entry must equal sales type of the PR (Reported, Estimated, or Audited)
-
Sales date of the sales entry must be within the range of the calculation period for this PR (this is explained right below)
The calculation period for the PR is derived based on the PR’s breakpoint method (Cumulative or Non-Cumulative). In any case, the calculation period will be a date range with a lower and an upper limit against which we will compare the sales entry’s sales date. In both cases, the upper limit date will be the same (explained below), but the lower limit will be different.
Cumulative method
Lower limit date: Tenant Fiscal Year End Date, minus 11 months
Example: if the Tenant Fiscal Year End Date is 22/12/2024, then we subtract 11 months, and move it to the beginning of the month (because we always want to consider whole months). Thus the lower limit in this case is 01/01/2024.
Non-Cumulative method
Lower limit date: Billing Next Date minus ((PR’s Month Frequency) months minus 1)
Example: if the Billing Next Date is 23/11/2024, and Months Frequency is 3, we subtract (3 - 1) months to the Billing Next Date, and move it to the beginning of the month.
In this example, month of Billing Next Date = 11, and Months Frequency = 3, telling us we want to calculate 3 whole months.
Thus we subtract 11 - (3 - 1), so that we move this date to the month of September, and can calculate September, October, and November, giving us 01/09/2024 as lower limit date.
In both breakpoint methods, the upper limit date is derived the same way.
Upper limit date: PR’s Billing Next Date
In this case we move the Billing Next Date to the end of the month, so that we consider the whole month. In other words, whatever the month - year of the Billing Next Date is, that will be the one we use as upper limit.
As an example, if the Billing Next Date is 17/06/2024, then the upper limit will be 30/06/2024.
Whenever we talk about dates in PR, we want to make sure we are always calculating whole months, regardless of what the initial values of the specific dates used for filtering are. Therefore if the Billing Next Date of a PR is in the middle of the month, we only care about the month - year value and not the specific day, and thus move it to either the beginning or the end of the month (depending if we are using it as the lower or upper limit)
Now that we have determined our calculation period, with a lower and an upper limit to use as range, we check which sales entries have a sales date that falls within that range, and discard those which don’t.
If no sales entry pass this filter, then we have nothing to calculate and just notify the user there were no qualifying sales entries.
Step 4 - Calculate Sales Base
Sales Base Amount represents the value under which the tenant is not due to pay any charges when being billed PR.
We calculate this value here on step 4, but only use it after we have calculated the overage value in step 6.
There are two different ways to arrive at the sales base amount:
-
The user inputs the amount when configuring PR at lease level, in which case we just use that numeric value
-
Or, the user selects the option “Based on charges” when configuring PR, telling us we have to calculate this amount each time we run the PR process (this is explained below)
Whether they choose option 1 or 2, the output of this step is a numeric value that we will use after calculating the overage.
Sales Base Amount Based on Charges
When the user selects this option, they have to pick which recurring charges of this lease are also used for PR. To calculate the sales base amount, we use the same logic we do when running the Generate Scheduled Charges process, calculating the charges of the recurring charges of this lease that have the Subject to Percentage Rent checkbox active, and the Cut Off Date entered as input for this process.
This will give us a numeric value (by adding up the calculated charges of each recurring charge selected as subject).
Once we have this Sales Base Amount value, we set it aside momentarily to use it later.
Step 5 - Calculate Overage
This is the step where we apply the breakpoint table configured at the lease level to the sales entries that were filtered in step 3.
There are two methods to calculate this: cumulative and non-cumulative. Both are explained in detail below in their respective pages.
Regardless of the breakpoint method selected and how exactly it is calculated, the output of this step will be a numeric value that we will call our overage.
Step 6 - Calculate Final Charge Amount
At this point, we count with the following variables:
-
an optional Cap Amount, configured at PR level
-
a Sales Base Amount, calculated in step 4
-
an Overage Amount, calculated in step 5
In this step, we want to know how much the actual charge to the tenant will be, if any. For this we take the following steps:
-
We compare the Overage Amount to the Sales Base Amount:
-
If the Overage Amount is greater, we subtract the Sales Base Amount from the Overage Amount
-
If it isn’t, then there are no charges to be billed, because the Sales Base Amount is equal or greater than the Overage Amount, and the result of the subtraction from point a will be <= 0, therefore we stop the process here, and do not charge anything to the tenant
-
-
If option a was successful in the previous step, we have a value X that represents Overage Amount - Sales Base Amount, and that is positive. We compare this to the Cap Amount:
-
If there’s no Cap Amount configured, X is the final charge to the tenant
-
If there’s a Cap Amount configured, then:
-
If the Cap Amount is greater, X is the final charge to the tenant
-
If the Cap Amount is lower than X, meaning it has been exceeded, the Cap Amount is the final charge to the tenant
-
-
Once again, the output of this process is a single numeric value, that is used in step 7. Before leaving this step, we apply rounding (if it was configured).
Step 7 - Create Invoice
In this step, we simply create the invoice for the tenant using the value from step 6 and the Item ID configured at PR level, and notify the user.
Step 8 - Advance Dates
After the invoice has been created in step 7, we have one final step which is updating the Billing Last Date, advancing the Billing Next Date of the PR, and potentially the Tenant Fiscal Year End Date.
Billing Last Date
Will equal the date in which the PR process is being run.
Example: if the PR process is run on 17/09/2024, then the new Billing Last Date will be 17/09/2024.
Billing Next Date
After each billing cycle, regardless of the breakpoint method, Billing Next date is advanced by Months Frequency months.
Example: if Billing Next Date is 22/08/2024, and Months Frequency is 2, we add 2 months to Billing Next Date, resulting in 22/10/2024.
Tenant Fiscal Year End Date
This date is only advanced in the case that the breakpoint method is cumulative, and provided the following condition is met: the month and year of the Billing Next Date (before performing this step, i.e. before advancing it as explained above) equals the month and year of the Tenant Fiscal Year End Date.
If this condition is met, this means the Billing Next Date has “caught up” with the Tenant Fiscal Year End Date, and that we have already calculated the entire year for this PR.
Therefore we add 1 year to the Tenant Fiscal Year End Date (i.e. if it was originally 22/12/2024, it will be 22/12/2025).
If the condition above is not met, then the Billing Next Date is advanced regardless, and the Tenant Fiscal Year End Date is left untouched.