This functionality enables companies to generate Tenant Statements and send them to tenants, ensuring they are informed about their balances.
Steps
-
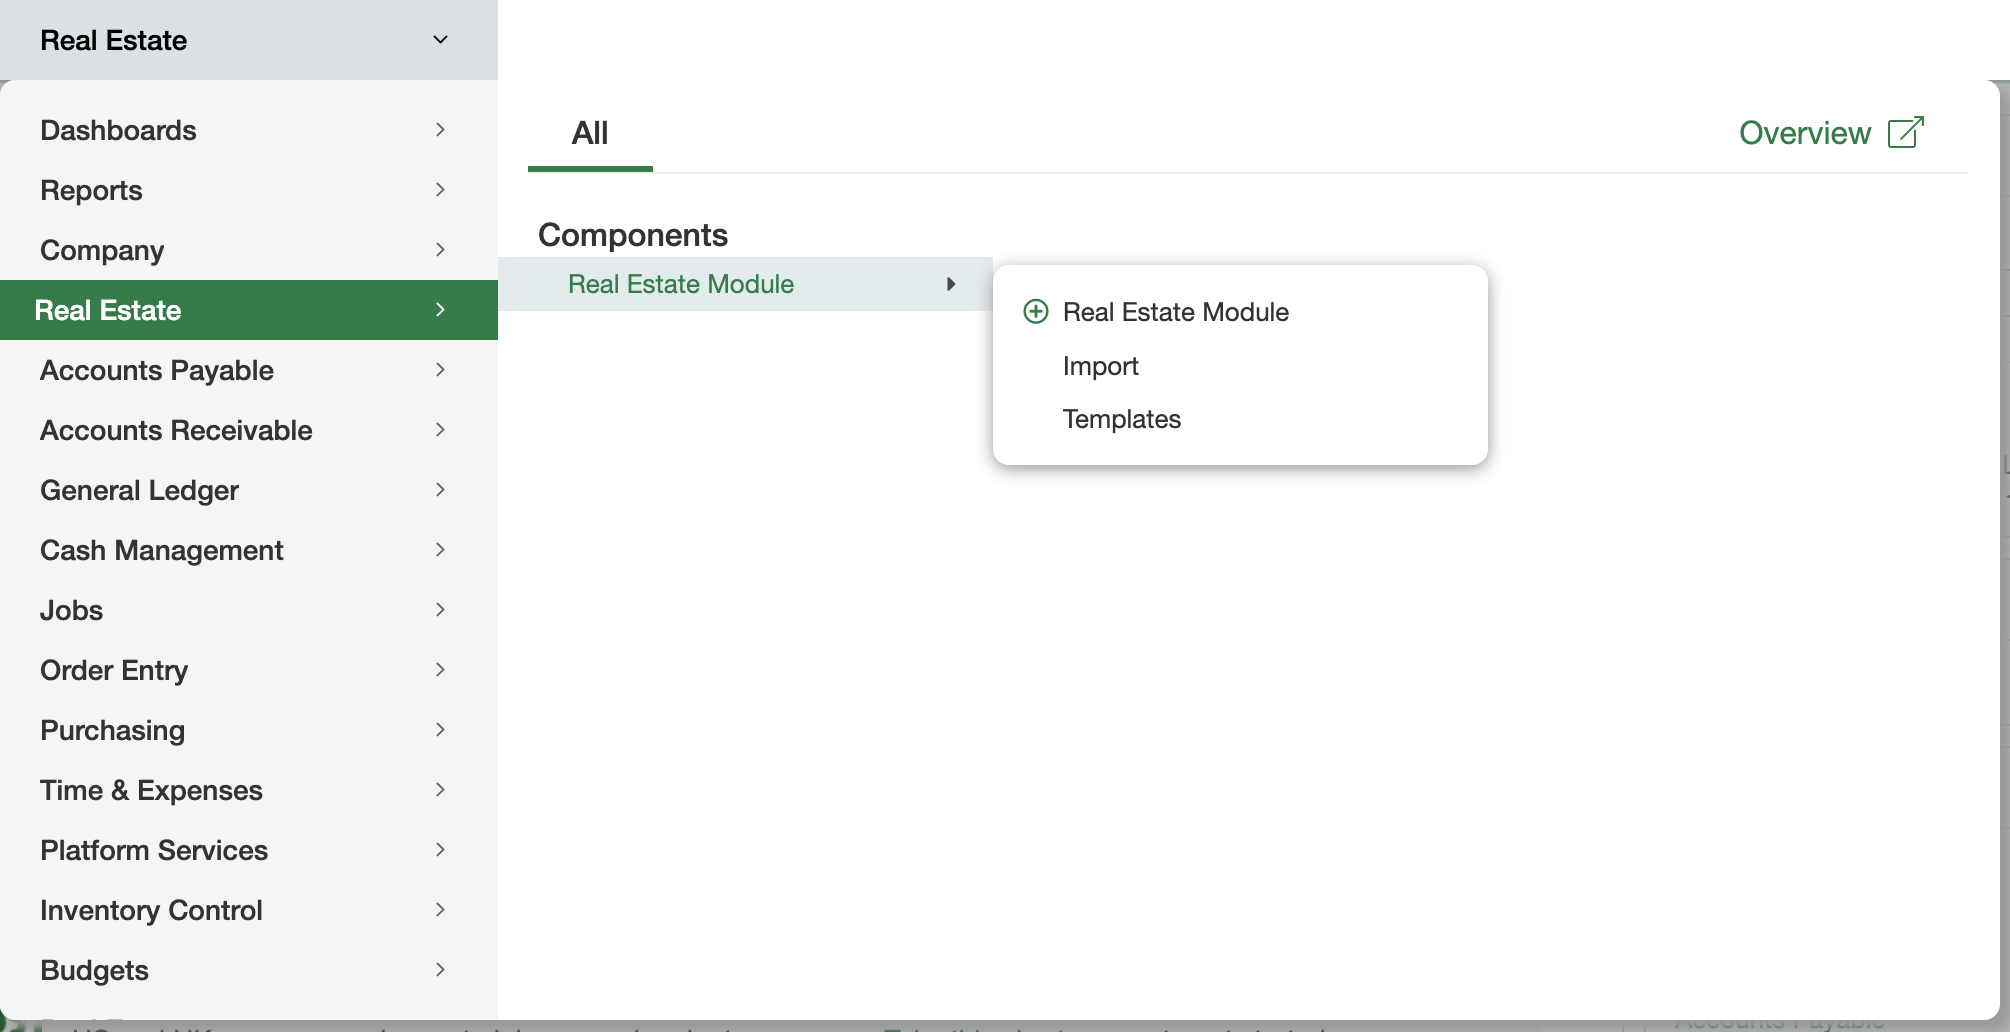
Navigate to the Real Estate Module
-
Applications – Real Estate – Real Estate Module – Real Estate Module
-
-
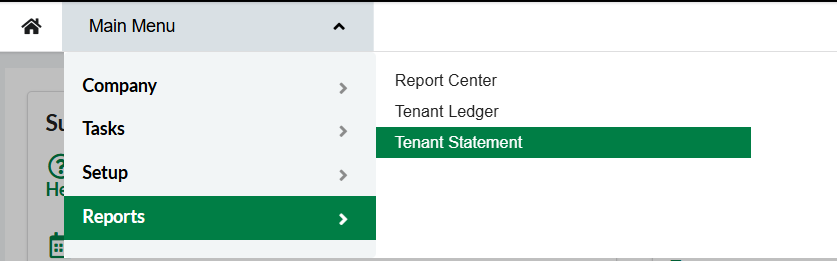
Navigate to the Tenant Statement screen
-
Main Menu – Reports – Tenant Statement
-
-
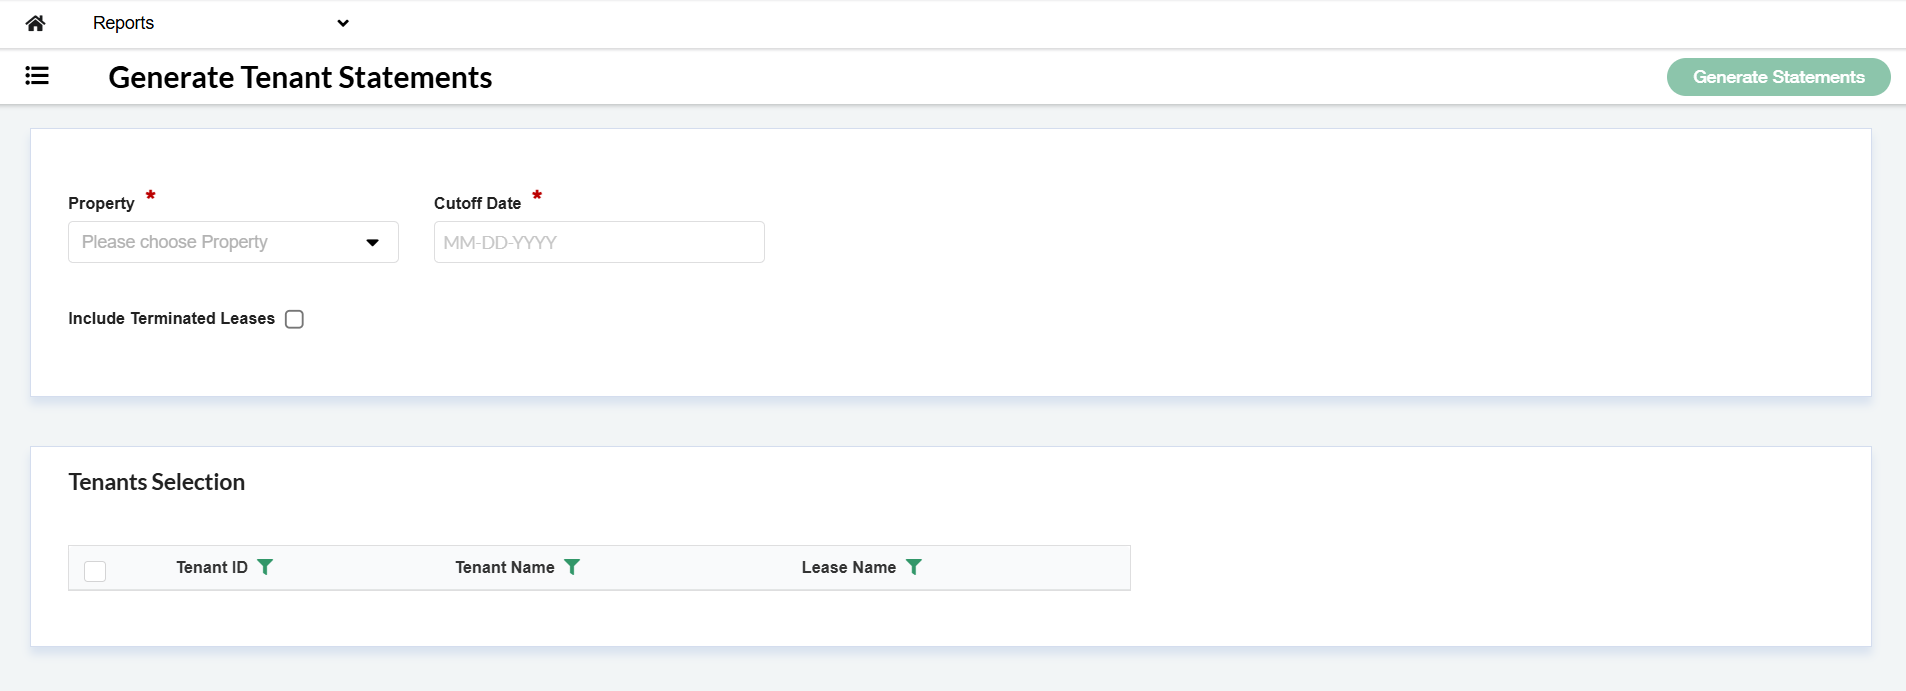
Complete the mandatory fields:
-
Property: it enables you to search and choose any of your properties. After the property is selected, only the Tenants with leases on the chosen property will be shown in the Tenants Selection list
-
Cutoff Date: it indicates the To Date until which the charges are considered for generating the Tenant Statement
-
-
The Include Terminate Leases checkbox lets you decide if you want to include in the Tenant Statements screen the Tenants included in Terminated Leases or exclude them by not checking the box.
-
Select the Tenants you want to generate the Statement for and click the Generate Statements button
-
You can filter by Tenant ID, Tenant Name, and Lease Name
-
-
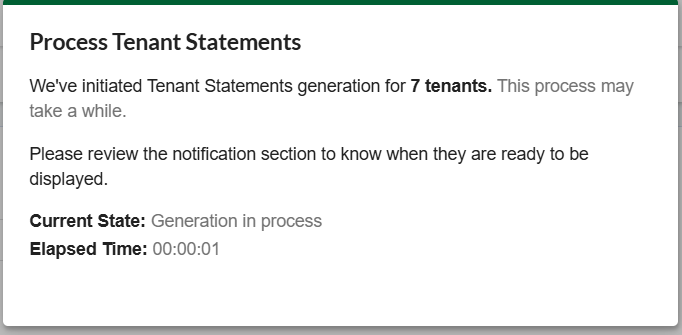
The Process Tenant Statements modal is displayed, informing that the Tenant Statements generation is in progress
-
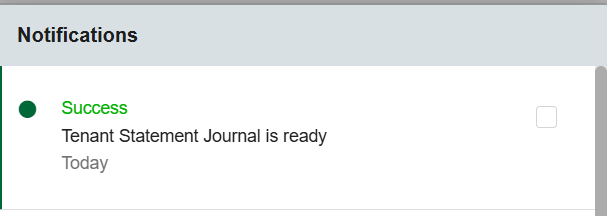
When the Tenant Statement journal is generated, a Success notification is received
-
Click the notification and click the View details button to see the Tenant Statements

-
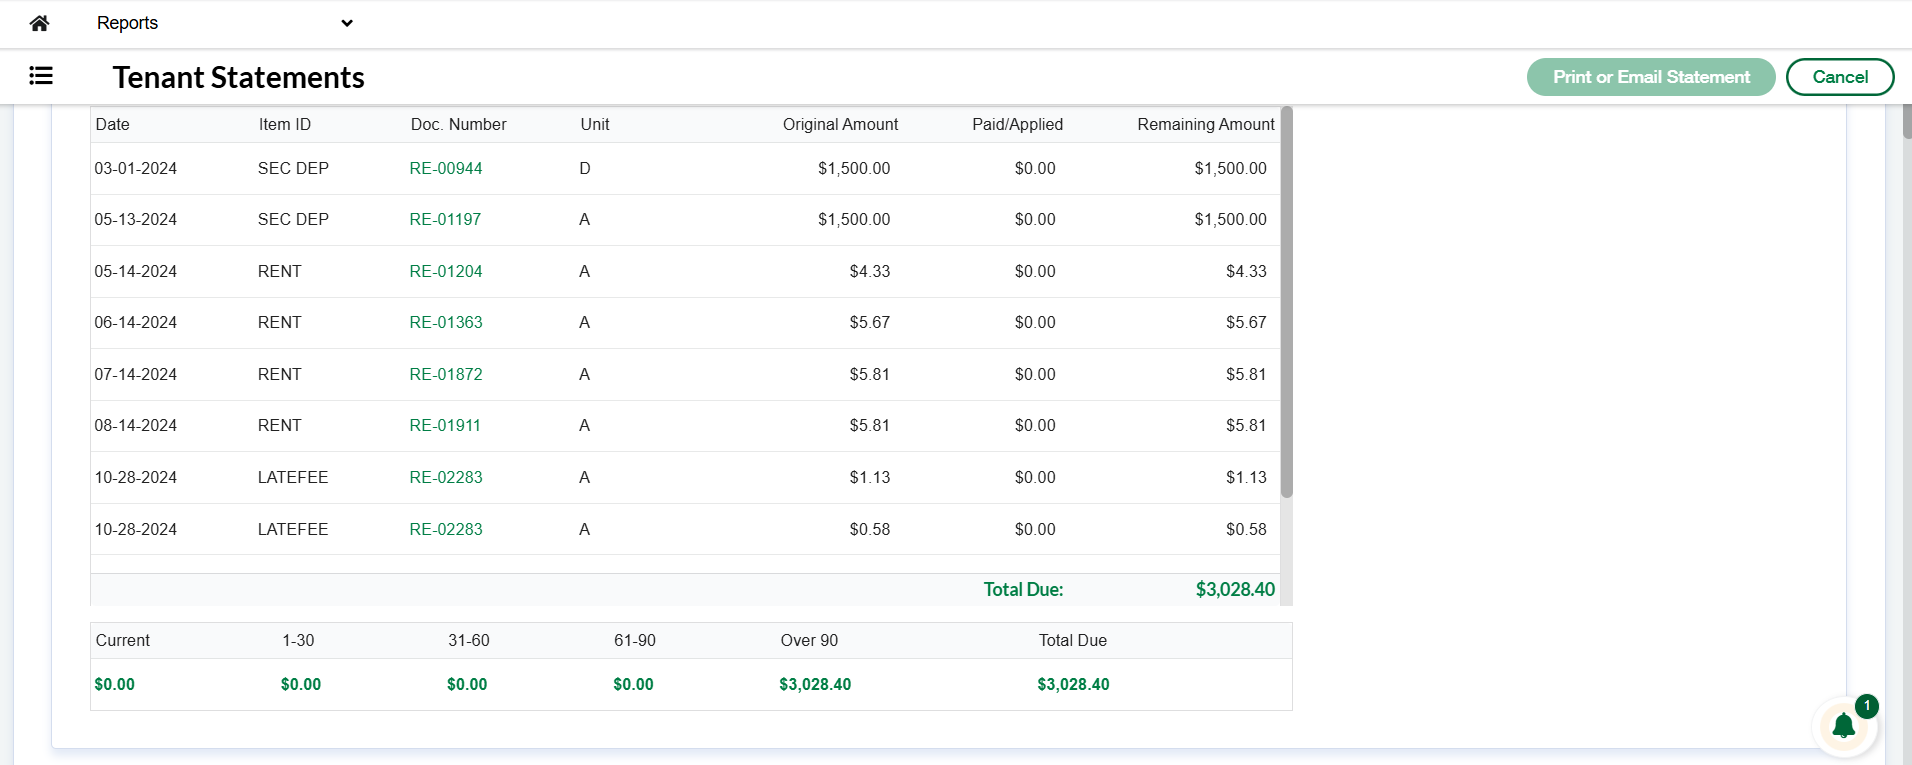
The Tenant Statements screen will show the statements for the selected tenants containing the following information:
-
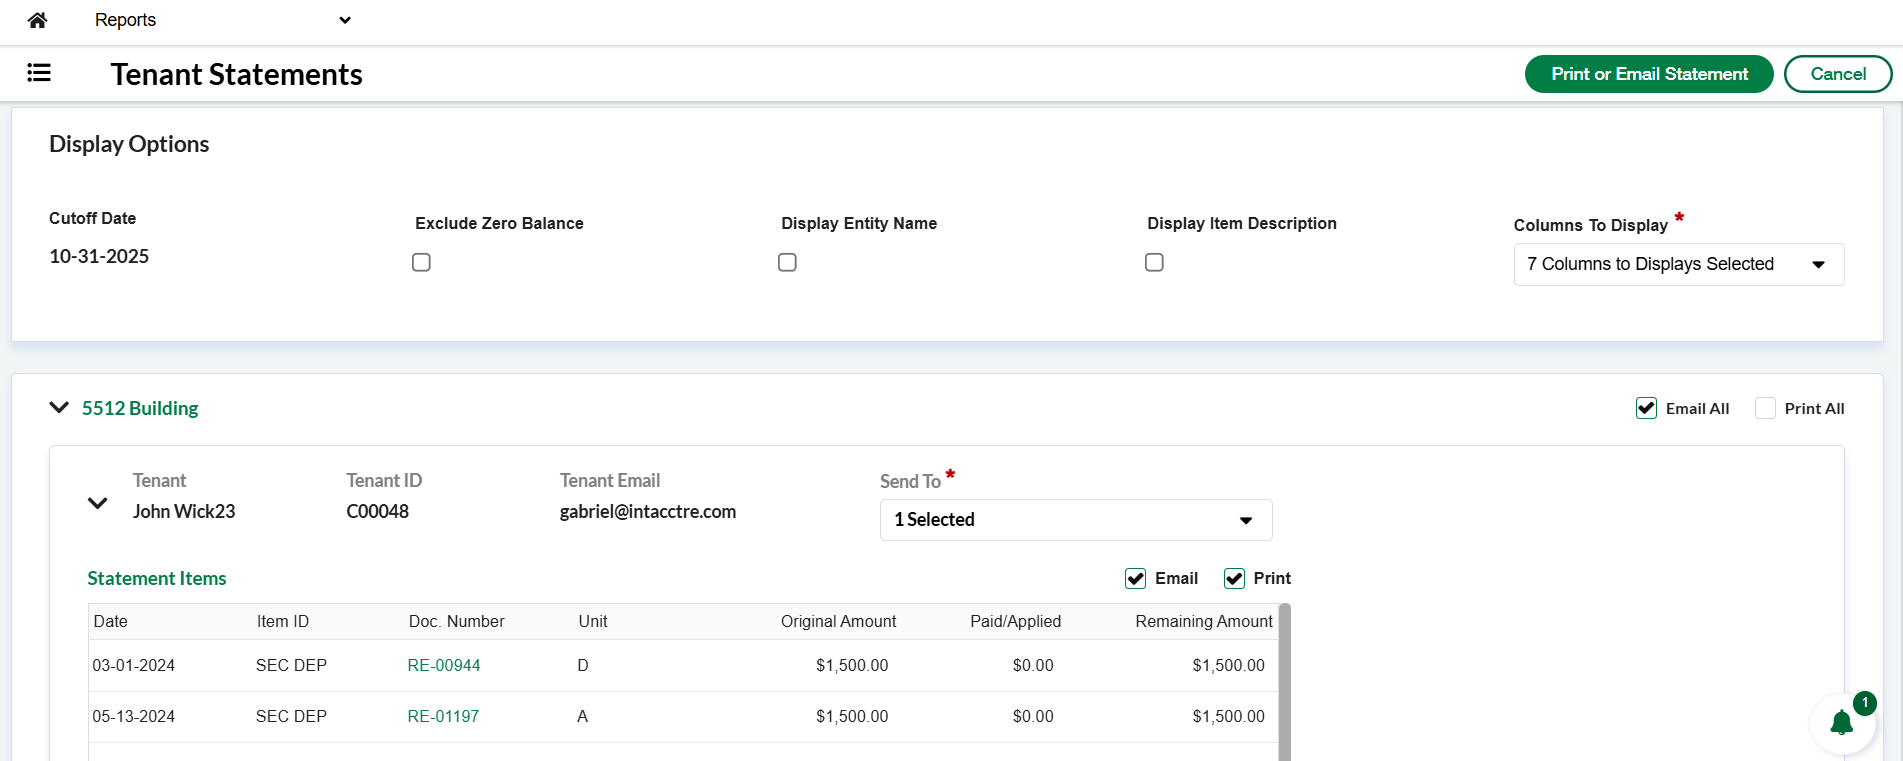
Display options:
-
Cutoff Date:
Displays the date selected on the setup screen. -
Exclude Zero Balance:
When checked, hides any rows (charges, payments, credits, or adjustments) that result in a net balance of $0.00. -
Display Entity Name:
When checked, displays the Entity Name instead of the Property Name. -
Display Item Description:
When checked, displays the Item Description instead of the Item ID in the Tenant Statement. -
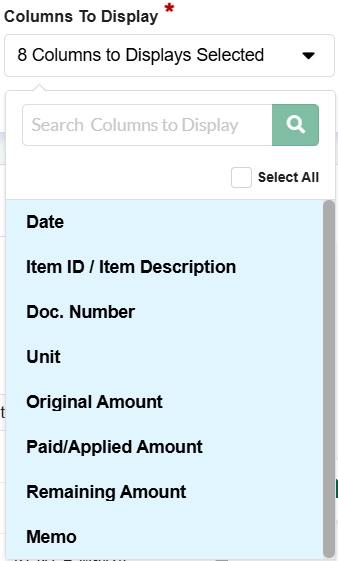
Columns to Display:
A dropdown selection field that allows users to choose which columns are displayed on the Tenant Statement. The user’s selection will be applied consistently to both the on-screen view and the PDF generated for export or email delivery.
-
Columns to display options:
-
There are 8 options to display: Date, Item ID/ Item Description, Doc. Number, Unit, Original Amount, Paid/Applied Amount, Remaining Amount, and Memo.
-
-
Last selection prepopulates:
-
We’ve added a new enhancement to the Tenant Statement feature that now remembers each user’s last selection.
When a user runs the Tenant Statement, the system will automatically prepopulate the checkboxes and columns to display based on the last configuration that same user selected.
This makes it easier and faster to generate the statement with your preferred settings.
Please note: these saved selections are stored locally in the browser. They will be reset if the user:
-
Changes to a different browser,
-
Clears the browser cache, or
-
Uses a different computer.
-
-
-
-
Header:
-
Tenant Name
-
Tenant ID
-
Tenant Email
-
Document Generated: the tenant statement can be exported to PDF
-
Send To:
-
By default, the Tenant Email will be shown
-
You can add more emails to send the statement using the Add New Option button
-
-
Statement Items:
-
Charge Date
-
Item ID
-
Invoice No.:
-
Only the invoices with Amount Due greater than 0 will be shown
-
You can click on any of the Invoice Numbers and access the invoice details on Intacct
-
-
Charge Amount
-
Payments
-
Amount Due
-
Total Due
-
-
-
-
Send or Print Statements
-
You can click Send to email an individual statement, or Send All to email all statements at once.
-
Each selected statement will be sent to the addresses listed in the Send To field. By default, this field includes the Tenant’s email address, but you can add additional recipients using the Add New Option button.
-
After selecting Send or Send All, click Send Statements to confirm and complete the action.
-
You can also click Print to generate a PDF for an individual statement, or Print All to export all statements together as a ZIP file.
-
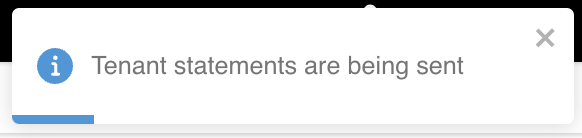
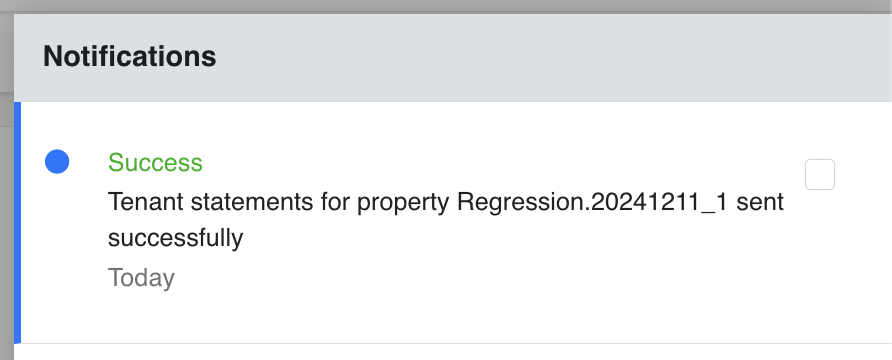
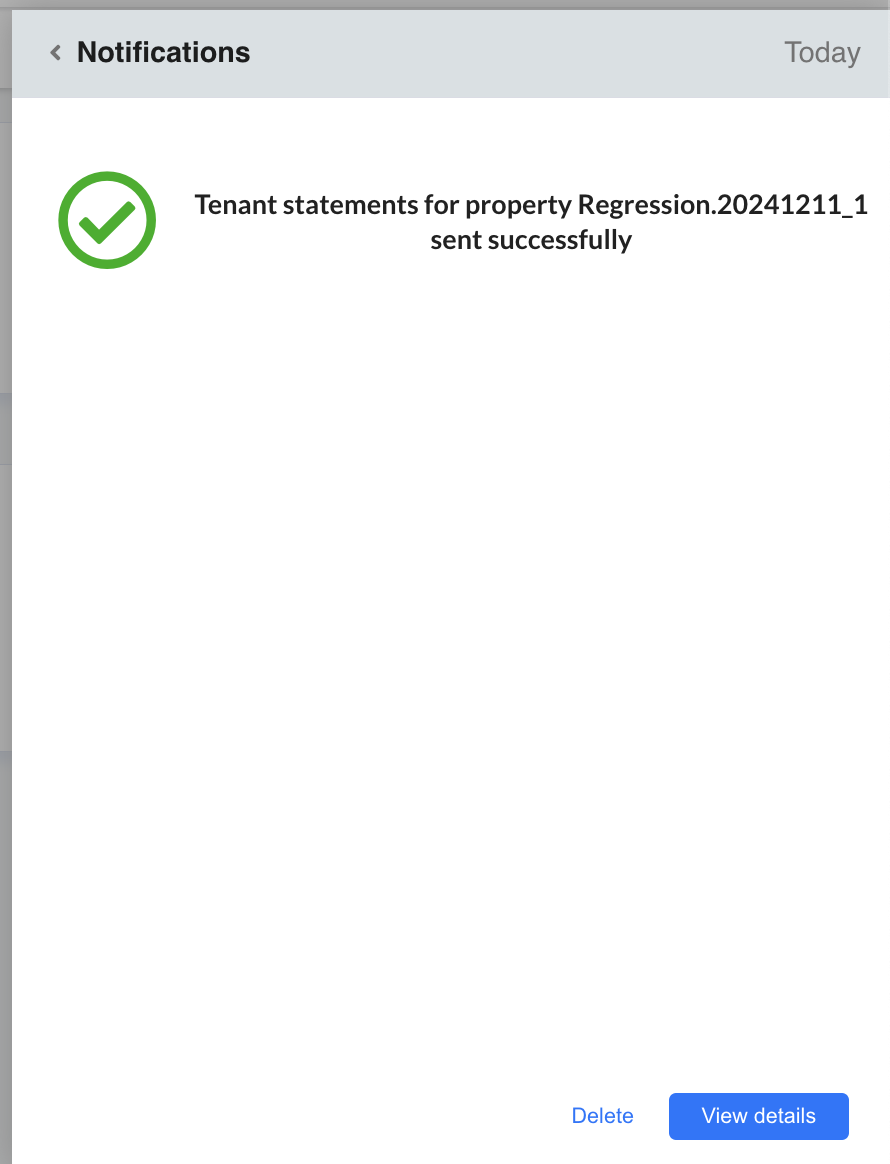
After the Send Statements is clicked the following notifications are received:
-
The Tenant statements are being sent toast
-
The Success notification informing that the statements have been successfully sent
-
Clicking the notification and the View details button, the Success modal is displayed showing some details of the statements that have been sent
-

-
The Tenant Statement is received by email with the PDF document attached

-
The Tenant Statement PDF contains the following information by default. The Columns displayed on the PDF would be the Columns selected on the Preview Journal before sending the Email or printing the PDF:
-
Header:
-
Property Name
-
Property Address
-
Company Name
-
Company Address
-
Tenant Name
-
Tenant ID
-
Tenant Address
-
-
Statement Items:
-
Charge Date
-
Item ID
-
Invoice Number
-
Original Amount
-
Payments
-
Remaining Amount
-
Remit To: Company Address
-
Due by: Cutoff Date
-
Total Due
-