Adding a lease to Sage Intacct will help streamline and automate the management of lease agreements within the application. To add a lease, please complete the following steps.
Adding a Lease to Sage Intacct Real Estate
-
Go to Applications and select Real Estate > Real Estate Module > Real Estate Module to navigate the nested menus and reach the Real Estate Module.
-
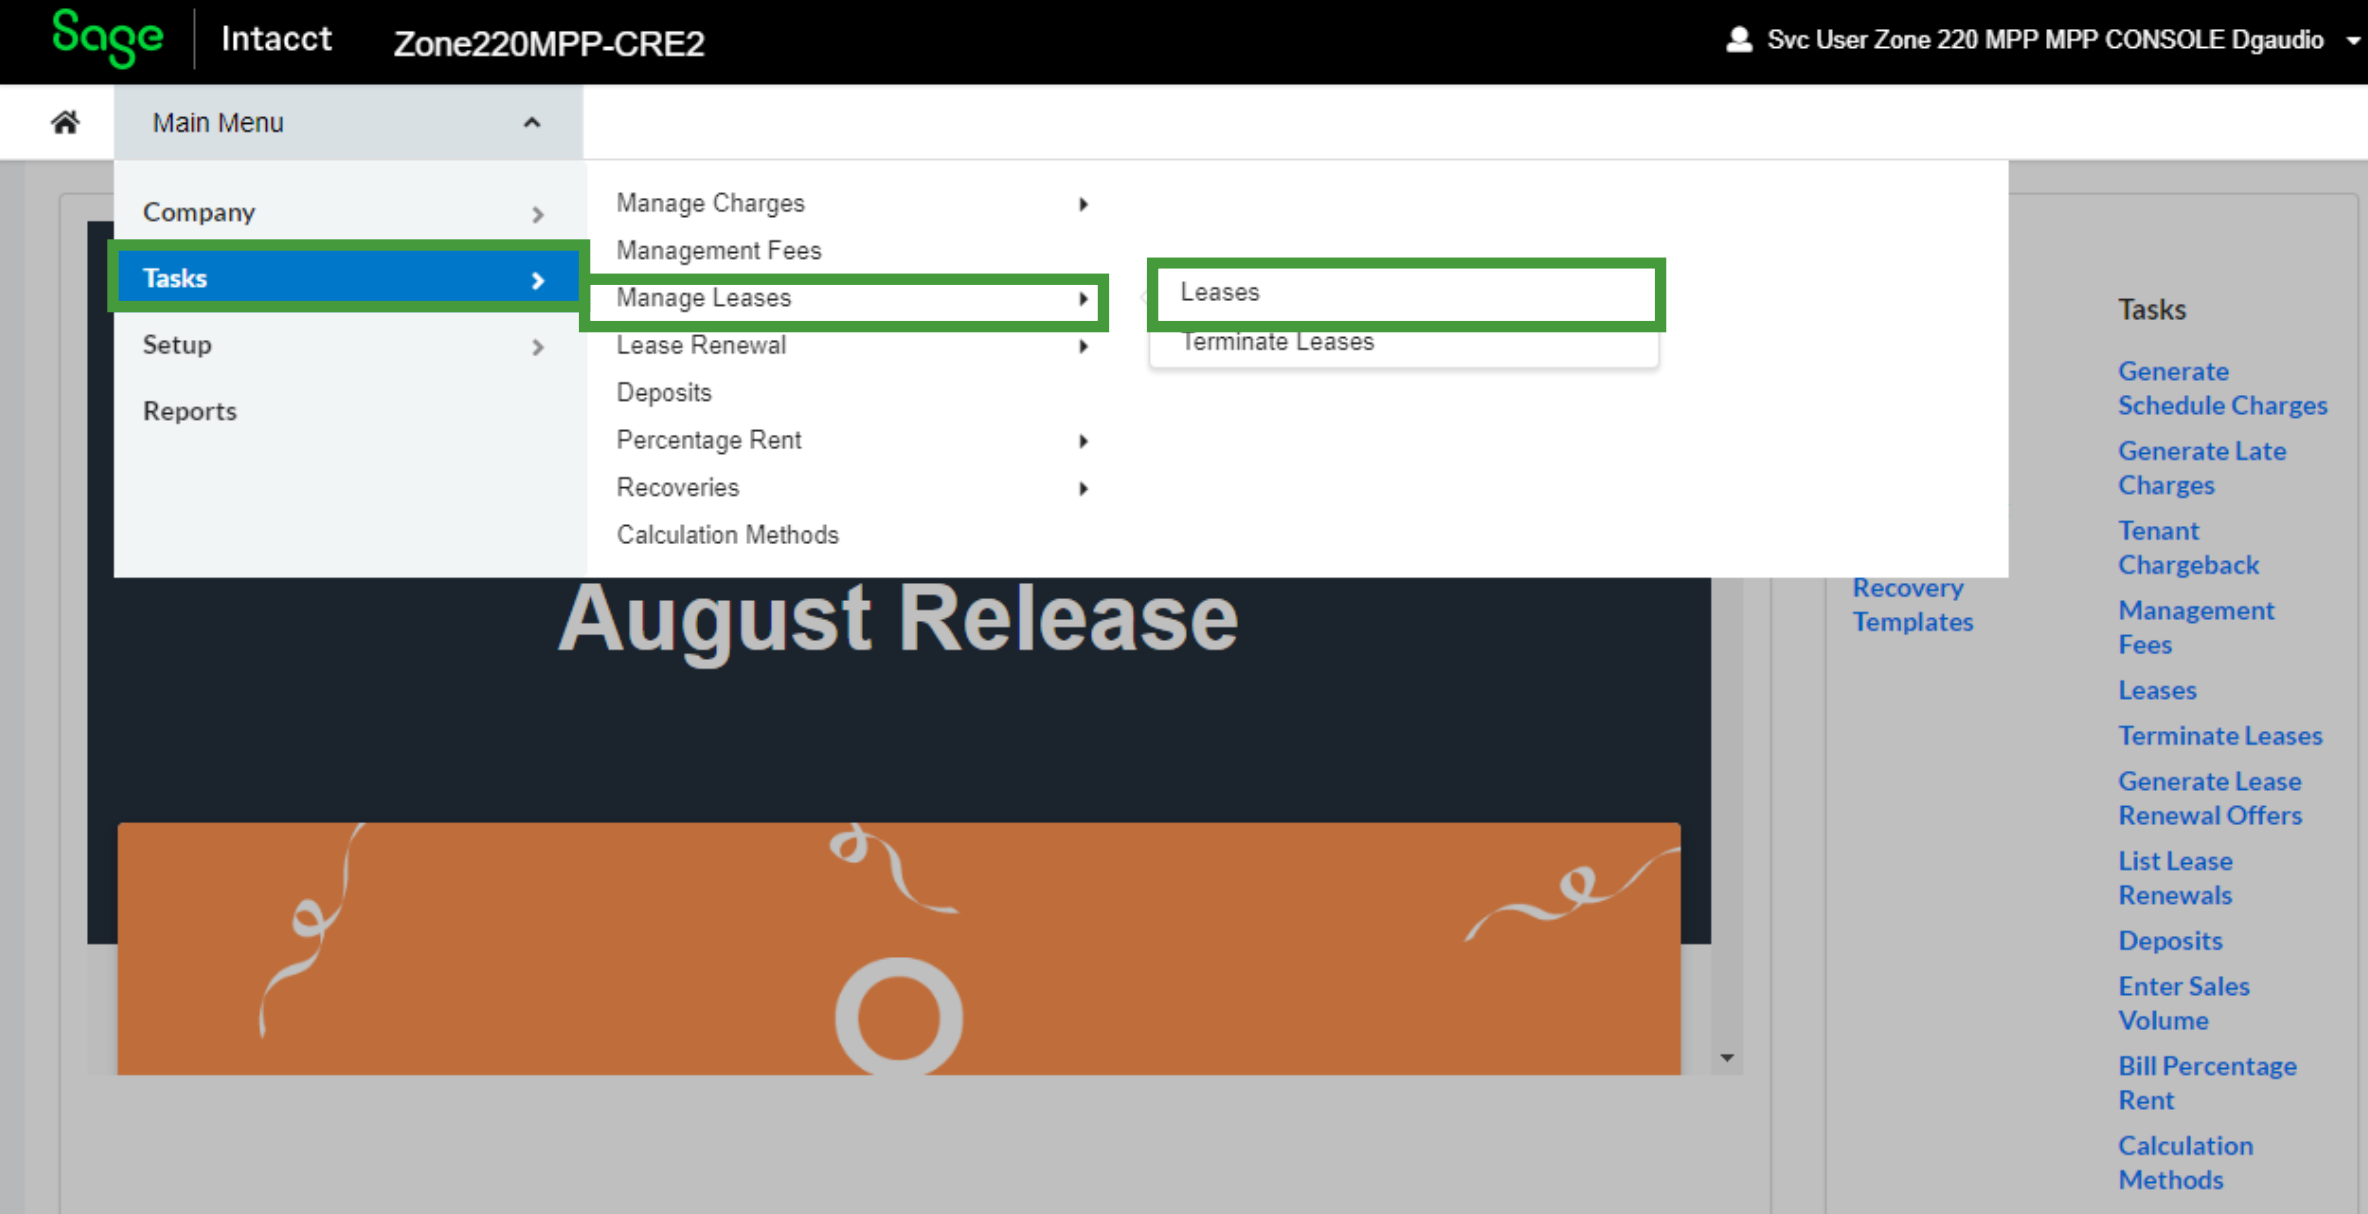
Navigate to Leases from the Main Menu by selecting Tasks > Manage Leases > Leases.
-
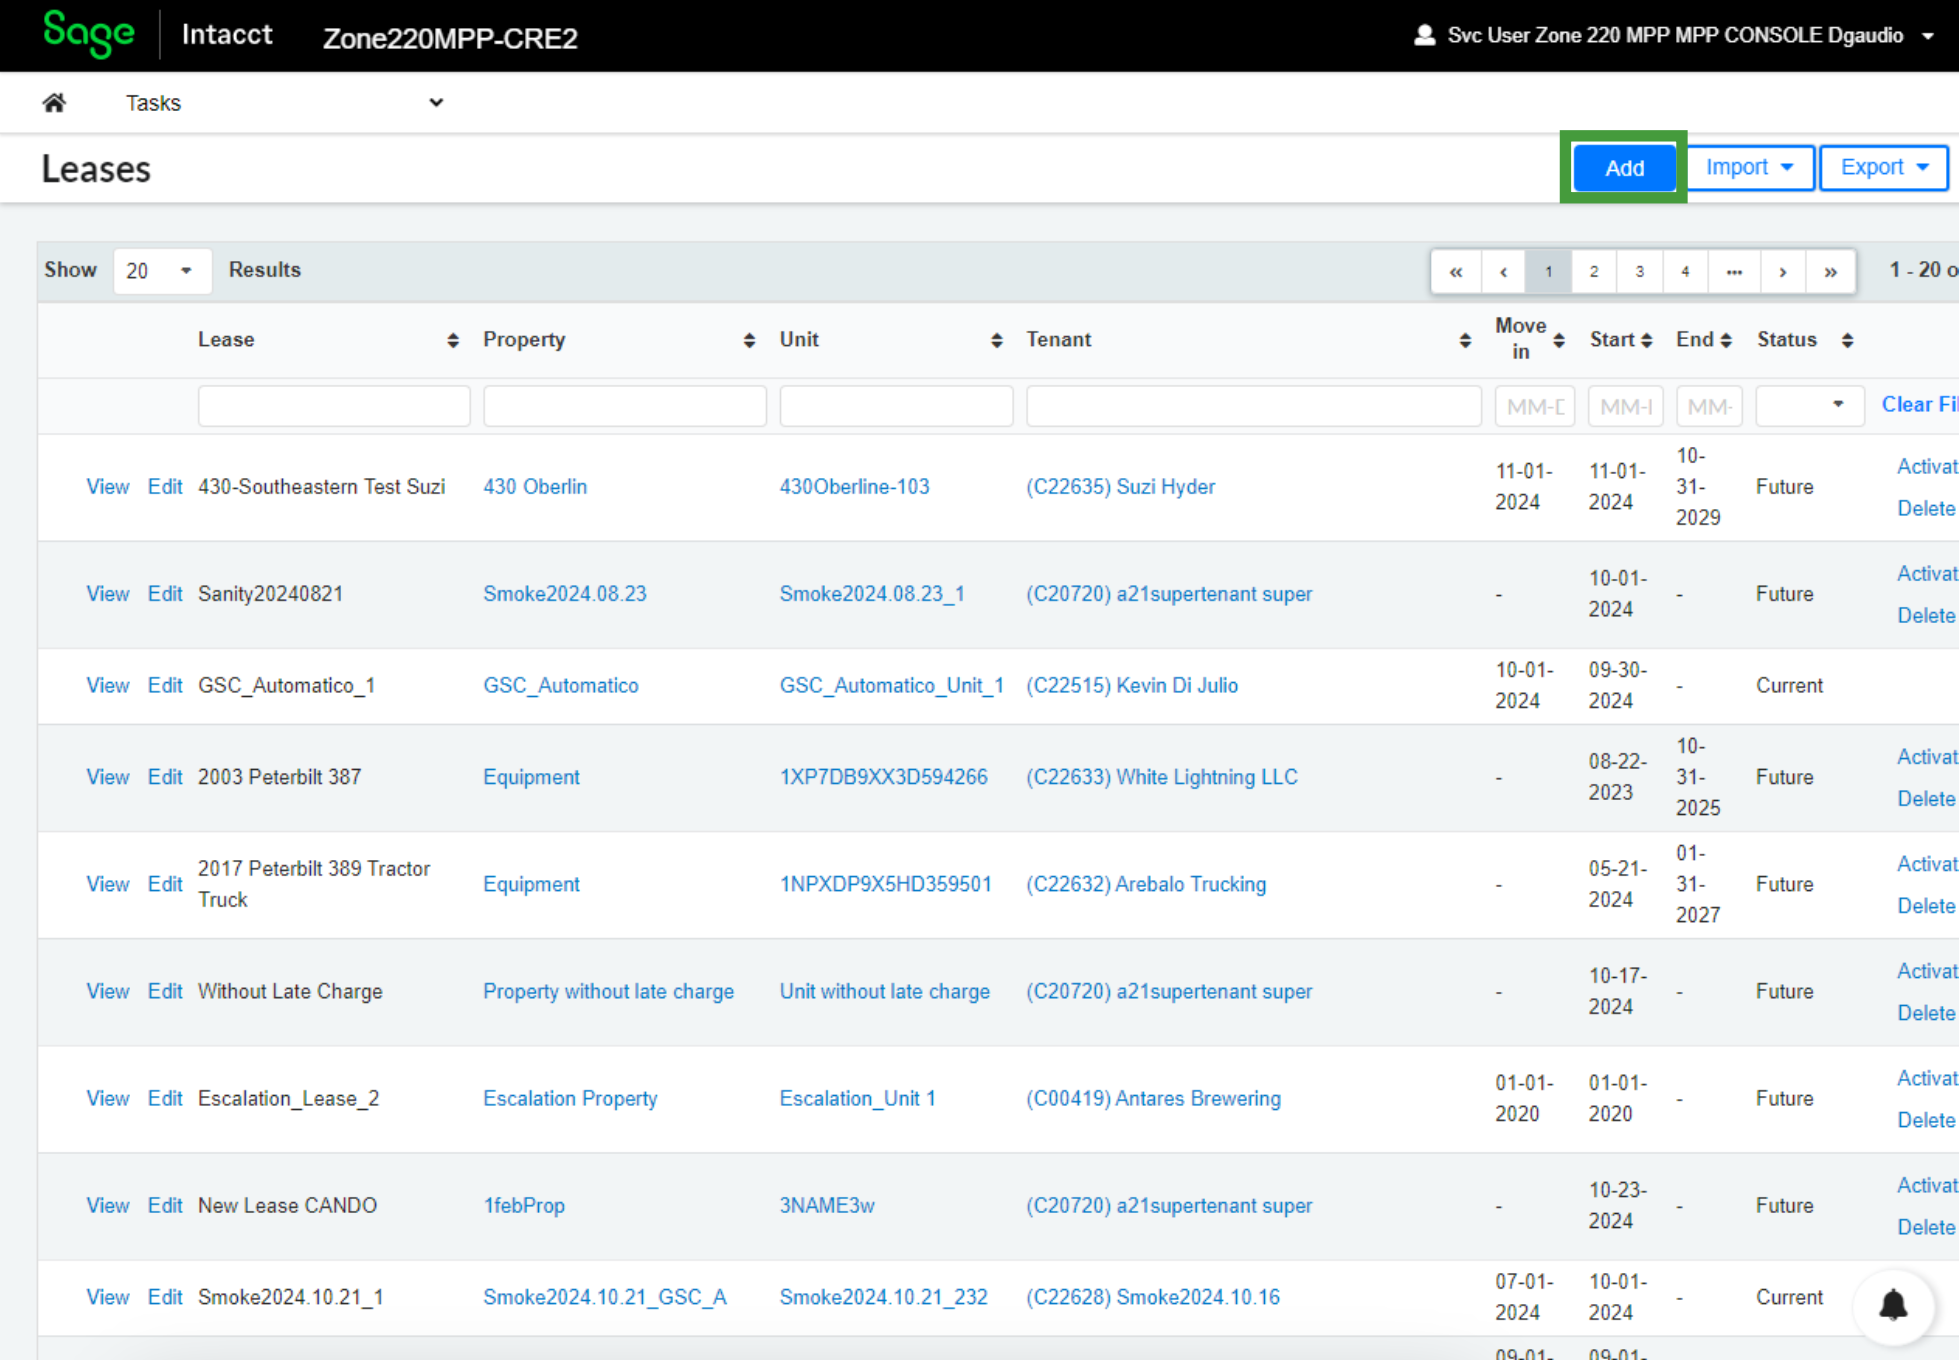
To begin adding a new lease, select Add.
Completing Required Fields for New Leases
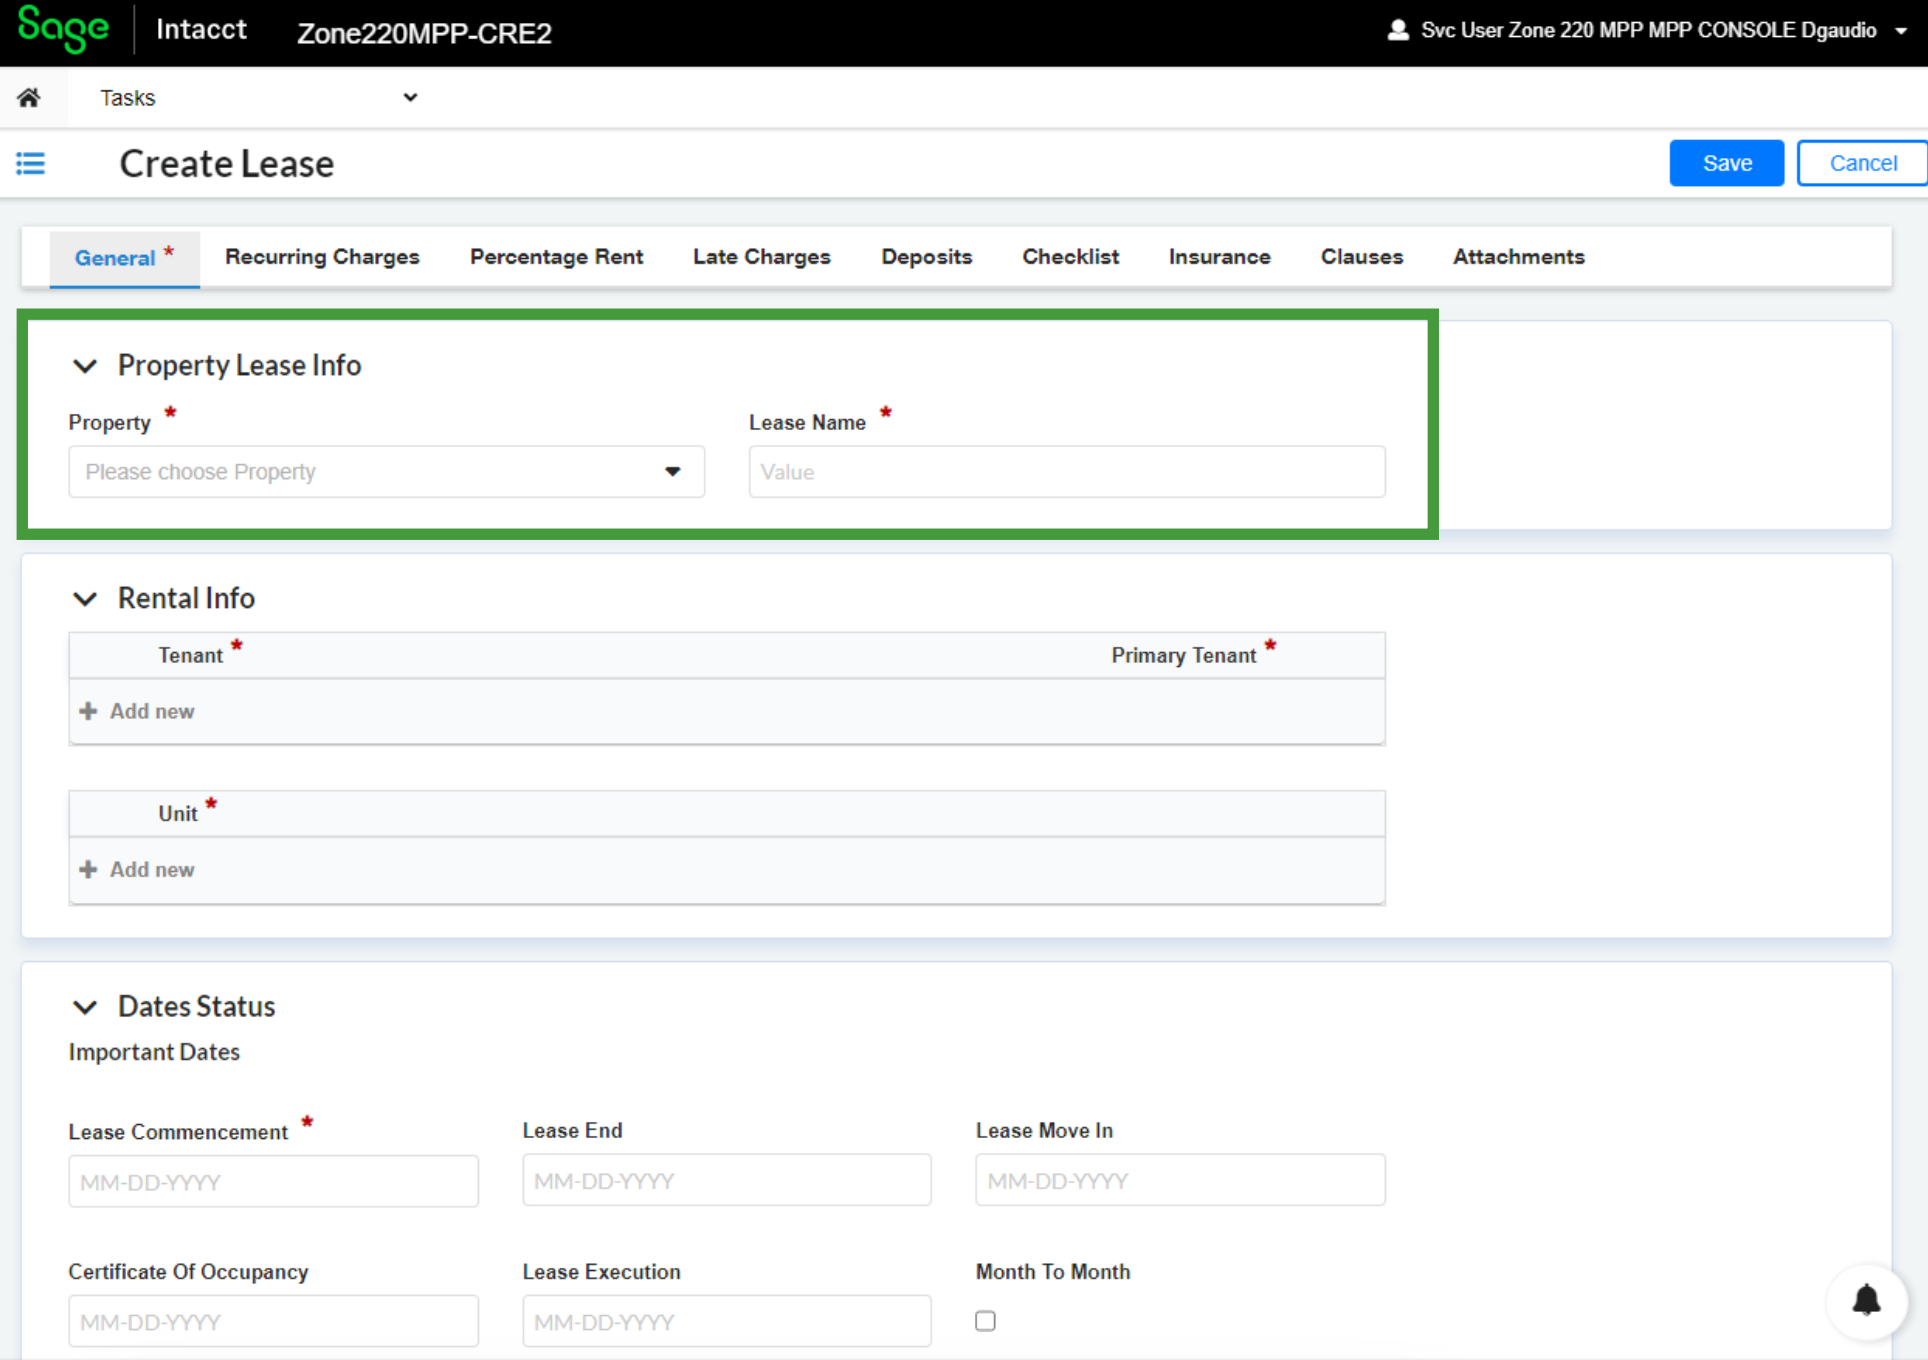
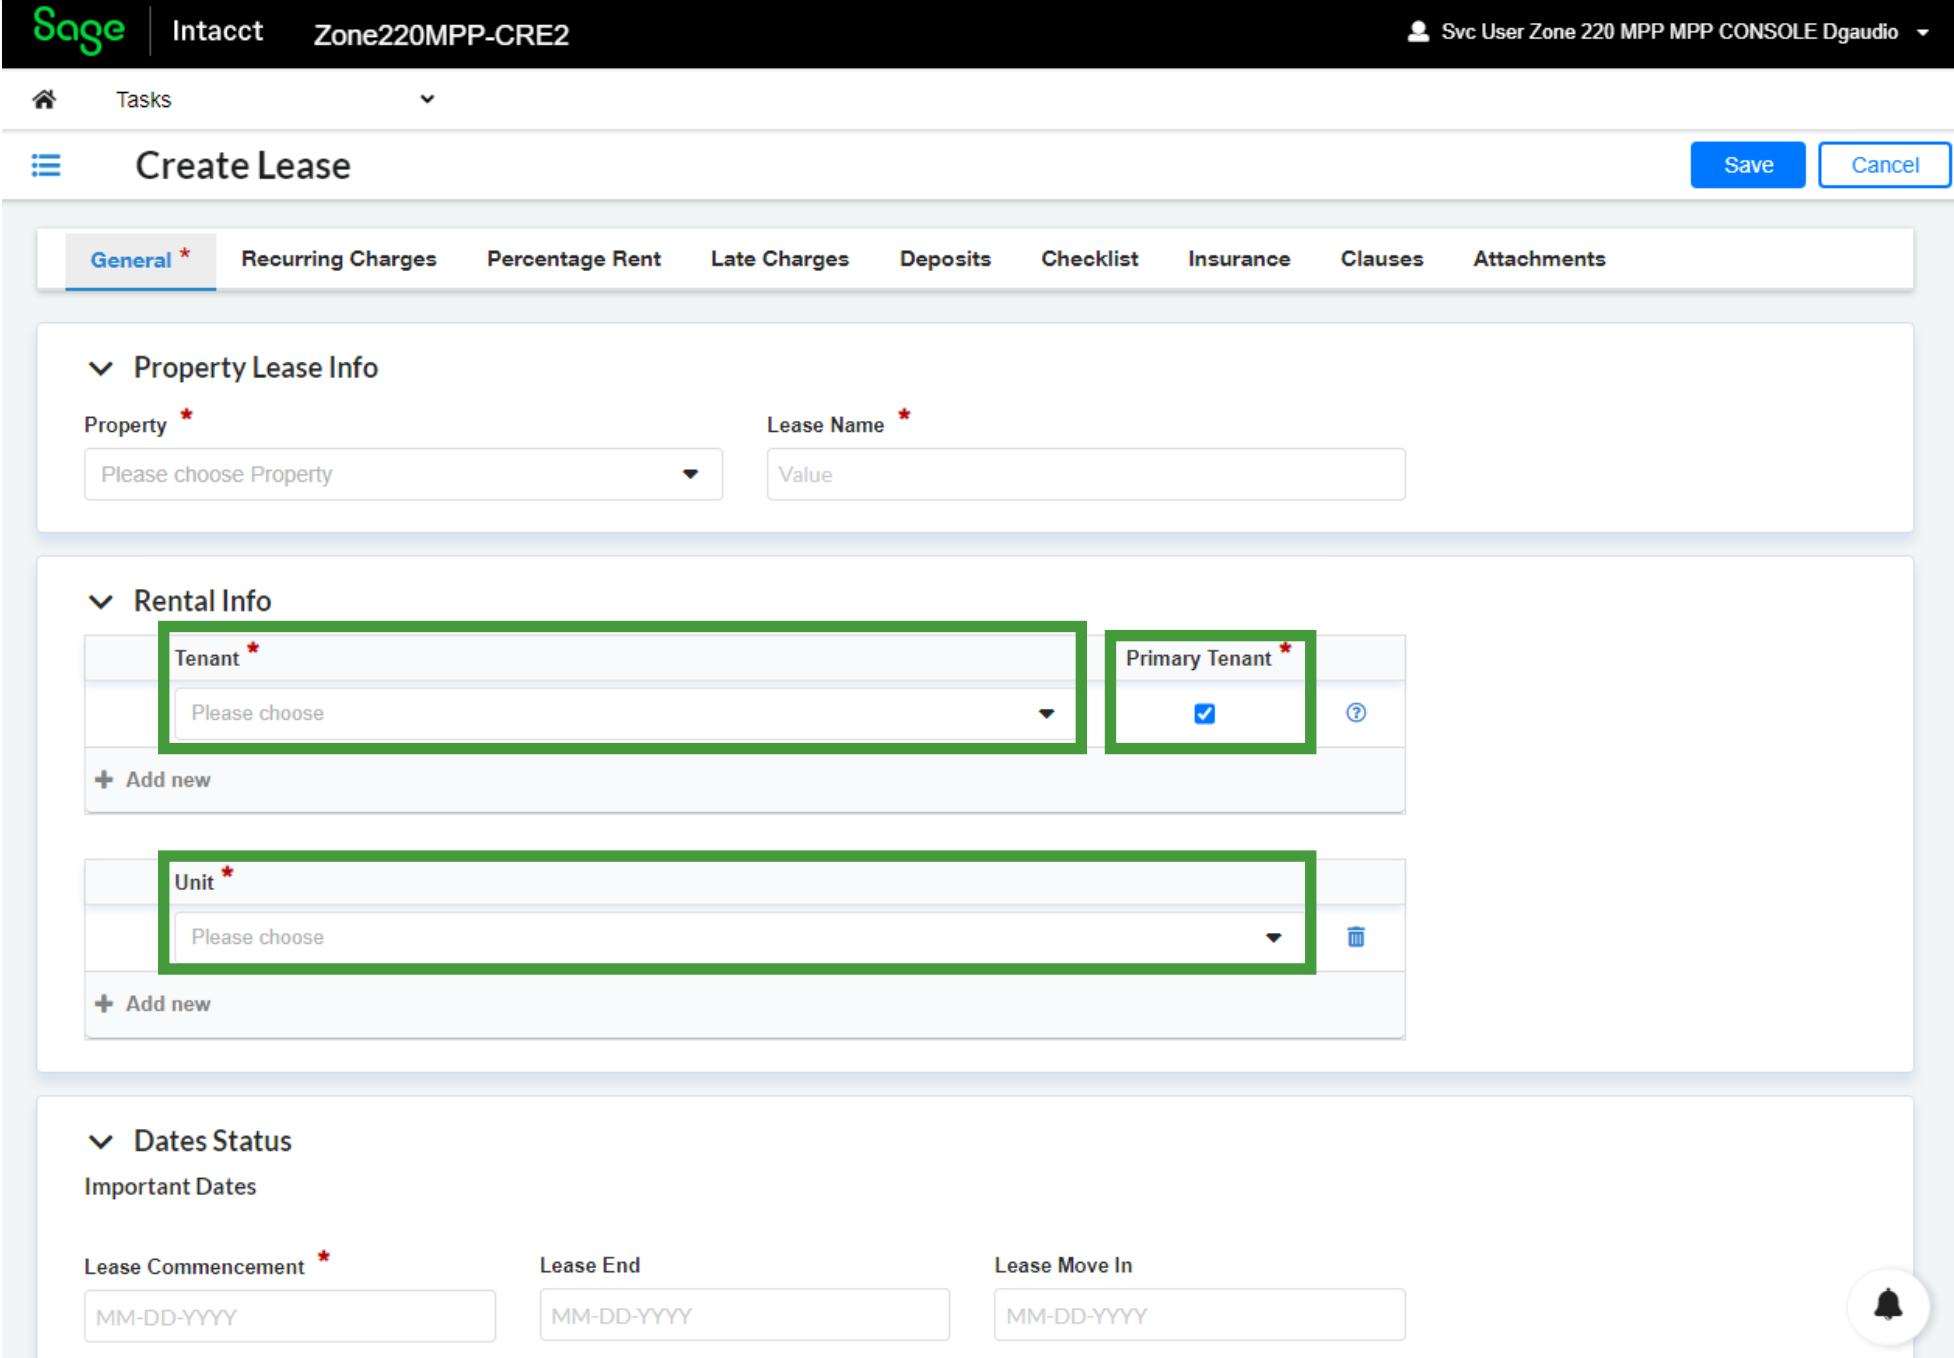
You will be brought to a new window with various tabs and form fields. Some of these fields will be required while others are optional. First, we will go through how to complete the required fields, which can be found in the General tab. The fields are organized into three sections: Property Lease Info, Rental Info, and Dates Status.
-
Property Lease Info
-
Select the Property from the drop-down menu. Note that this property must already exist in Sage Intacct.
-
Enter a unique name for the lease in the Lease Name textbox.
-
-
Rental Information
-
You will need to add the associated Tenant to a rental property. To add a tenant, please complete the following steps:
-
Click + Add New.
-
Select Tenant from the drop-down menu.
-
If this is the Primary Tenant tick the checkbox beneath this field.
-
If there are additional tenants, please repeat this process.
-
-
You will also need to specify the Unit associated with the Lease. To add the Unit, please complete the following steps.
-
Click + Add New.
-
Select Unit from the drop-down menu.
-
If there are additional Units connected to this Lease, please repeat this process.
-
-
-
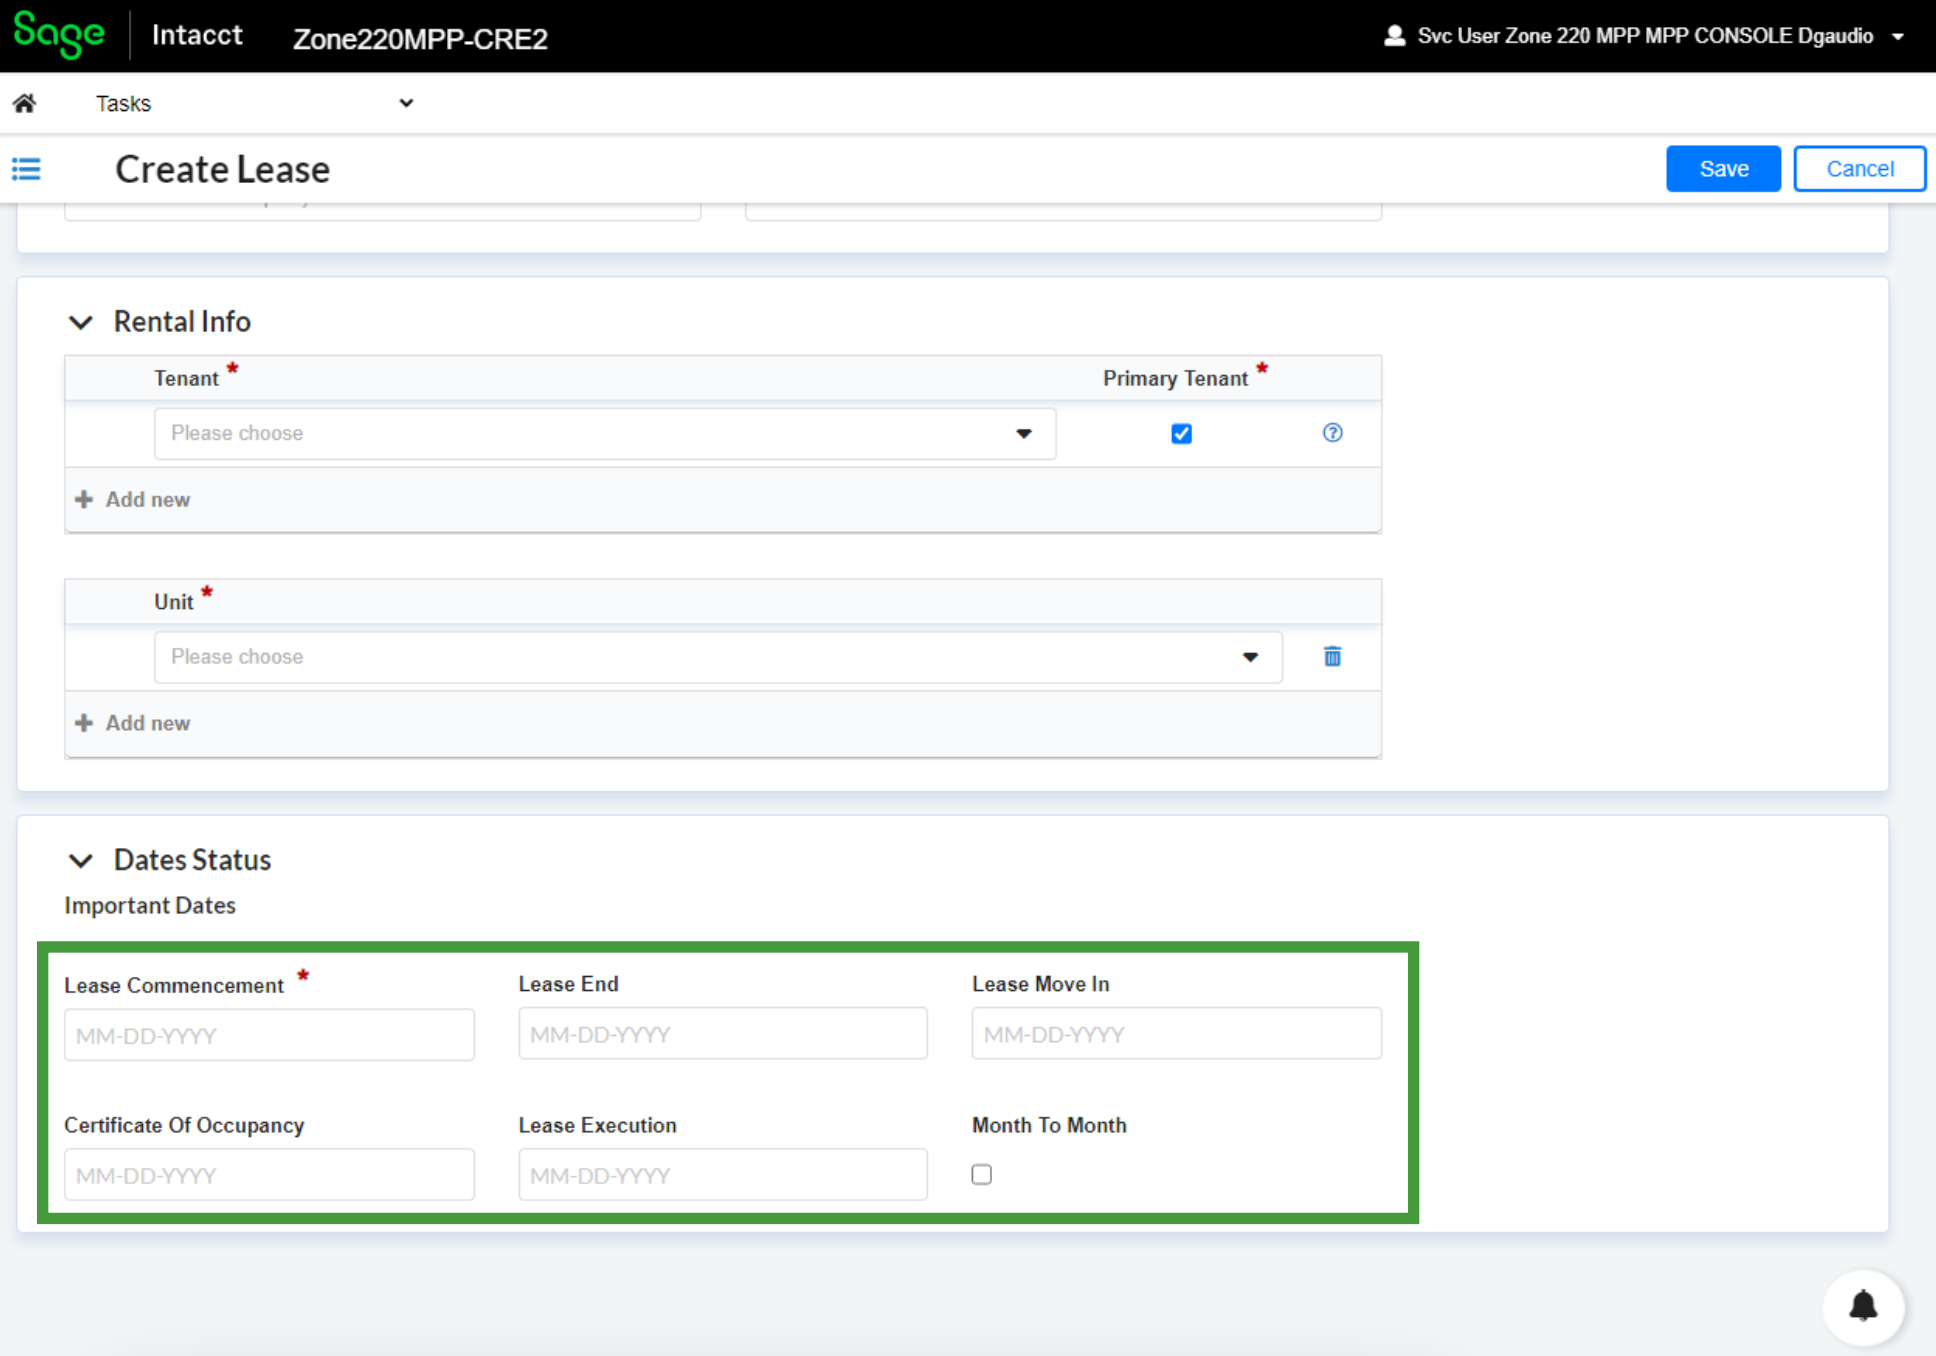
Dates and Status Information
-
Please specify the date of the Lease Commencement in the date selector.
-
If applicable, enter dates for the following optional fields:
-
Lease End
-
Lease Move In
-
Certificate of Occupancy
-
Lease Execution
-
-
Completing Optional Fields for New Leases
At this stage, the required information is complete and the new Lease has been added into Sage Intacct. There are also a number of optional fields found in the other tabs. Though non-essential, we encourage you to complete these fields to maximize the value of your Sage Intacct deployment.
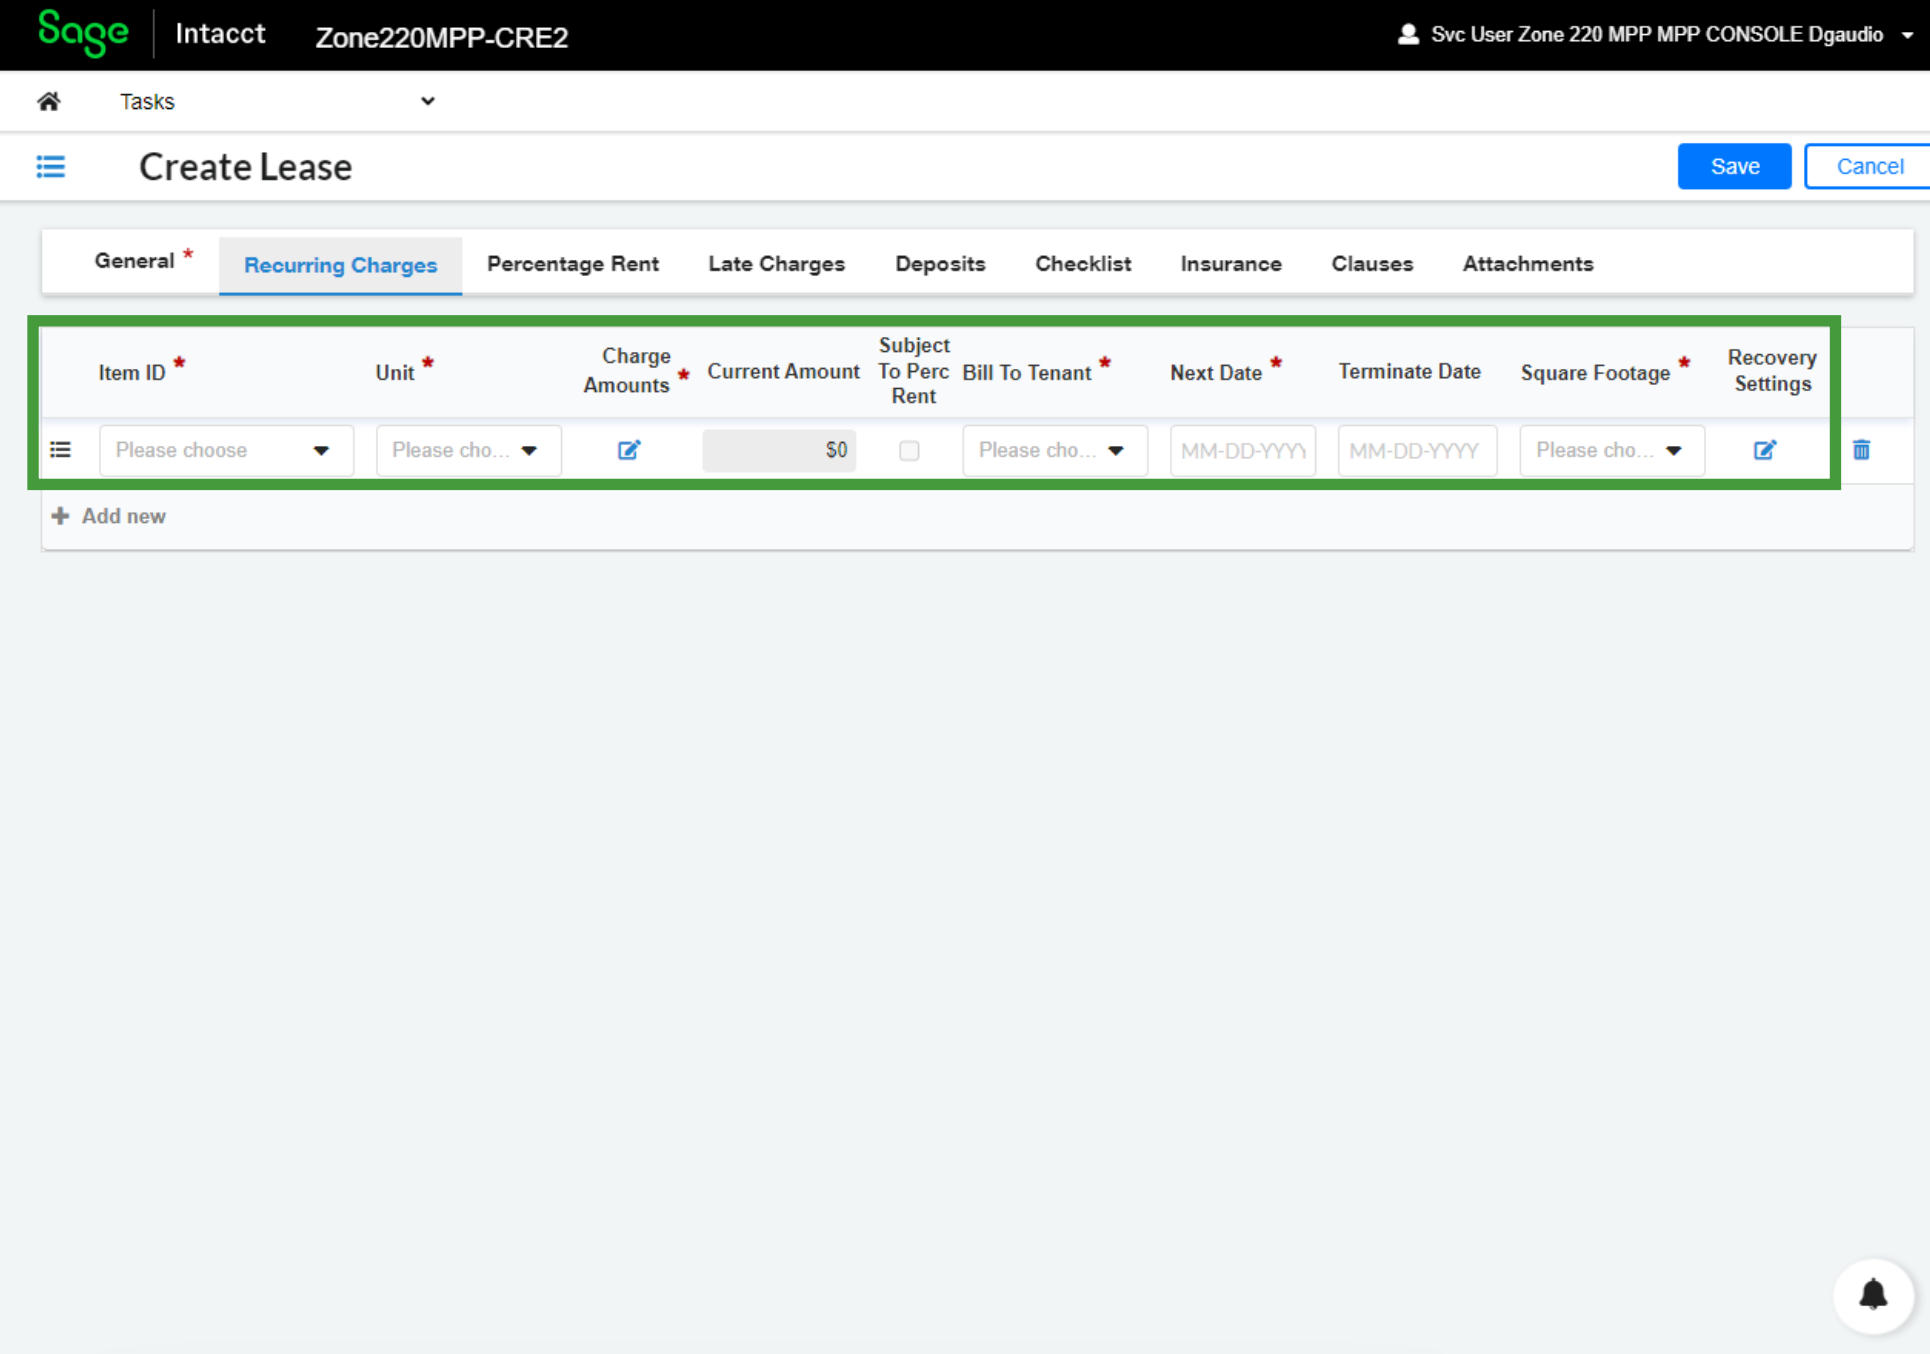
Adding a Recurring Charge
To add a Recurring Charge, such as a rental payment, please complete the following steps:
-
Navigate to the Recurring Charge Tab
-
Click + Add new
-
This will generate a line item for the recurring charge with various drop-down menus, calendars, and checkboxes. Please complete these fields starting with Item ID. This will indicate the type of Recurring Charge. Select the most appropriate option from the drop-down menu.
-
The Unit field assigns the Recurring Charge to a particular unit. Select from the drop-down menu.
-
Click the Edit icon resembling a pencil in a box, under Charge Amounts. This will allow you to specify the period, frequency, and amount of the Recurring Charge.
-
Click + Add new
-
Enter the Effective Date
-
Enter the Charge Amount
-
Select the Frequency
-
Click Ok to confirm
-
-
Select the appropriate tenant from the drop-down menu in the Bill to Tenant field.
-
Enter the Next Date the charge should be applied in the Next Date field.
-
If there is an applicable terminate date enter it in the Terminate Date field.
-
Select the Square Footage type from the drop-down menu.
-
If Recoveries are enabled, click the Edit Icon under Recovery Settings.
-
Search for an existing recovery template in the Search a Template box.
-
Confirm all Template settings are correct.
-
Click Ok
-
Repeat as needed.
-
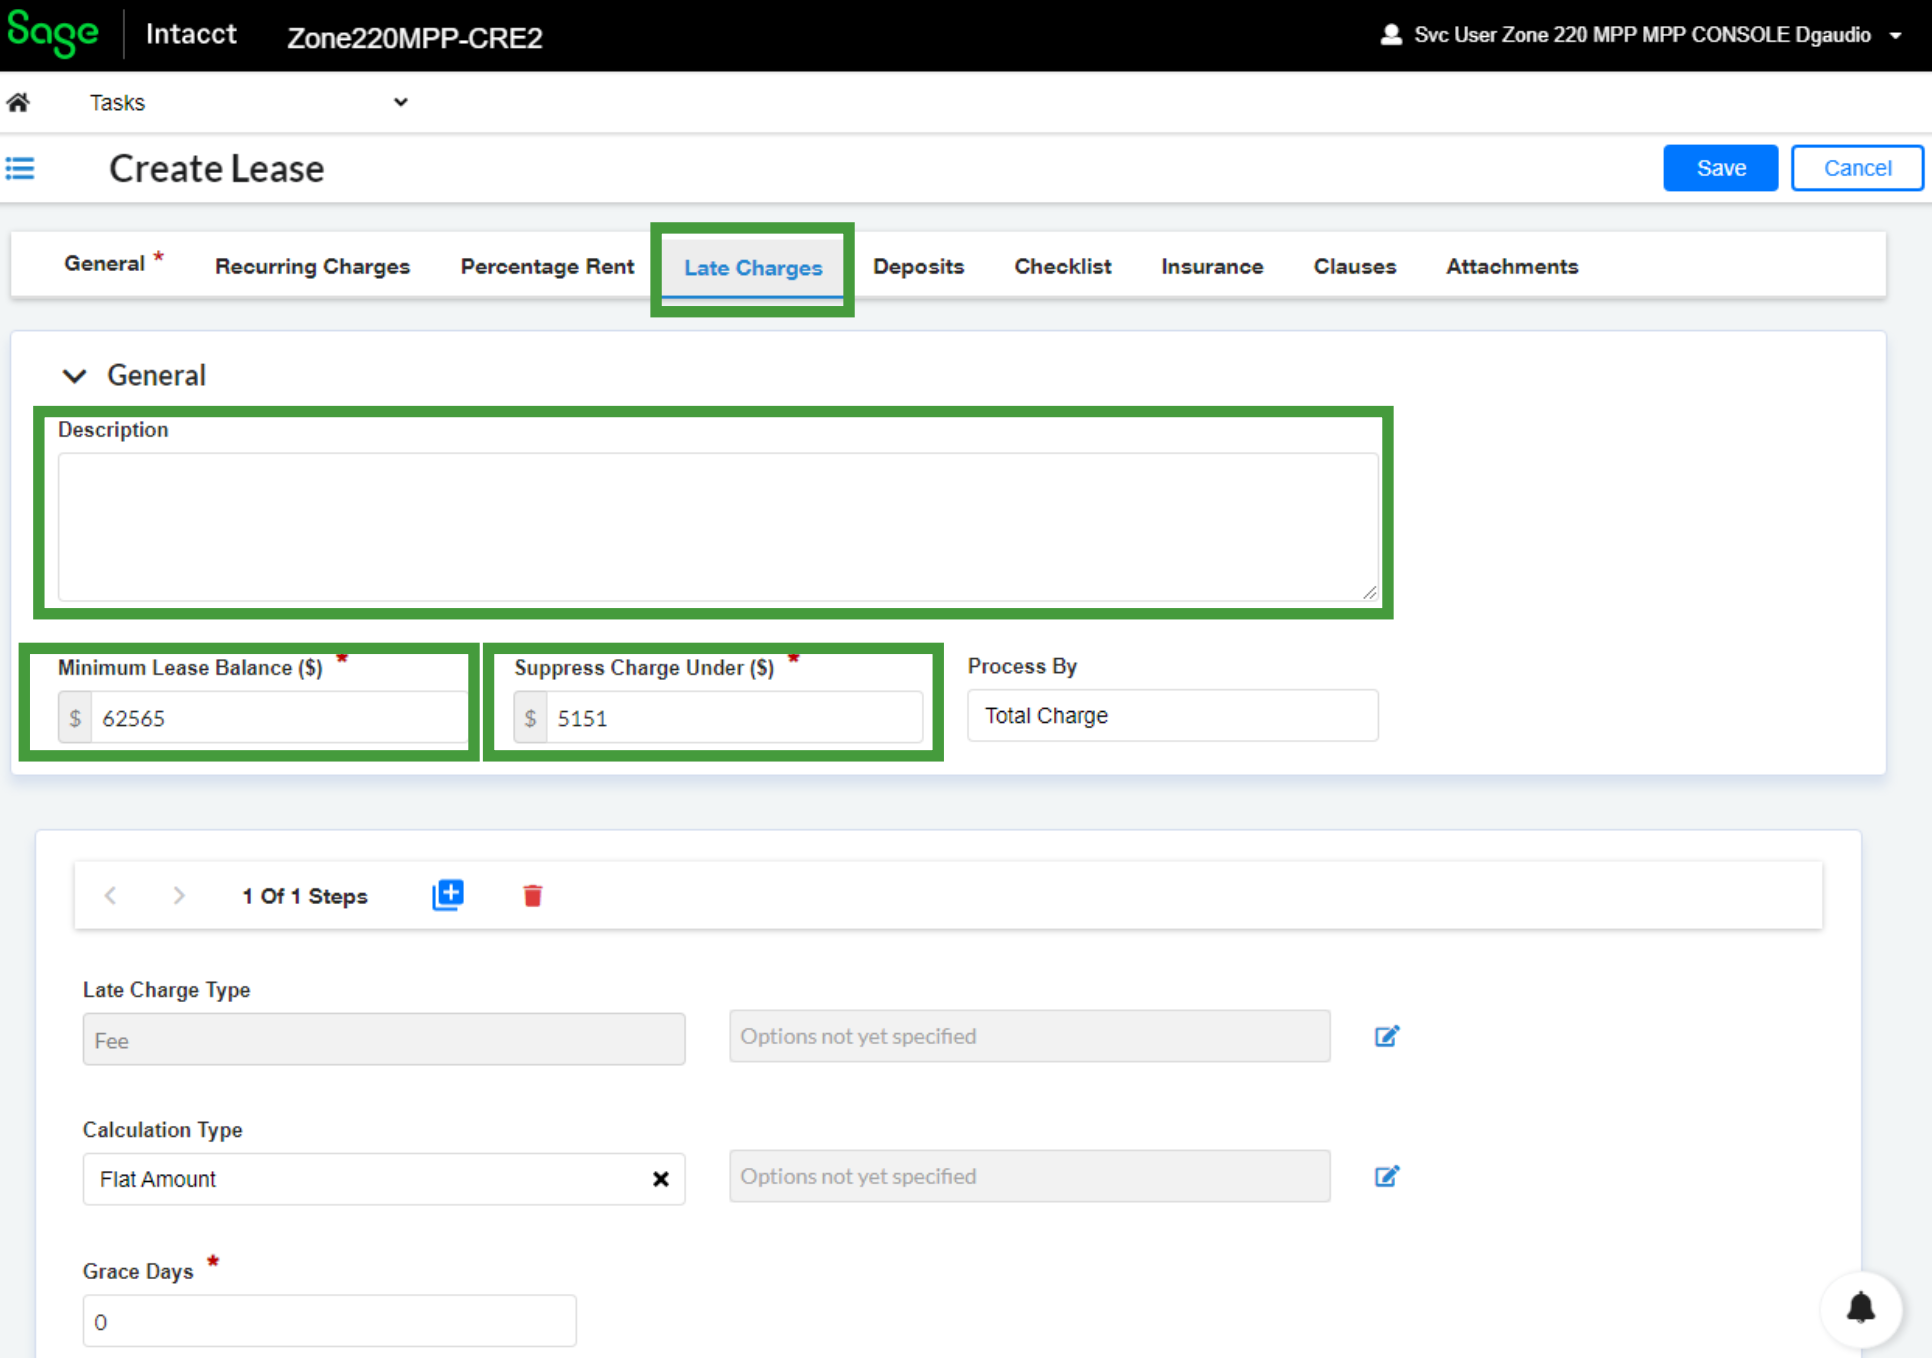
Adding a Late Charge Fee
To add a Late Charge Fee please complete the following steps:
-
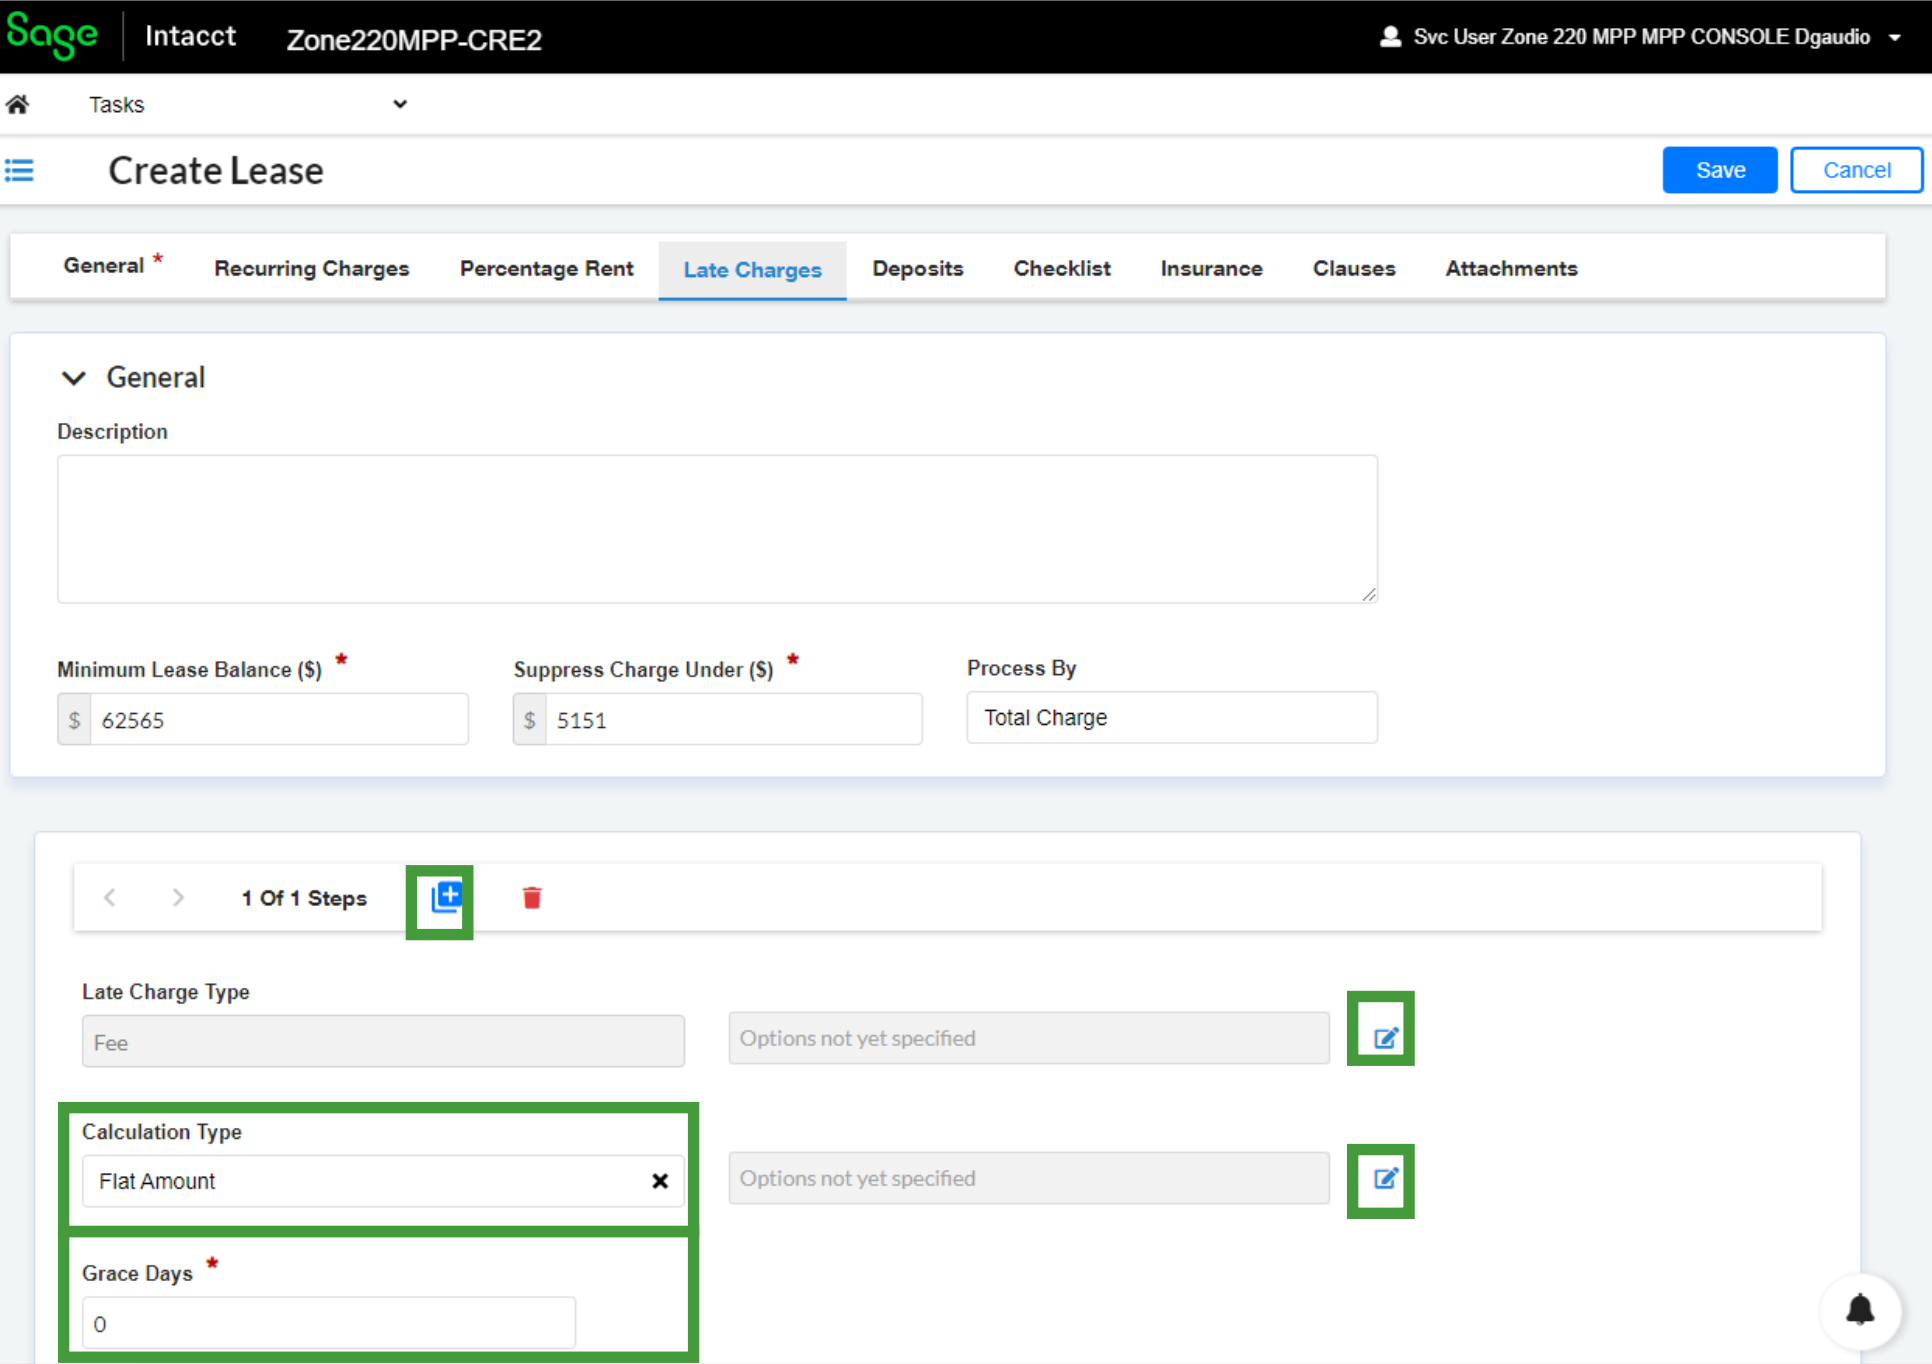
Navigate to the Late Charges tab.
-
Navigate to the General section and complete the associated fields.
-
Enter a Description of the Late Charge
-
Enter the Minimum Lease Balance. This number is used to calculate the Late Charge in the event that only a portion of the rent is paid.
-
You can specify a threshold under which a Late Charge Fee will not be applied. If the calculated fee based on the Minimum Lease Balance is below the number entered in Suppress Charges Under ($), the fee will not be applied to the Tenant.
-
-
Next, navigate to the lower section of the page to further calibrate the Late Charge Fee.
-
Click the + icon to add a Late Charge Formula. Additional form fields will appear.
-
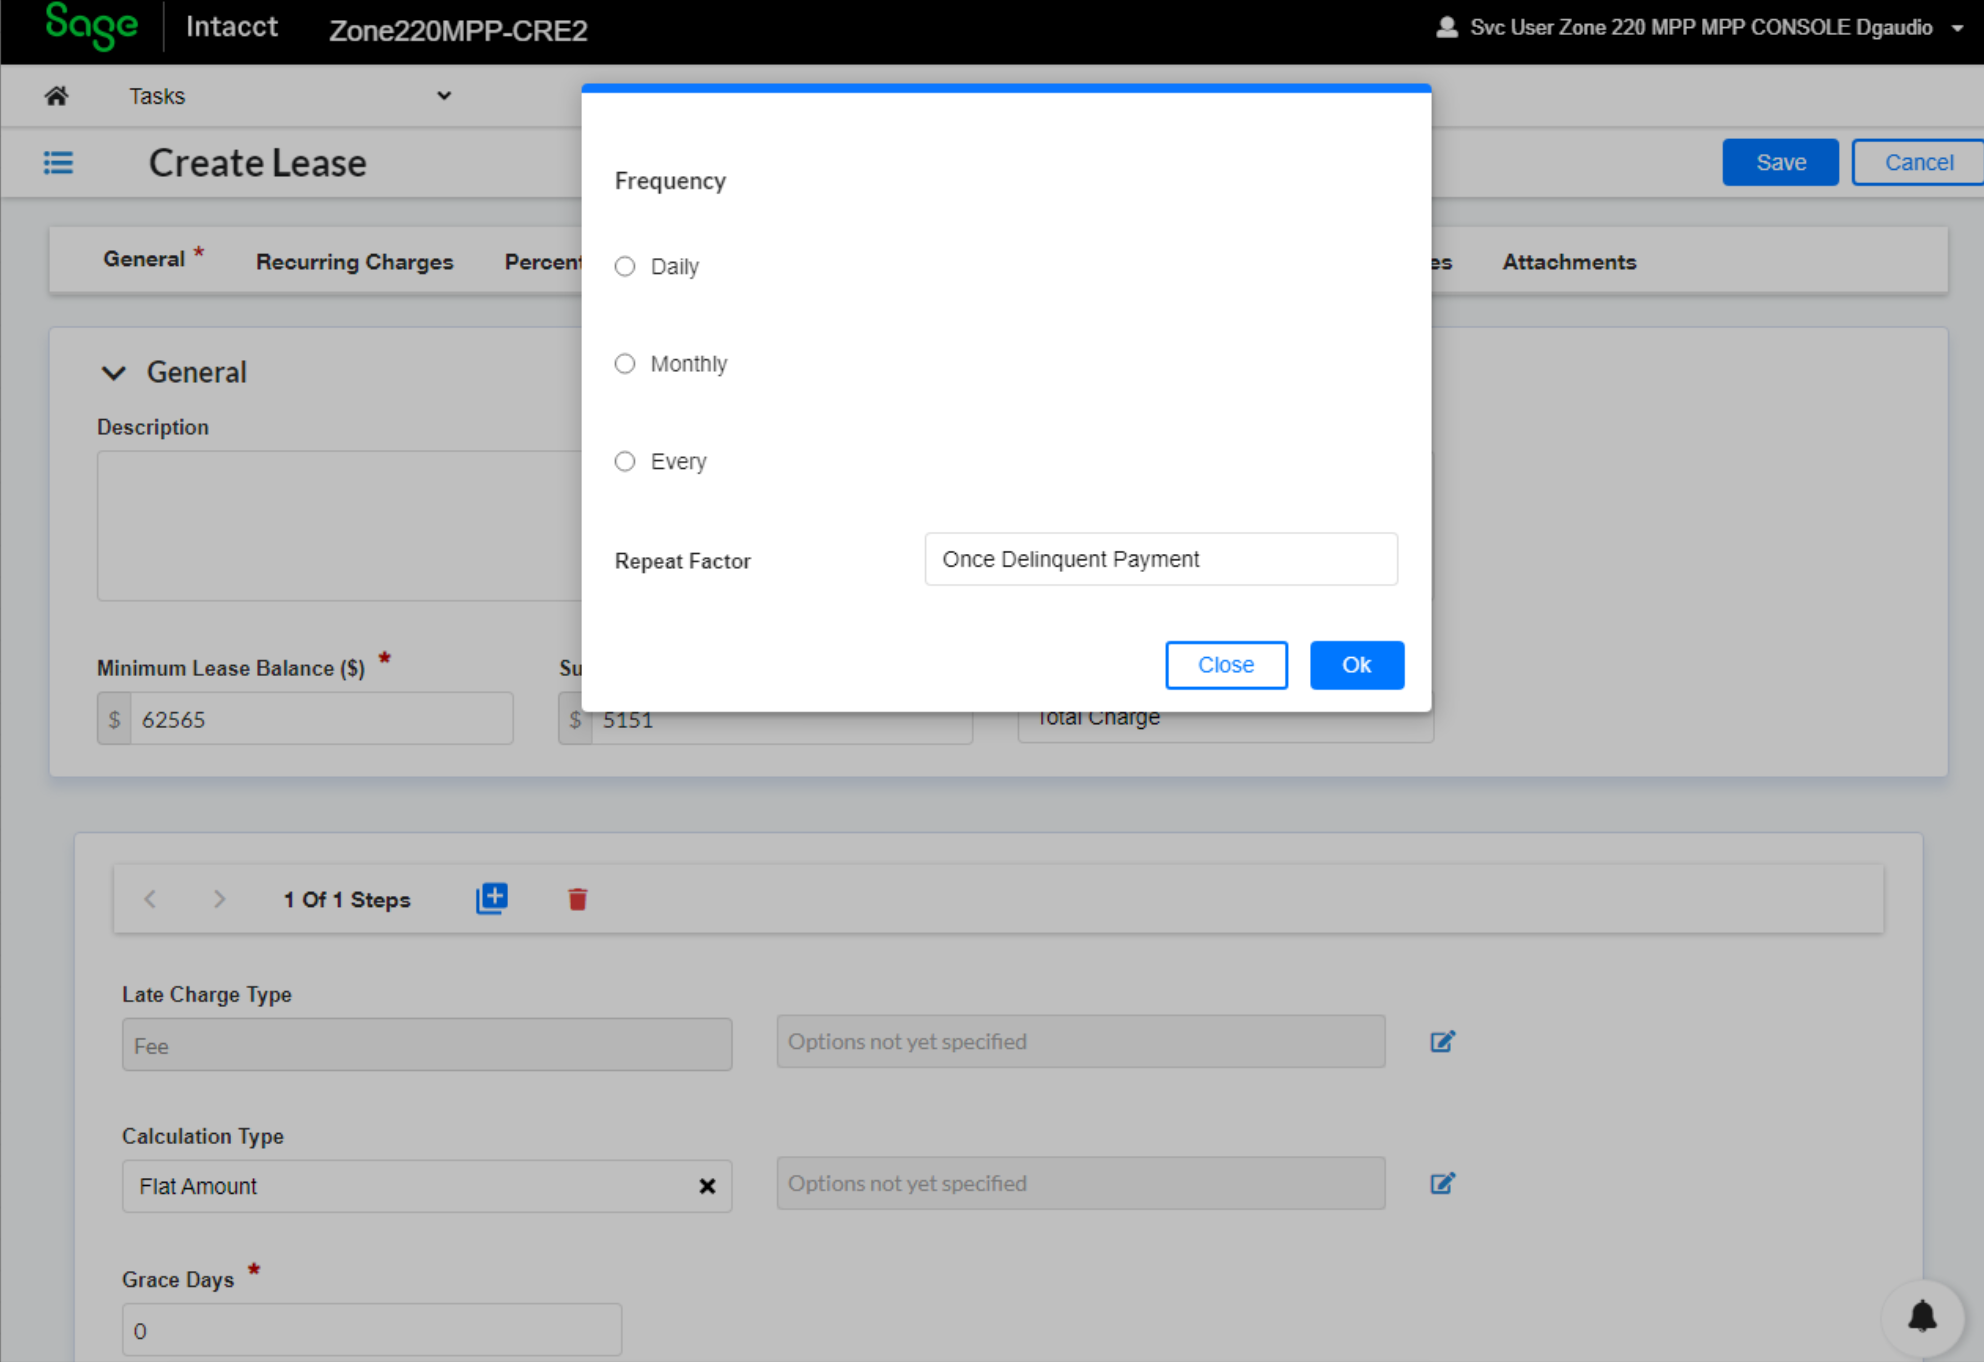
To specify the frequency of the charge, click the pencil icon to the right of the Late Charge Type. A popup window will appear. Select from the radial menu either a Daily, Monthly, or custom periodic frequency (by adding a number to the Every X Days field) for the Late Fee.
-
Repeat Factor can be used to reinitiate the Late Fee under certain conditions. Select the most appropriate option from the drop-down menu.
-
Click Ok to Save.
-
-
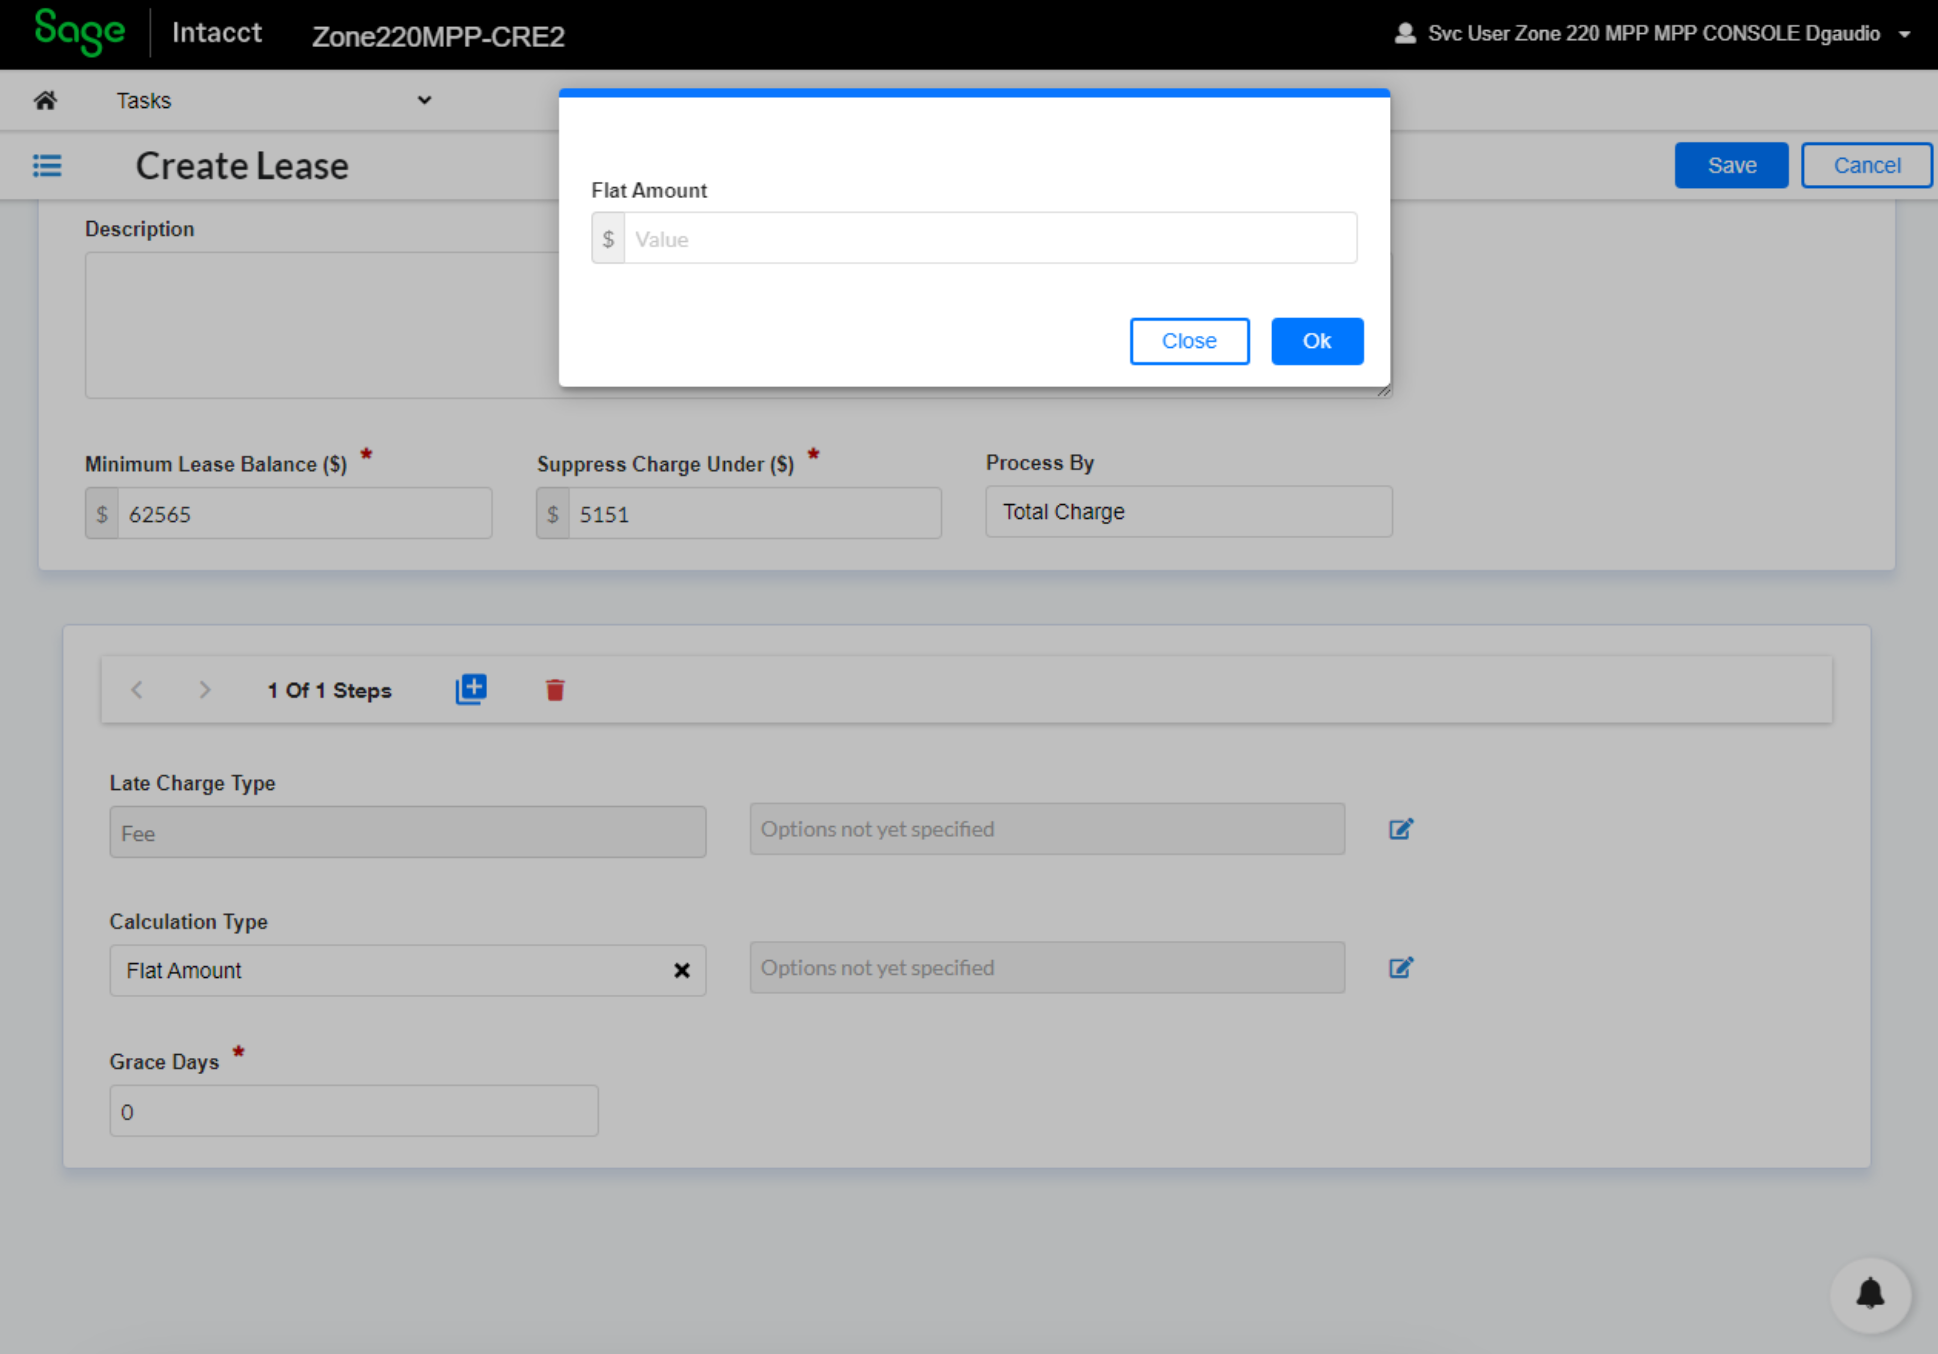
Specify a Flat Amount or Percentage in the Calculation type field.
-
Indicate the number of Grace Days a tenant has to return to good standing before a Late Charge is generated.
-
To specify the amount of the late charge, click the pencil icon to the right of the Calculation Type. A popup window will appear where you can enter the dollar figure.
-
Click Ok to Save.
-
-
Tracking Deposits for Rental Units
Sage Intacct enables users to assign and track deposits received from tenants for their rental units. To do so, please complete the following steps:
-
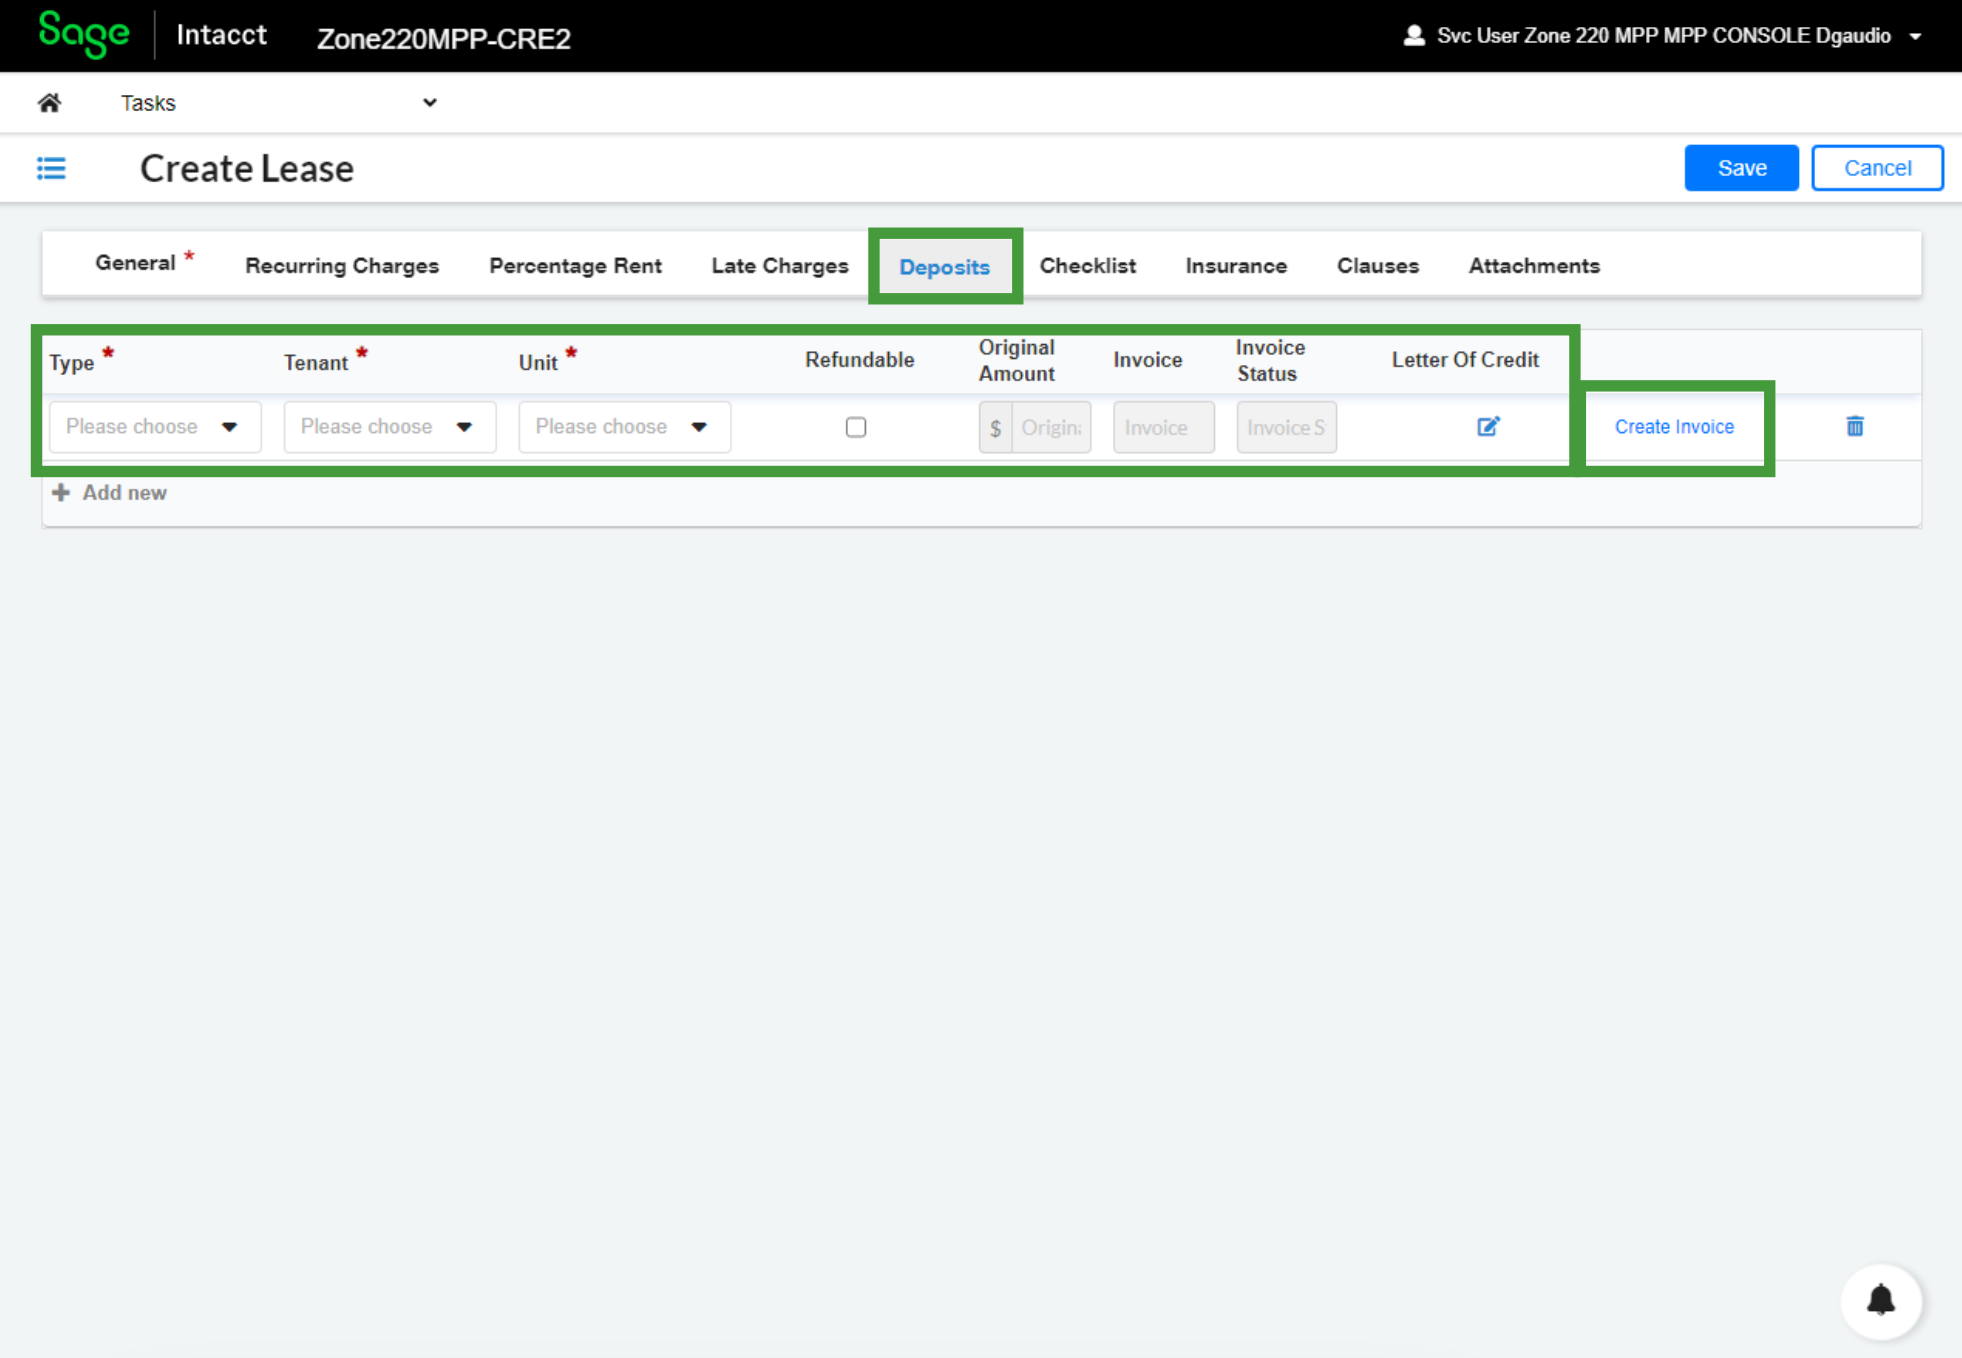
Navigate to the Deposits tab.
-
Click + Add new. This will generate a new web form with several fields.
-
Select the Deposit Type from the drop-down menu.
-
Select the appropriate Tenant from the drop-down menu.
-
Select the relevant Unit from the drop-down menu.
-
If the deposit is refundable, ensure the Refundable Checkbox is ticked.
-
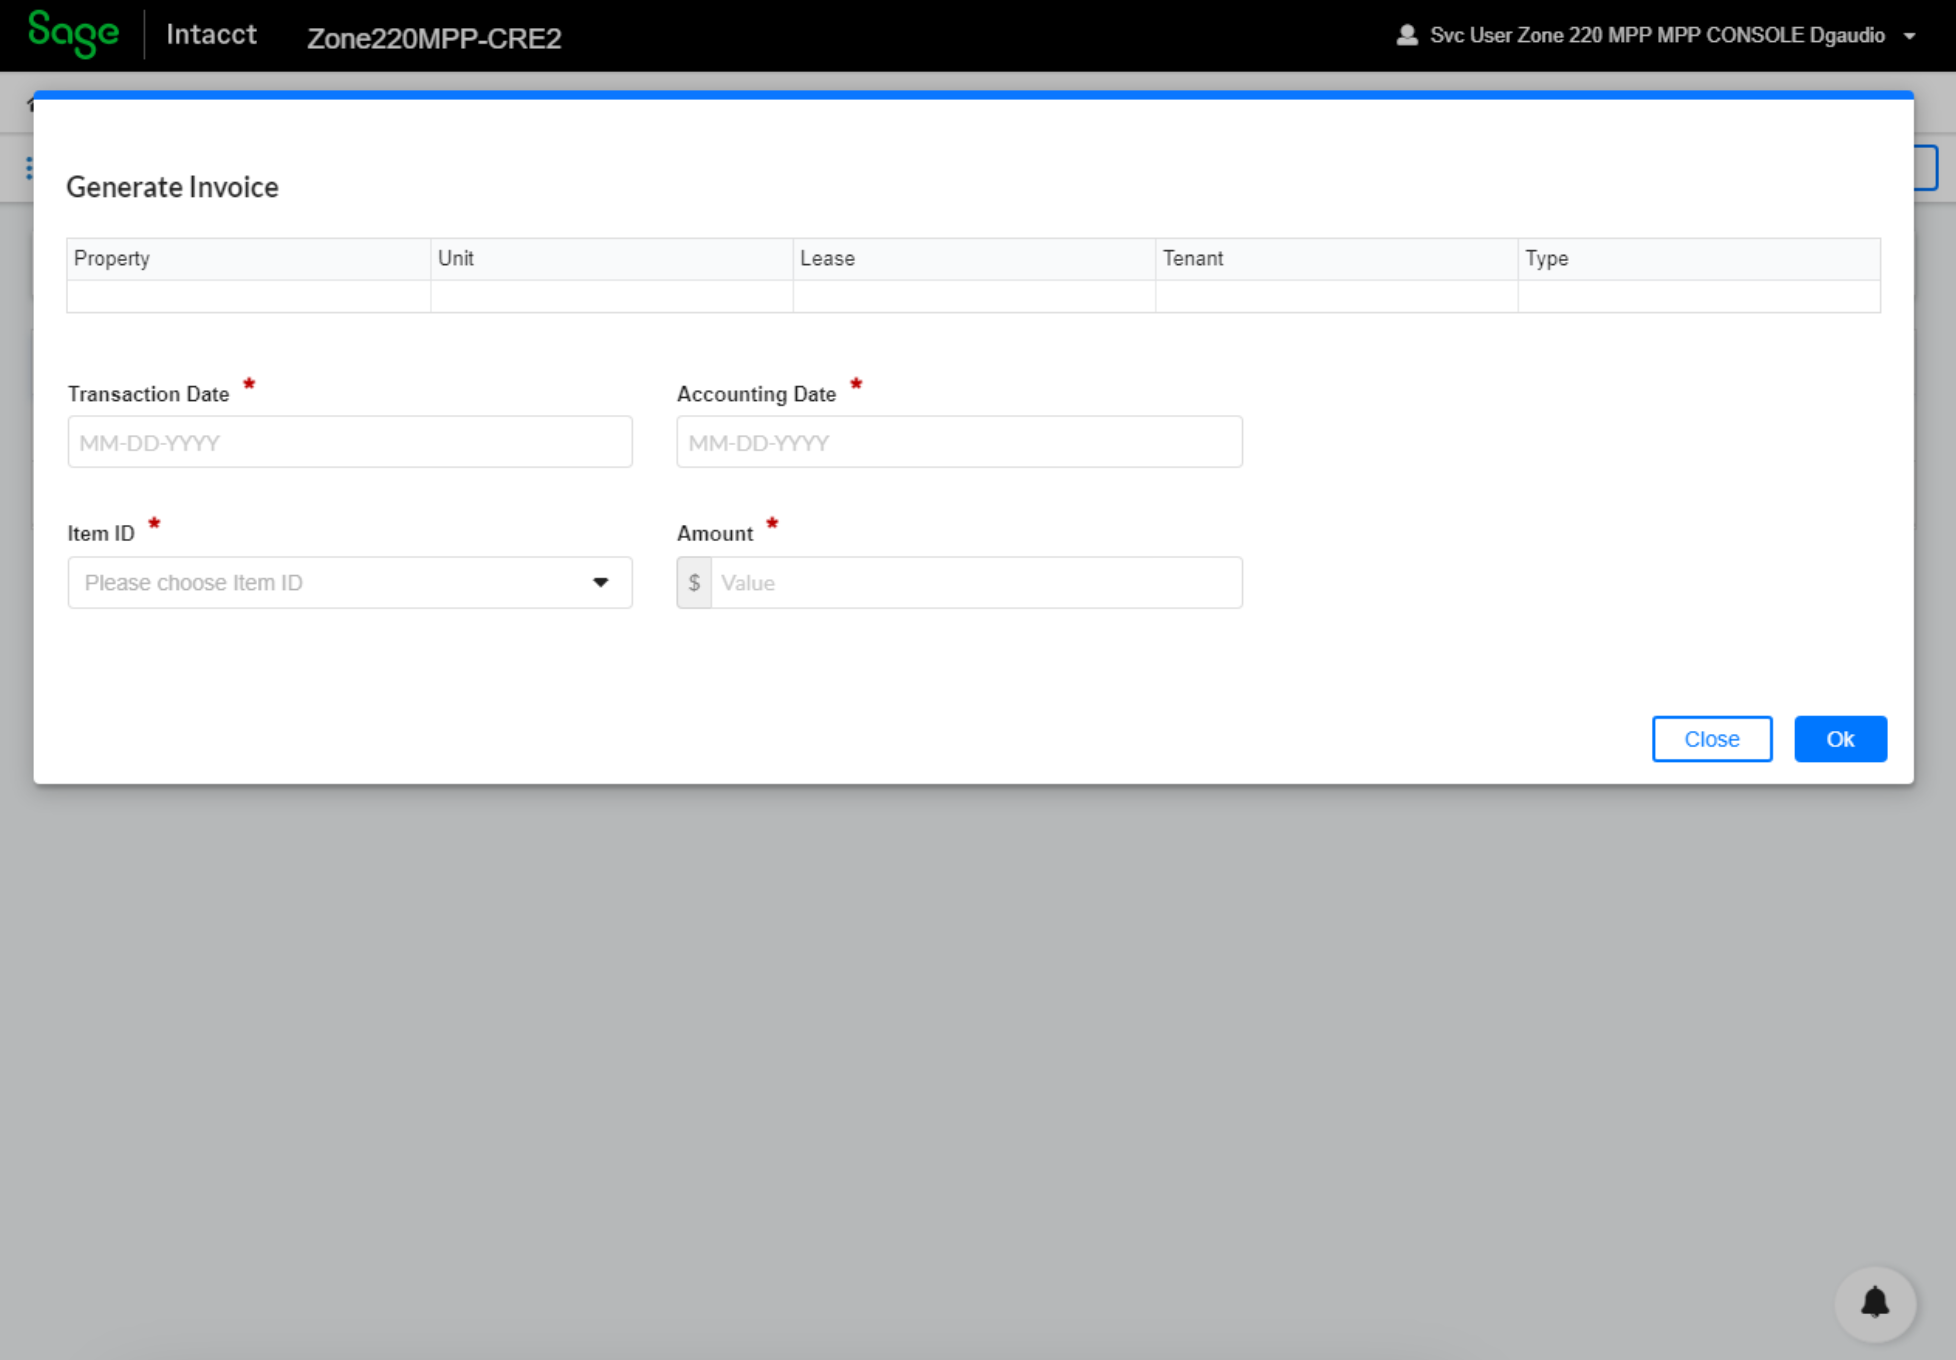
Now, click the Create Invoice button to generate an invoice for the deposit. This will create another window with a few additional fields.
-
Enter the Transaction Date for the deposit.
-
Enter the Accounting Date for the deposit. This refers to the General Ledger (GL) posting date.
-
Select the most appropriate option from the drop-down menu for Item ID.
-
Enter the deposit Amount.
-
Click Ok.
-
Repeat this process for any additional invoices or deposits.
-
Creating a Checklist for Lease Activation or Termination
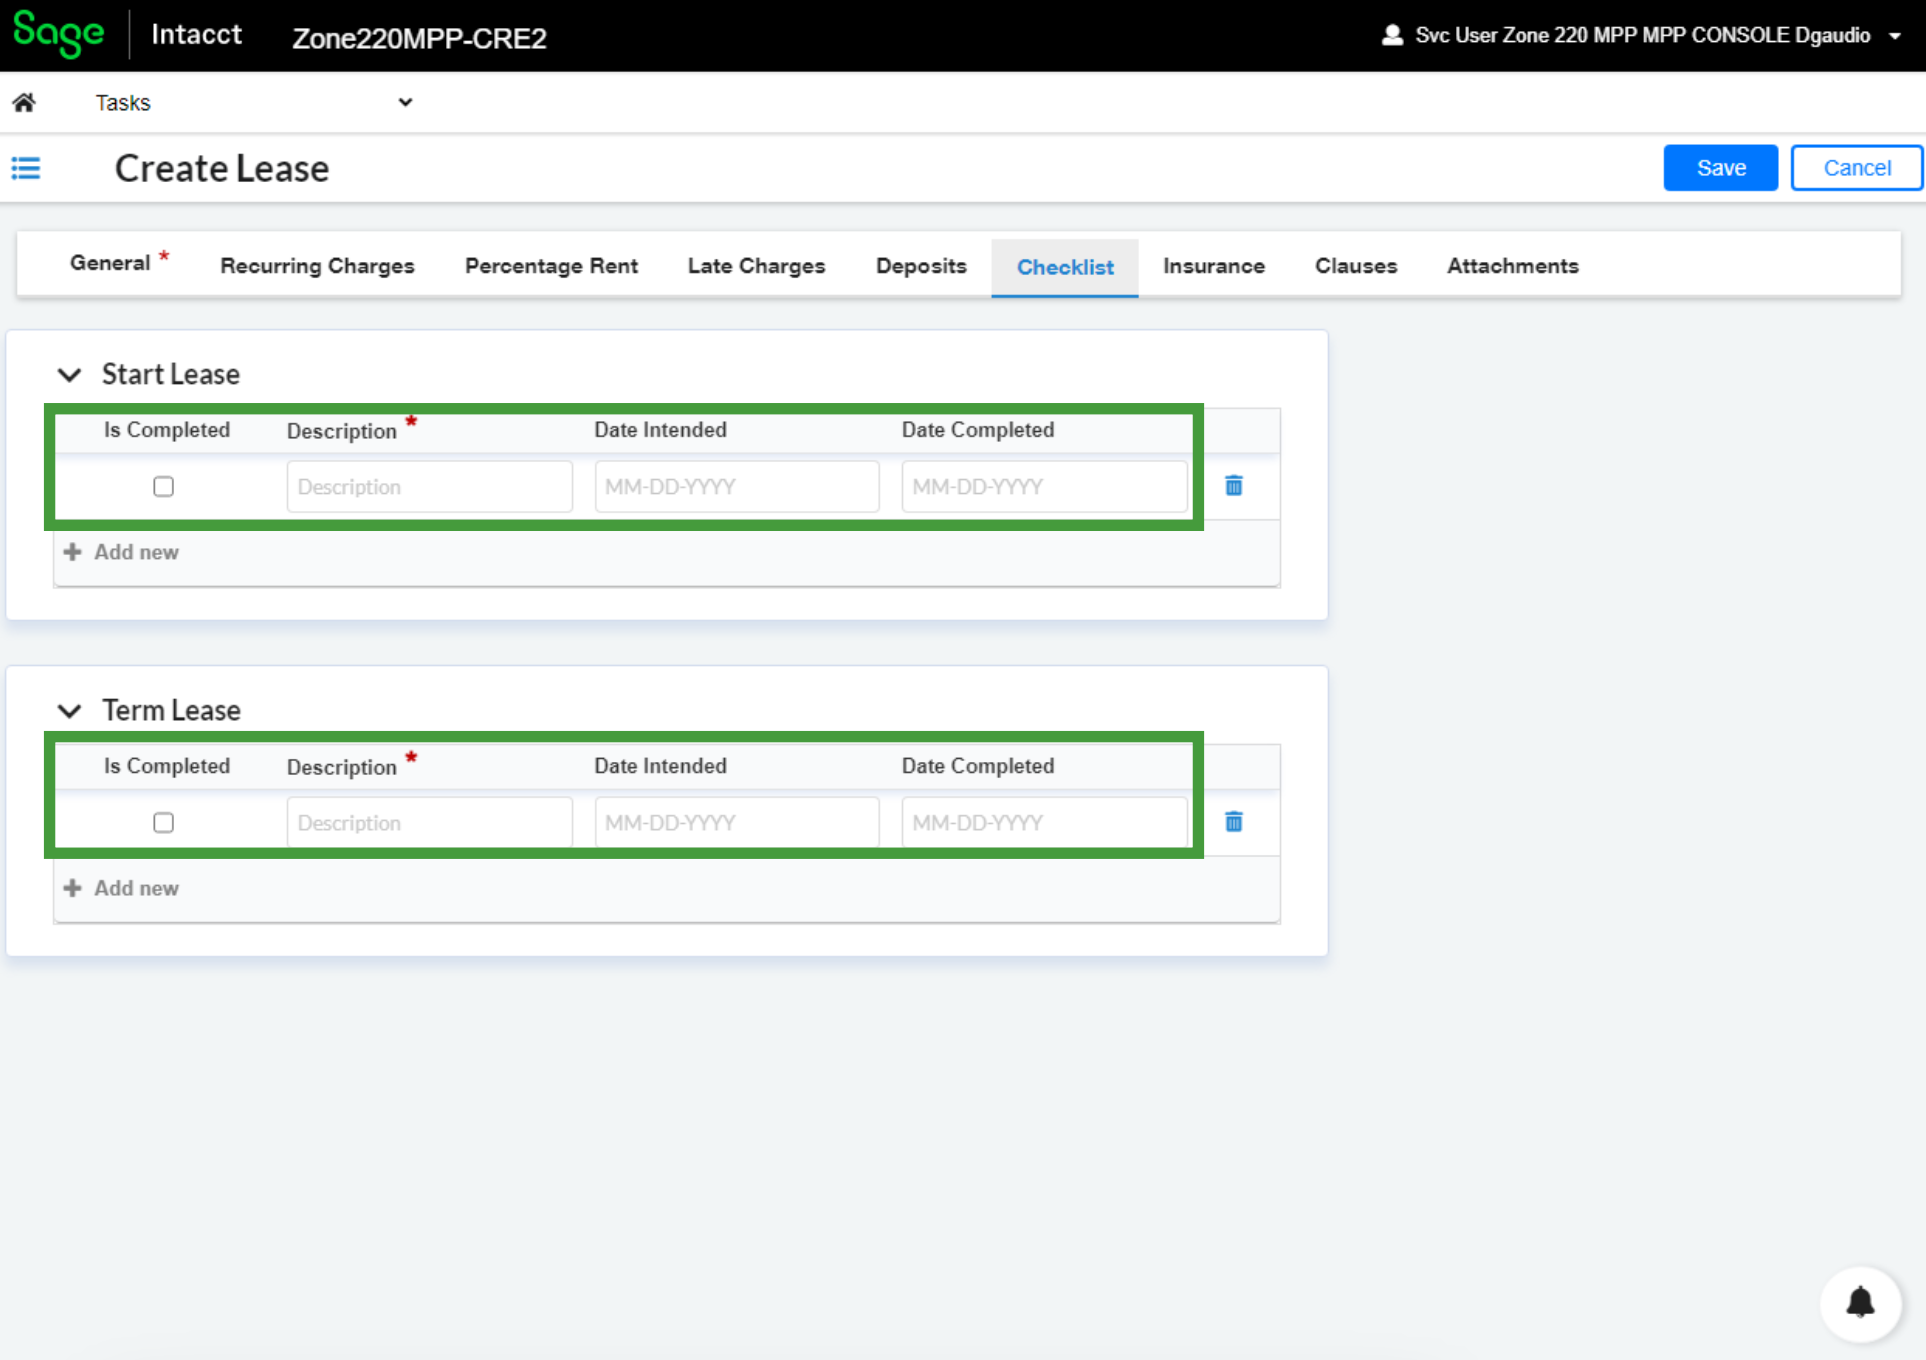
The Checklist Tab provides a valuable organization tool for property management. Within, you can create a list of action items to be completed either before the lease is activated or before its termination. To use this tab, follow these steps:
-
Navigate to the Checklist tab. From there, select Start Lease.
-
Click + Add new to create a new action item.
-
Enter a Description for the task.
-
Repeat this process for all tasks that must be completed before the lease can be activated.
-
Next, navigate to Term Lease where you can follow a similar process for items that must be completed before the lease is terminated.
-
Click + Add new to create a new action item.
-
Enter a Description for the task.
-
Repeat this process as necessary.
Archiving Insurance Information
Tracking insurance information related to rental units is important for mitigating risk and ensuring compliance with State and Local regulations. To record insurance information, complete the following steps:
-
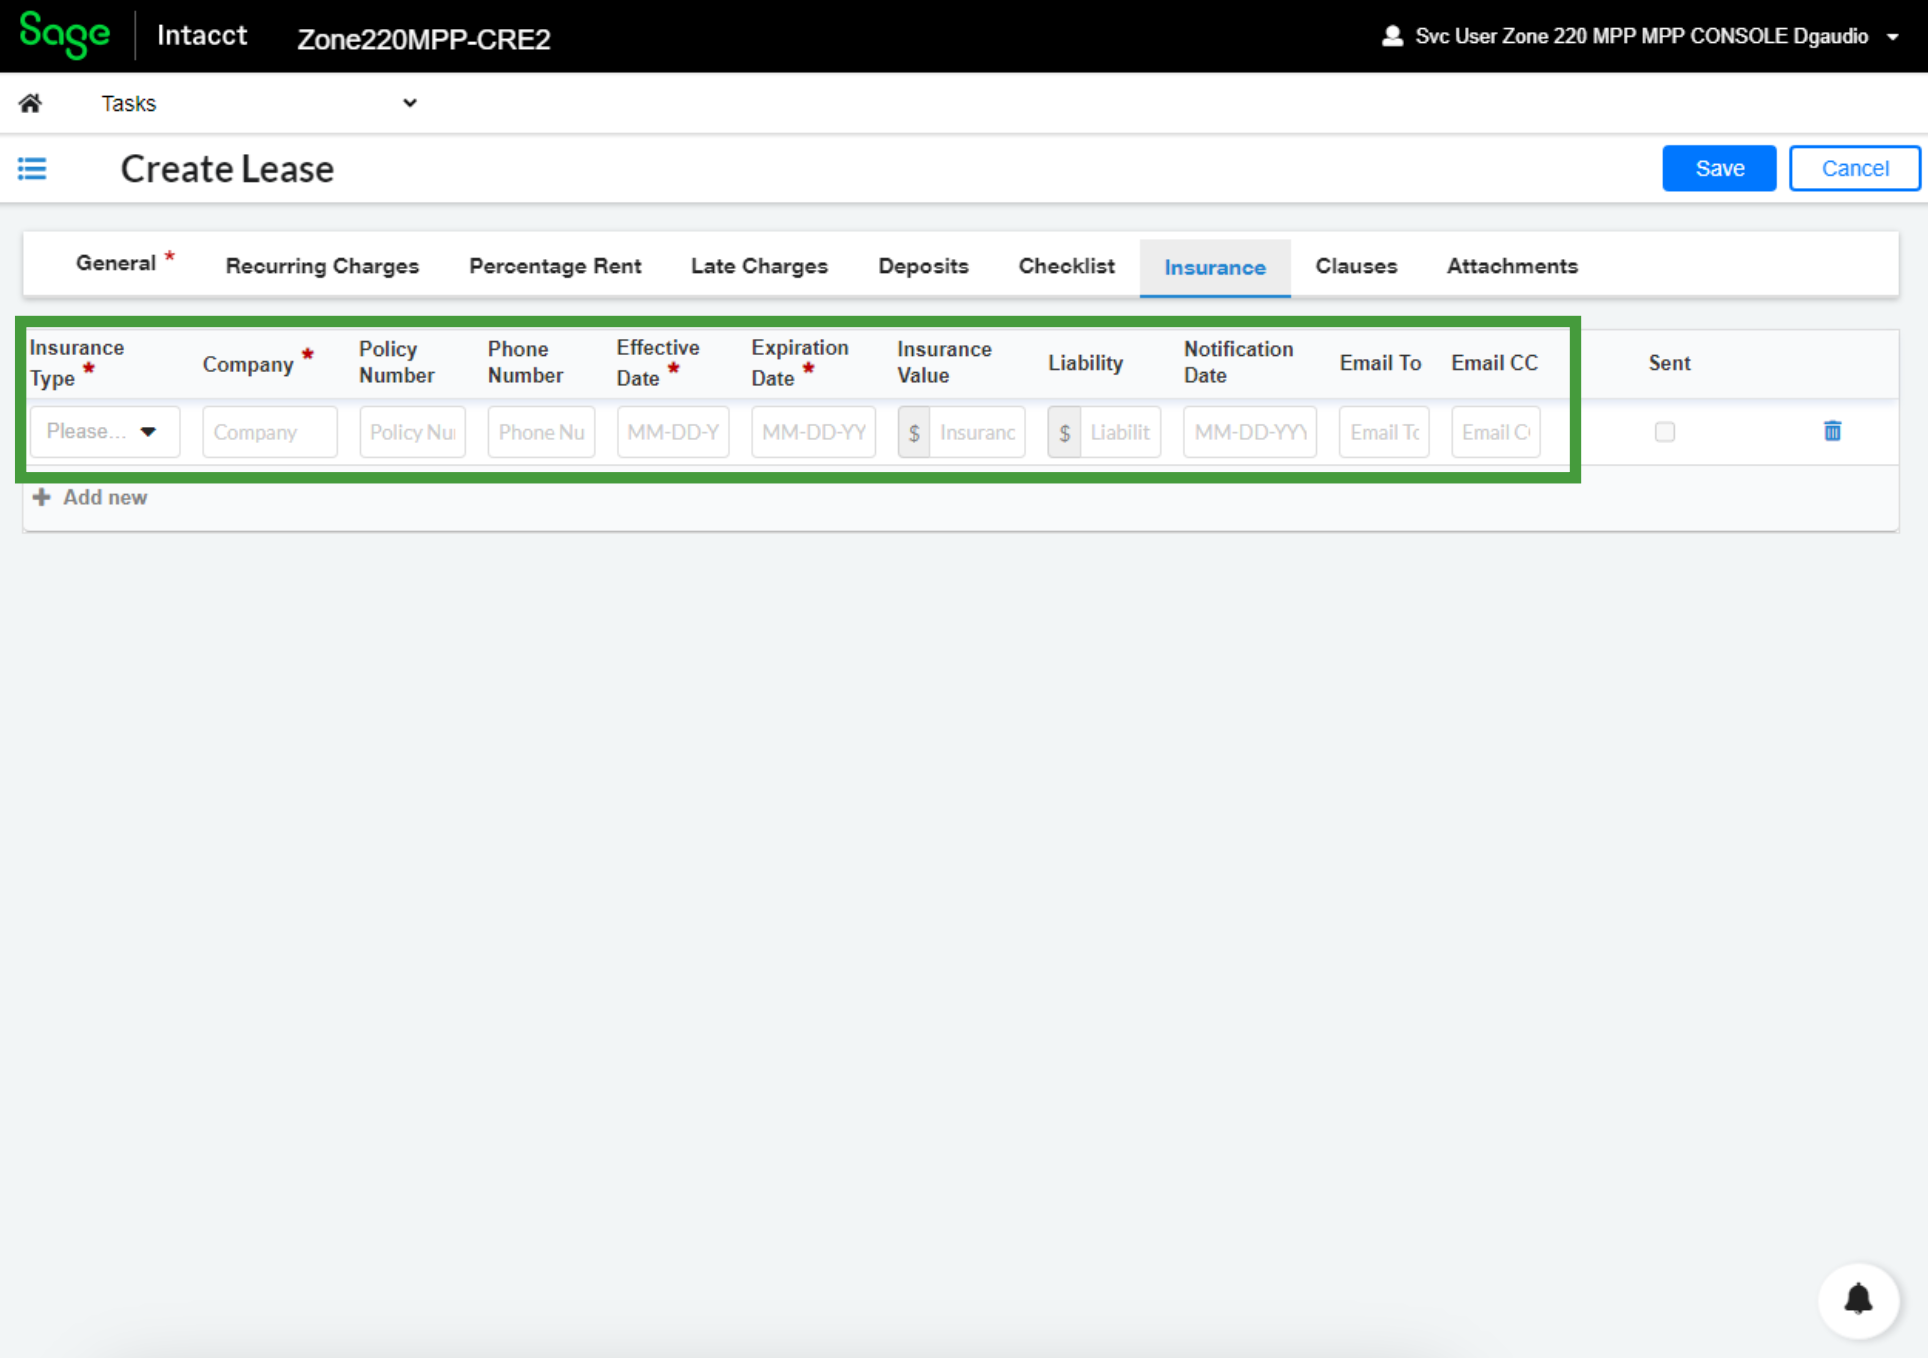
Navigate to the Insurance tab.
-
Click + Add new to create a new entry and complete the required fields.
-
Choose Insurance Type from the dropdown menu.
-
Enter the insurance provider in the Company field.
-
Enter the date the policy became or will become active in the Effective Date field.
-
Enter the date the policy expires in the Expiration Date field.
-
-
There are also several optional fields which you may find valuable. Complete these fields as necessary.
-
Specify the Policy Number.
-
List the name of the insurance Agent.
-
Include a Phone Number for the agent or insurance provider.
-
Indicate the value of the policy in the Insurance Value field.
-
Indicate any liability considerations in the Liability field.
-
Note the Deductible and Premium in their associated fields.
-
-
Repeat these steps as needed for any additional insurance policies.
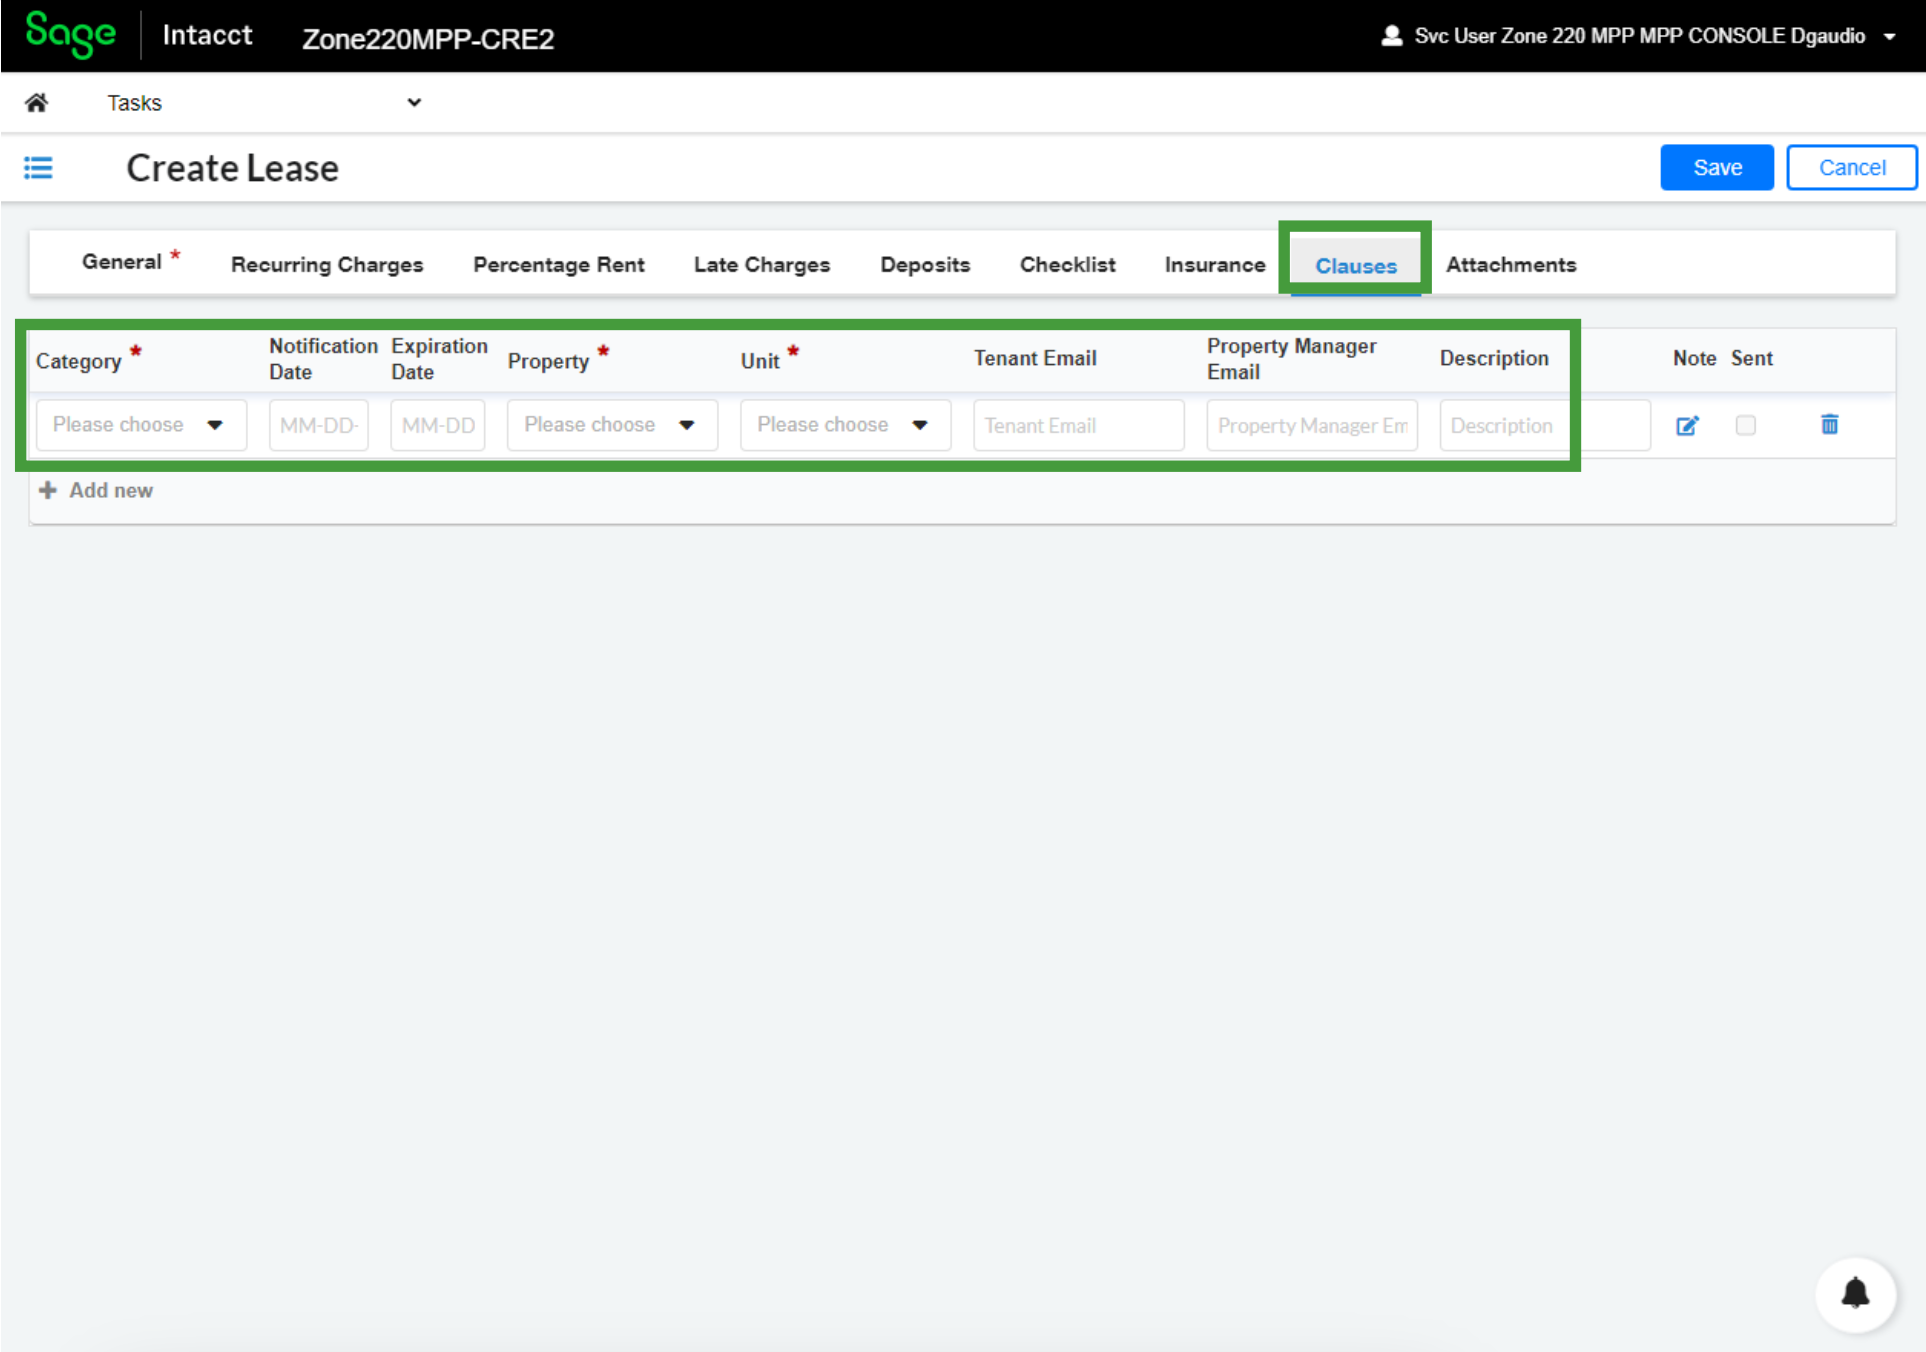
Store Clauses for Reporting Purposes
The Clauses tab is used to record exemptions, notices, holdovers, and other specifications of a lease. To add a clause, please complete the following steps:
-
Navigate to the Clauses tab to begin.
-
Click + Add new.
-
This will create a new window with a collection of form fields. Complete the required fields.
-
Specify the Category from the drop-down menu.
-
Indicate the associated Property and Unit in the relevant fields.
-
-
Next, complete ’s Email and Property Manager Email in the associated fields.
-
Provide a description of the clause in the Description field.
-
Include any other important information in the Notes field.
-
-
Repeat these steps as needed for any additional clauses.
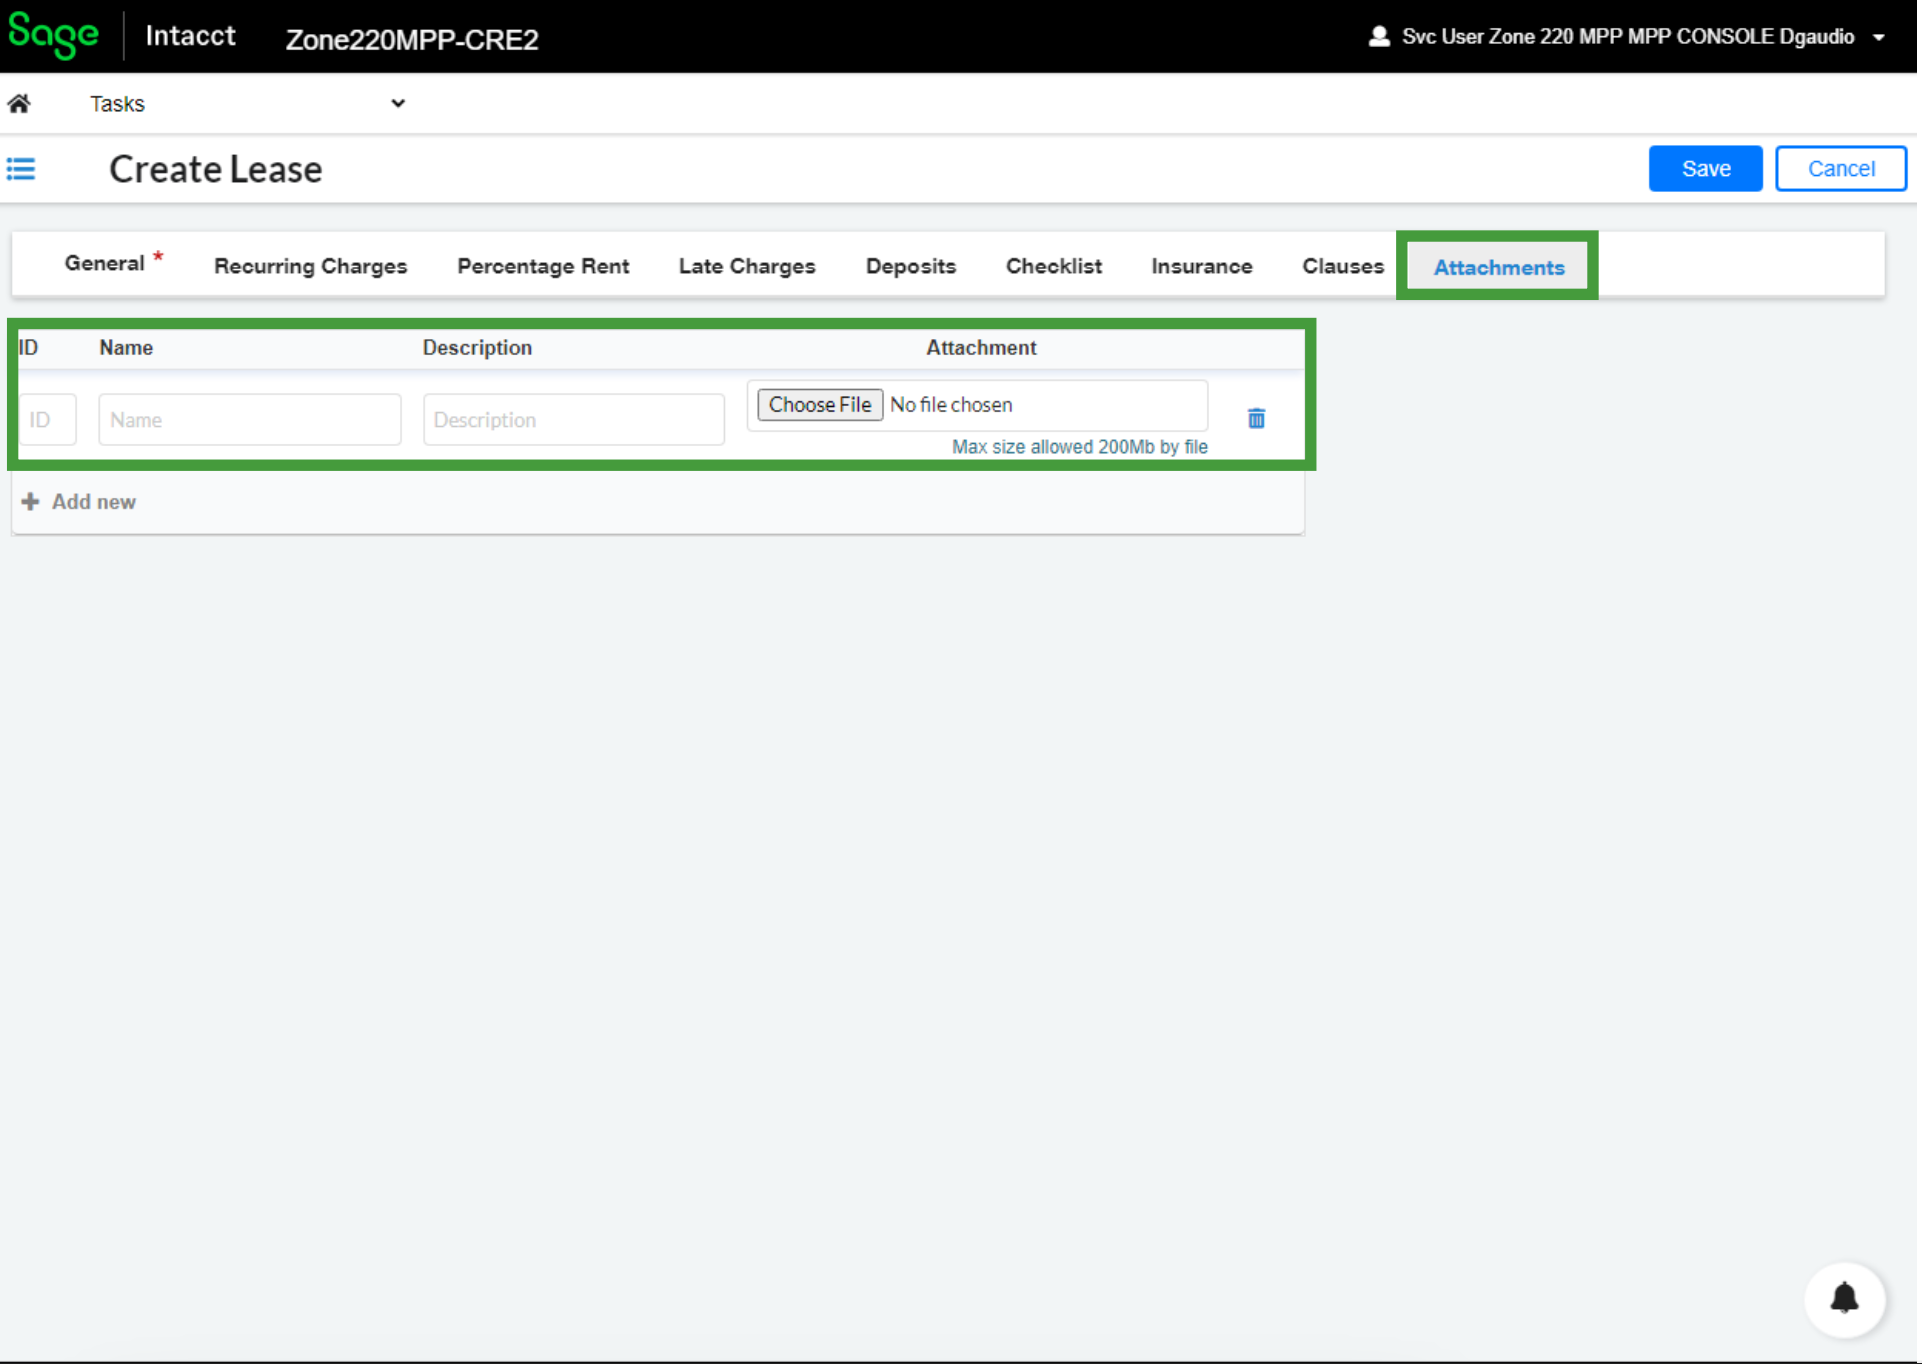
Store Any Additional Documents as Attachments
There are some additional documents that may be necessary to include with your Lease in Sage Intacct, such as floor plans and proof of insurance. This final tab will allow you to upload these documents as attachments. Please complete the following steps:
-
Navigate to the Attachments Tab.
-
Click + Add new.
-
Select Choose File under the Attachment header and use the file browser to upload an attachment.
-
Repeat as necessary for all additional attachments.