How to Record Historical Security Deposits When Migrating to Sage Intacct Real Estate
This guide will walk you through the steps required to record historical security deposits when migrating to Sage Intacct Real Estate or SIRE. This process only applies to security deposits that are refundable and were received before the migration date. Nonrefundable security deposits will be brought into the system with other historical data.
Requirements
|
Subscription |
Order Entry, Company, Cash Management, Accounts Receivable, General Ledger |
|
User Type |
Business with admin privileges |
|
Permissions |
Order Entry transactions: List, Add Accounts: Add, View, Edit Checking accounts: Add Manage payments: List, View, and Add Journal entries, Business user: List, View, Edit, Add, Delete, Reverse, Reclassify Journal entries, Employee: List Journal entries, Approval: List, View |
Recording Security Deposits with the Real Estate Module
-
Navigate to the Real Estate Module
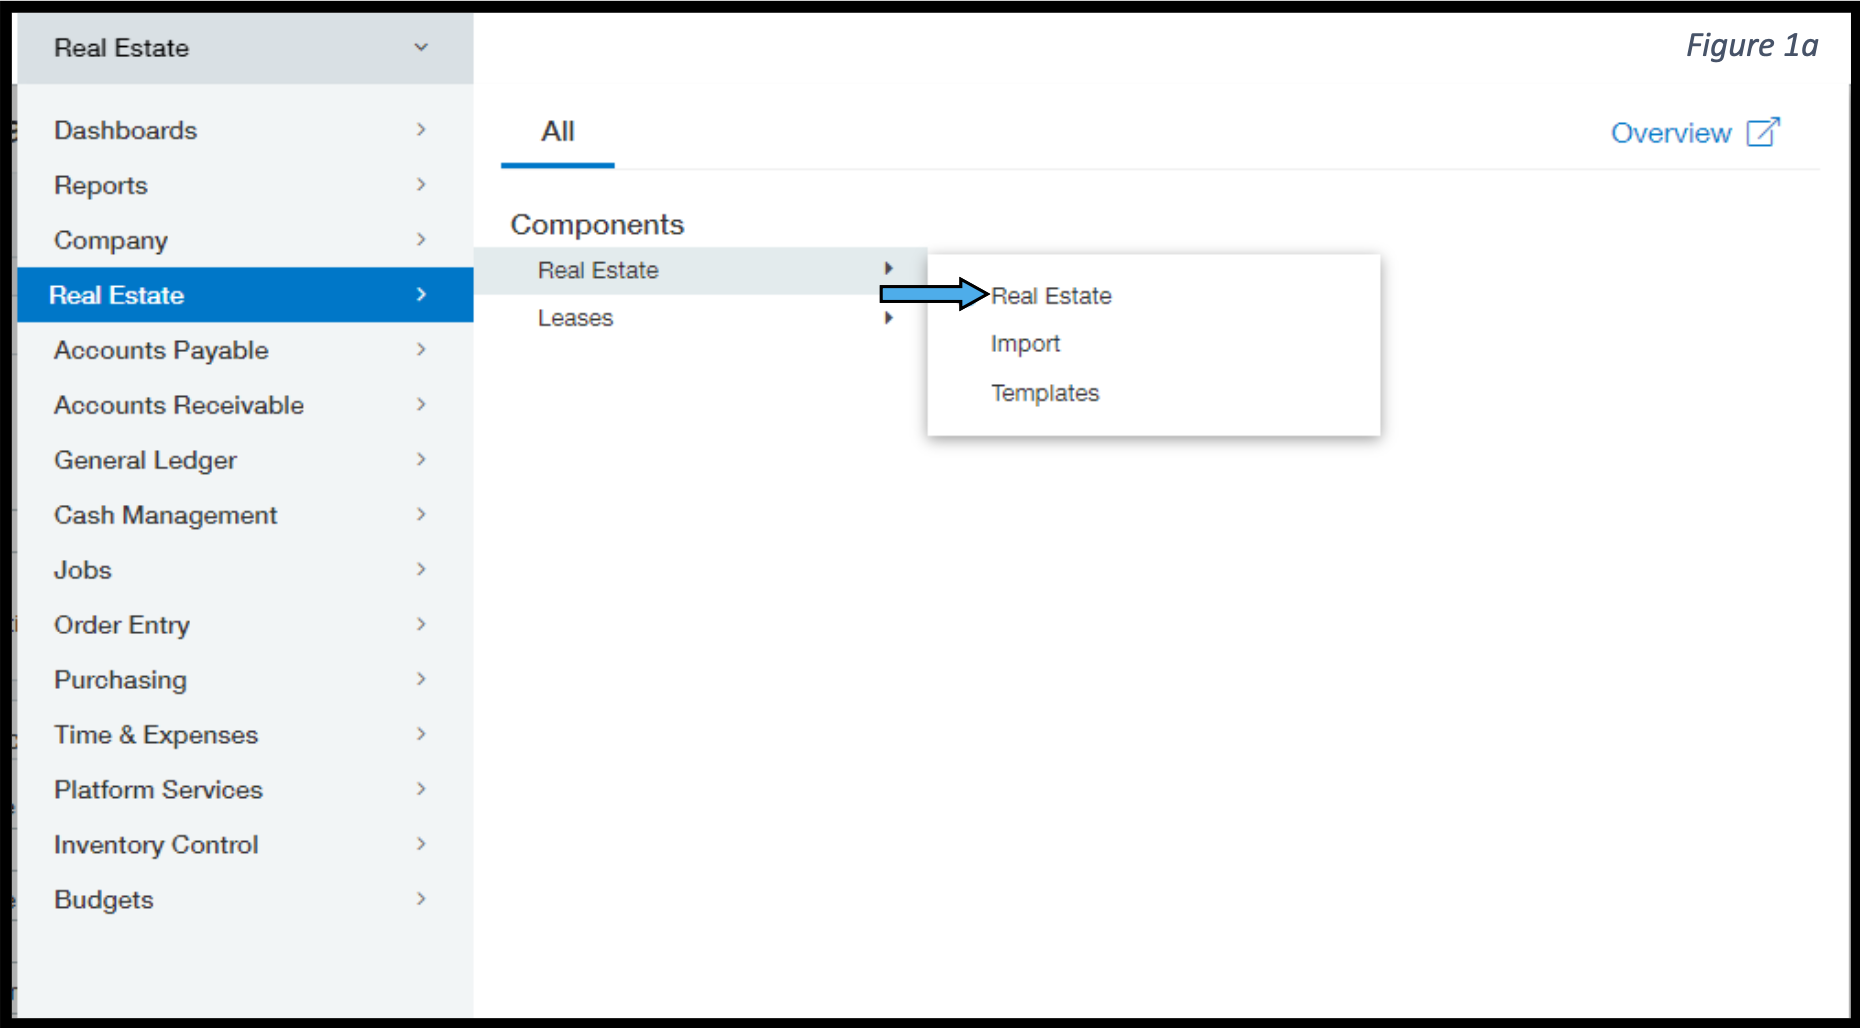
-
Navigate to the Lease in the Real Estate Module
-
Main Menu – Tasks – Manage Leases – Leases
-
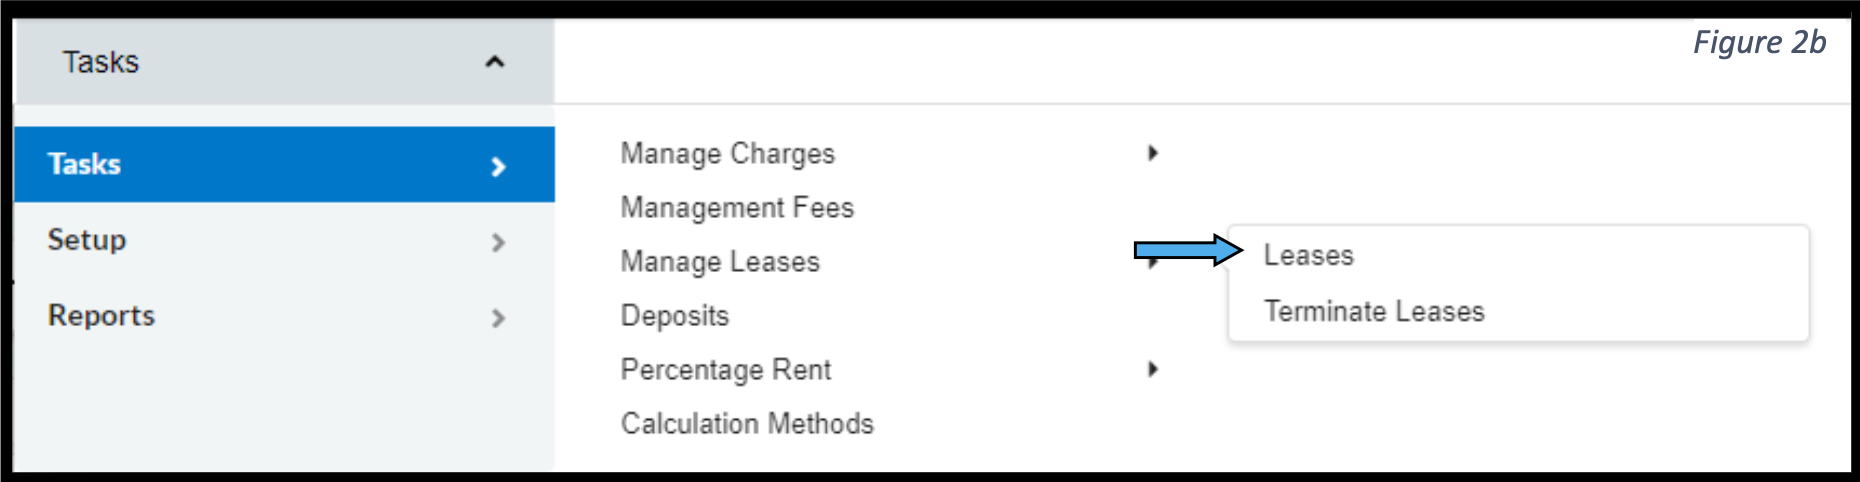
i. Click Edit on the Lease the Security Deposit is For
-
Navigate to the Deposits Tab
-
Click “+ Add New”
-
Enter the Required Information
-
Type
-
Tenant
-
Unit
-
-
Click Create Invoice
-
Enter the Required Information in the Generate Invoice Window
-
Transaction Date
-
Accounting Date (GL Posting Date)
-
Item ID
-
Amount
-
-
Click Ok
-
Click Save
-

Add GL Accounts for Historical Security Deposits
A General Ledger account must be created for each Bank Account used to receive Historical Security Deposits.
-
Go to General Ledger > All tab > and click + beside General Ledger Accounts. The General Ledger Accounts page appears
-
Populate the required fields
-
Account Number
-
Title
-
Historical Security Deposits
-
-
Account Type
-
Normal Balance
-
Period End Closing Type
-
-
Select Required Dimensions
-
Property
-
Tenant
-
Lease
-
-
Click Save
Create Bank Account for Historical Security Deposits
The best practice is to make a historical bank account for each entity in your system at either the top or entity level.
-
Go to Cash Management > Setup tab > Accounts and select the + sign beside Checking
-
On the Details tab, populate the required fields
-
ID
-
Bank Name
-
Historical Security Deposits
-
-
GL Account
-
Use the GL Account Created in the Previous Step
-
-
Property ID
-
Use the Property/Location that is the Parent of the Unit with Refundable Security Deposits
-
-
-
Click Save
Apply Historical Payments to Real Estate Invoices
-
Go to Accounts Receivable > All tab > Invoices and select + next to Receive payments - New!
-
Populate the payment information
-
Tenant
-
Account Type
-
Bank
-
-
Account
-
Use the Bank Account created in the previous step.
-
-
Payment Method
-
Record Transfer
-
-
-
Select Show invoices
-
If the customer has only the invoice created during step one it will populate the grid below
-
If the customer has more than one open invoice: A list of open invoices for the customer appears
-
Use Filter sets to filter for specific invoices
-
Select invoices from the list, then select Add and close
-
-
-
Populate Additional Information
-
Date Received
-
Payment Date
-
Payment amount
-
-
Click Post
-
Use Post & new if you are recording multiple security deposits
-
Create Reversing Journal Entry
As the balance of these historical security deposits is already included in your GL balances, these transactions need to be reversed. Since the invoices need to be in a paid state to be refunded by SIRE, a journal entry is required.
-
Go to General Ledger > All tab > Journal entries and click +beside Journal entries
-
Populate the required header information
-
Journal
-
Use of a Historical Journal is recommended
-
-
Posting Date
-
Description
-
-
Populate line items
-
Tenant
-
Lease
-
Property
-
Account
-
Debit – Security Deposit Account
-
Credit – GL tied to the Bank Account Created in Step 3
-
-
-
You can record a single Journal Entry for all Security Deposits
-
Click Post
Deactivate Historical Security Deposit Bank Accounts
-
Go to Cash Management > Setup tab > Accounts > Checking
-
Click edit next to the Historical Security Deposit bank Account
-
On the details tab, change the Status drop down from Active to Inactive.
-
Click Save