Welcome to the Data Testing Guide. The purpose of this document is to provide a clear, step-by-step checklist to verify that all your company's data has been accurately loaded into Sage Intacct Real Estate implementation environment. This process is crucial to ensure a smooth transition and a successful launch in the production environment.
Please follow these steps to confirm the accuracy and completeness of your migrated data.
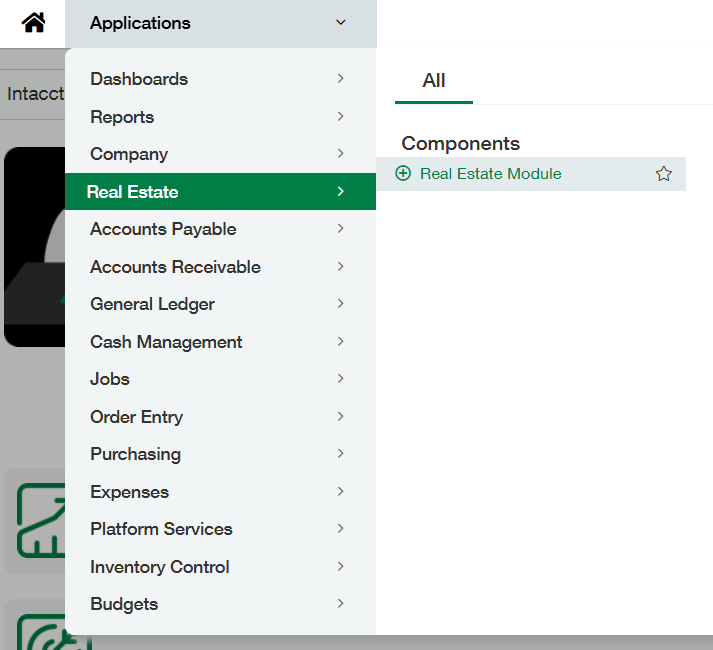
1. Properties
Objective: Verify that all property data, including names, IDs, and core attributes, has been migrated correctly (Property setup).
Navigation: Real Estate Module > Main Menu > Setup > Properties
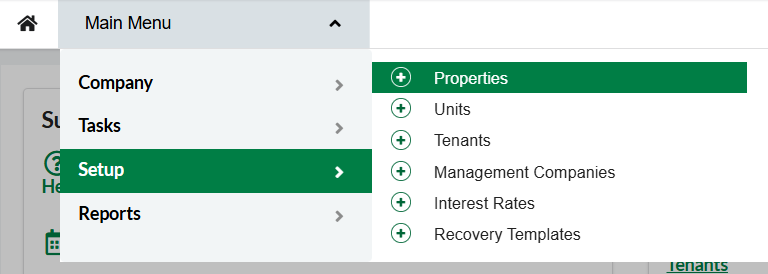
Testing Steps:
-
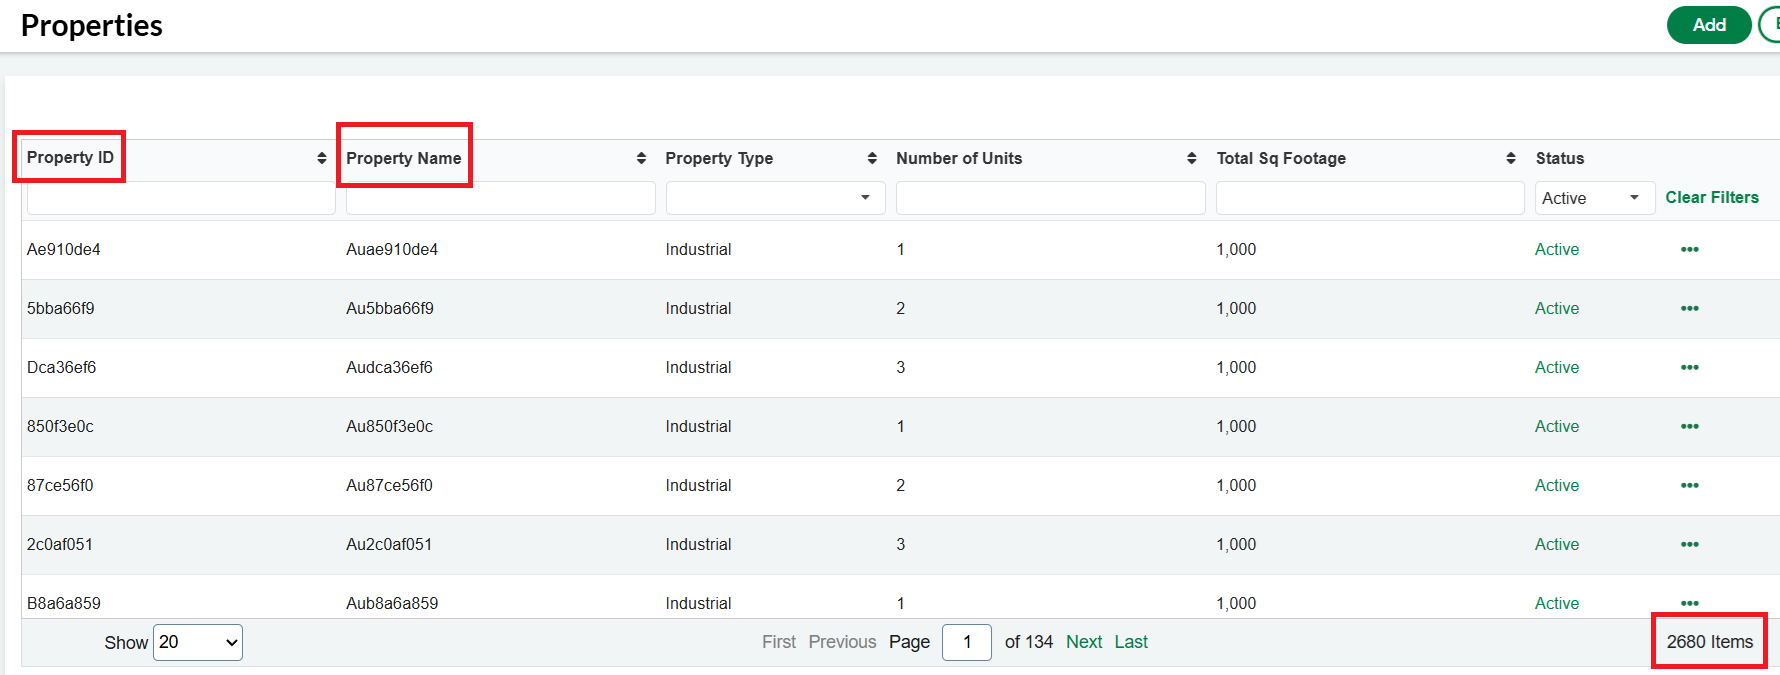
1.1 Verify Property list, Names and IDs:
-
Navigate to the Properties list.
-
Check that the name and unique ID for each property are correct.
-
Confirm that the total number of properties in the system matches your portfolio.
-
-
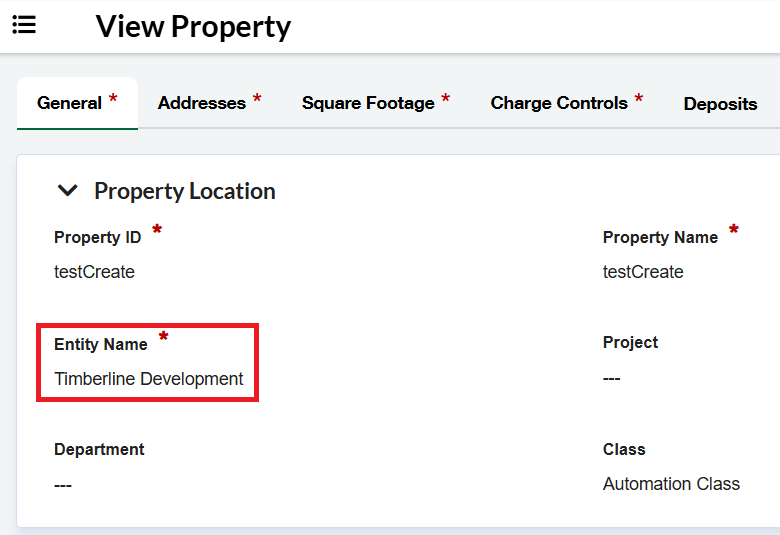
1.2 Verify Property and Entities Relationship:
-
From the property list, click into a specific property.
-
Verify that the property is correctly associated with the correct Entity.
-
-
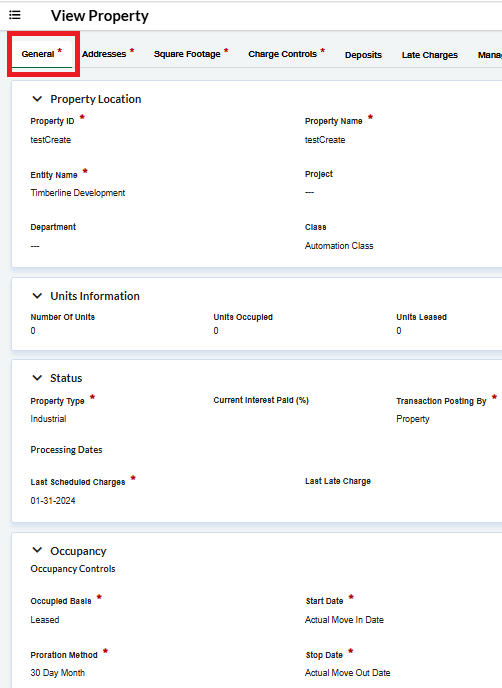
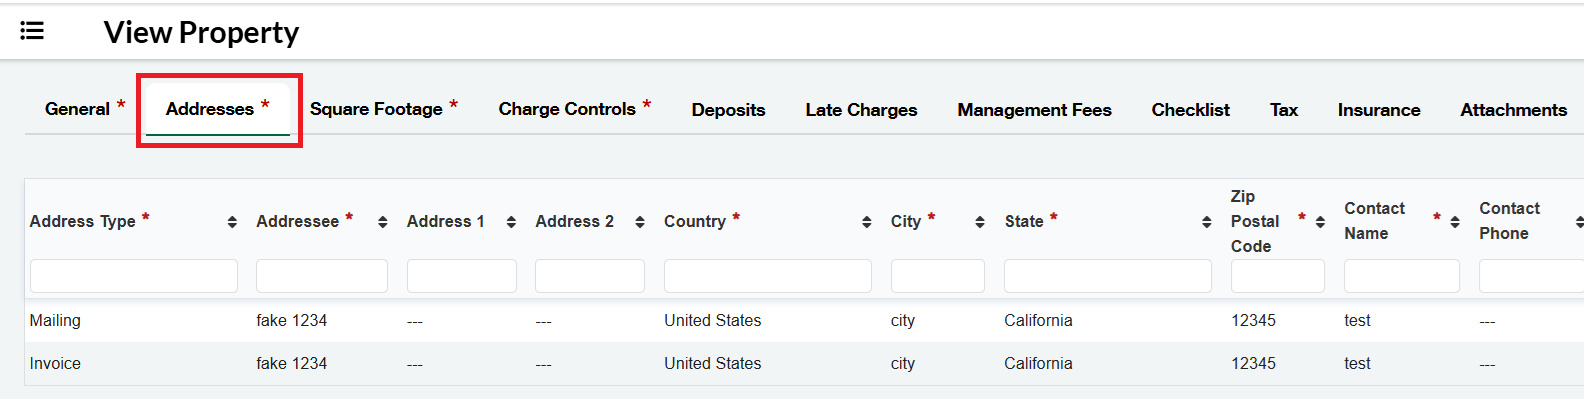
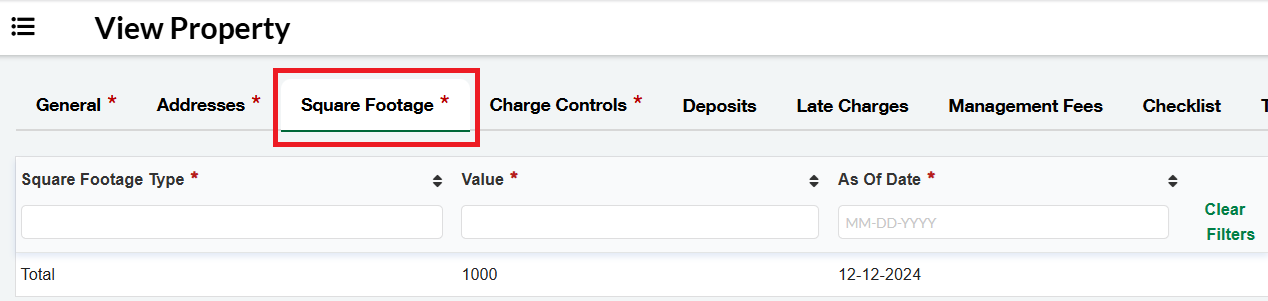
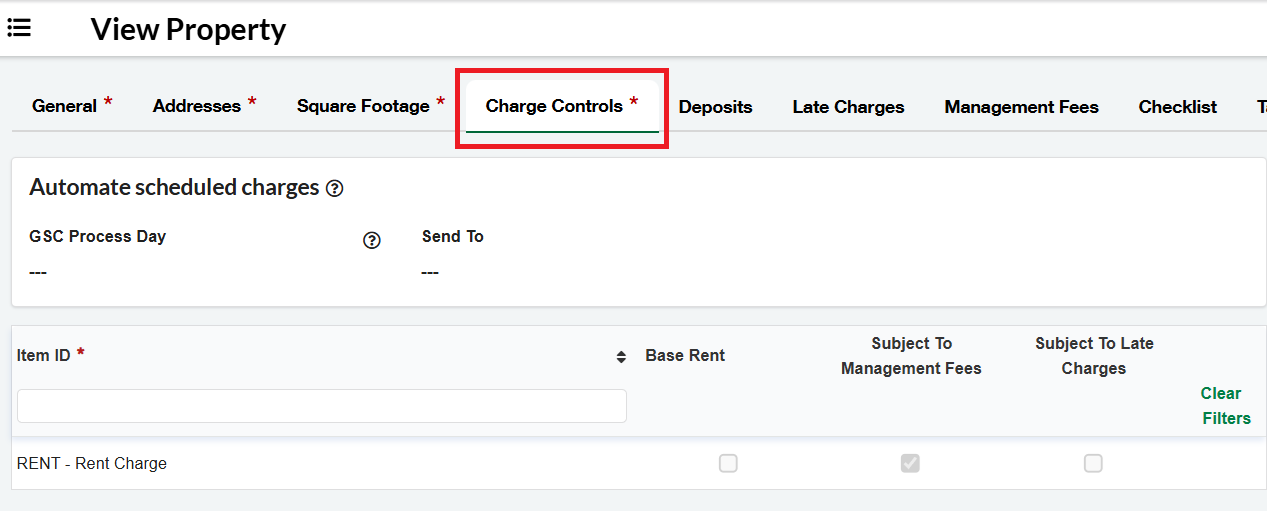
1.3 Verify Property Required Attributes in RE Module:
-
Review the detailed information for several properties.
-
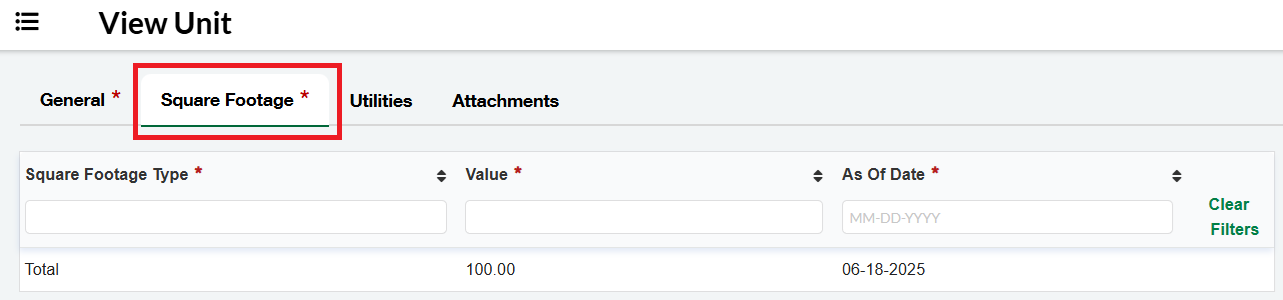
Confirm the General, Address, Square Footage, and Charge Controls fields are all accurate.
-
-
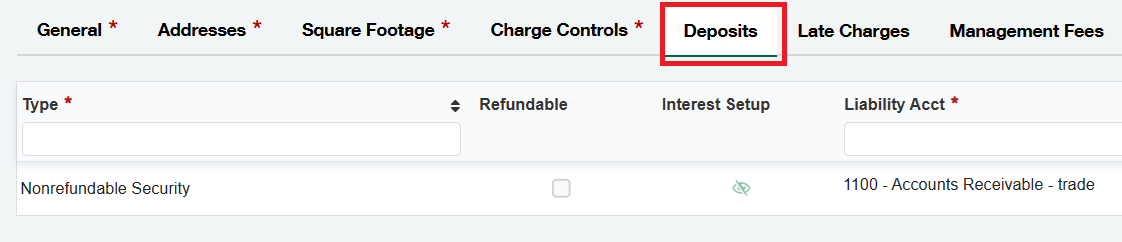
1.4 Verify Property Deposits:
-
If applicable, click on the Deposits tab. Verify that the Deposits loaded are correct.
-
-
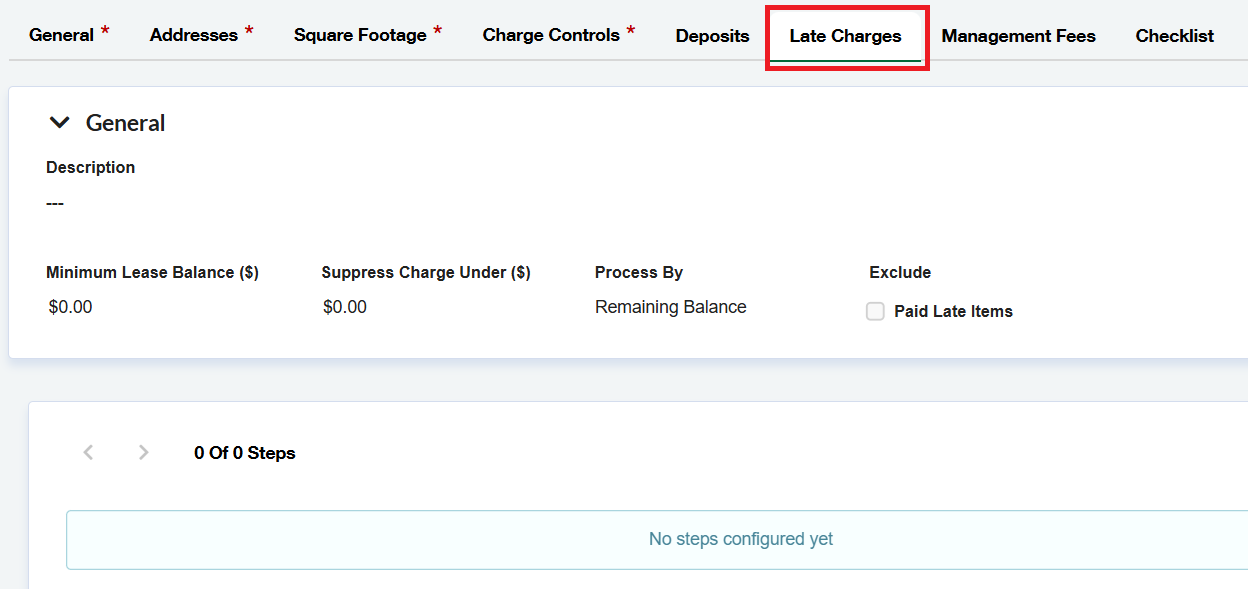
1.5 Verify Property Late Charges Configuration:
-
If applicable, click on the Late Charges tab. Verify that the Late Charges property configuration is correct.
-
-
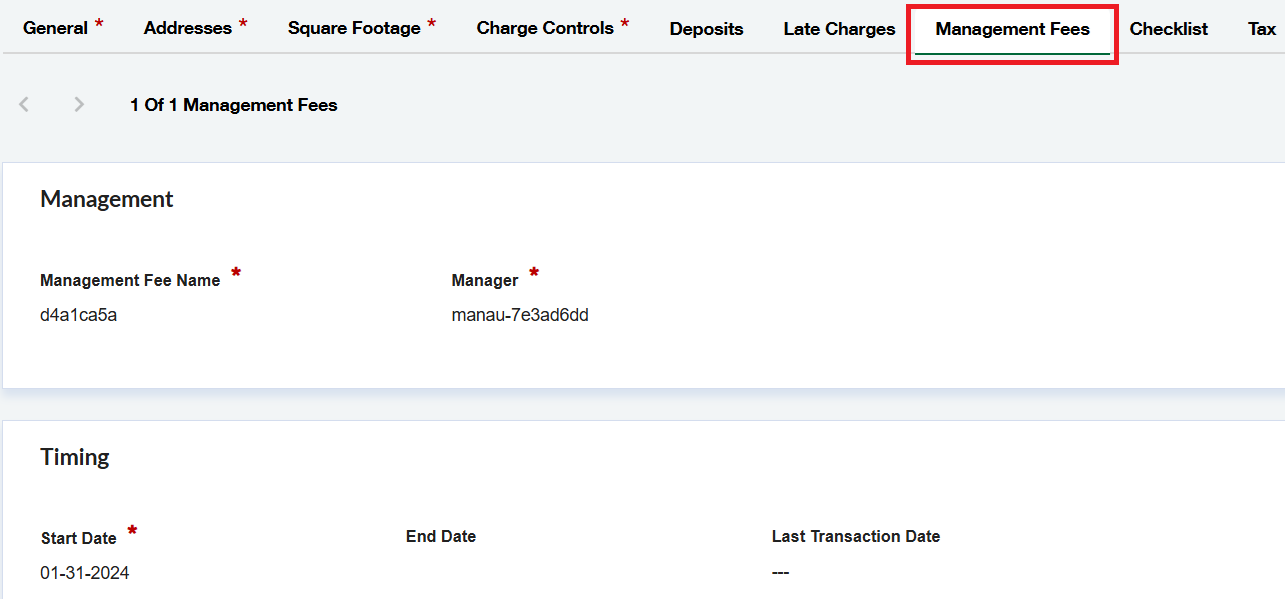
1.6 Verify Property Management Fees:
-
If applicable, click on the Management Fees tab. Verify that the Late Charges property configuration is correct.
-
-
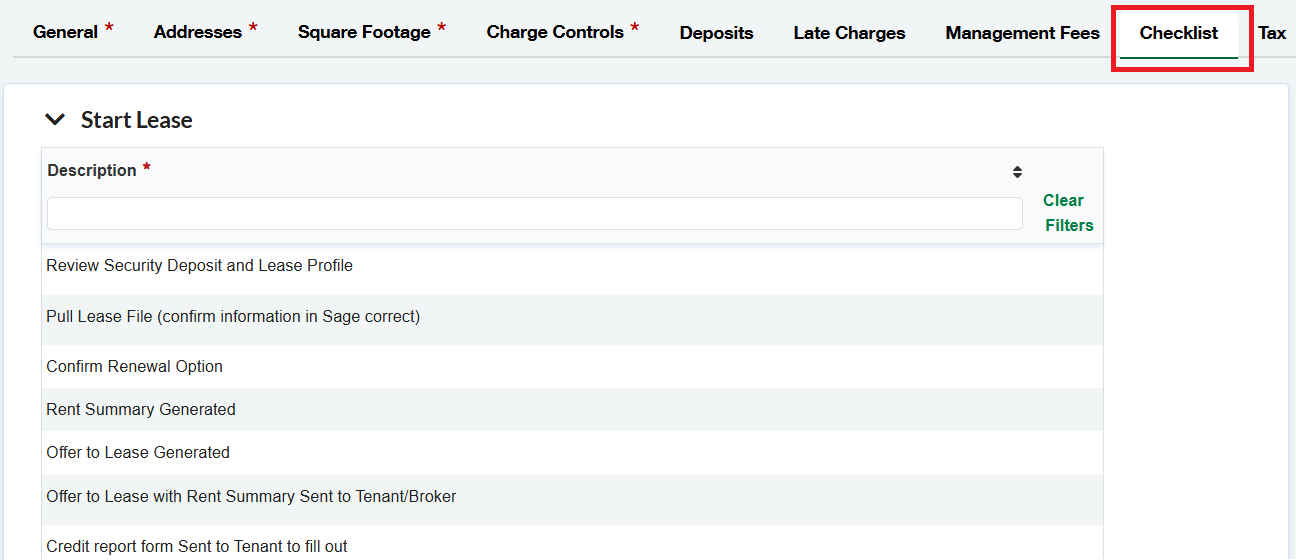
1.7 Verify Property Checklist:
-
If applicable, click on the Checklist tab. Verify that the Property Checklist is correct.
-
-
1.8 Verify Property Tax:
-
If applicable, click on the Tax tab. Verify that the Tax information loaded is correct.
-

-
1.9 Verify Property Insurance:
-
If applicable, click on the Insurance tab. Verify that the Tax information loaded is correct.
-

2. Units
Objective: Ensure all individual unit details are accurately reflected within their respective properties.
Navigation: Real Estate Module > Main Menu > Setup > Units
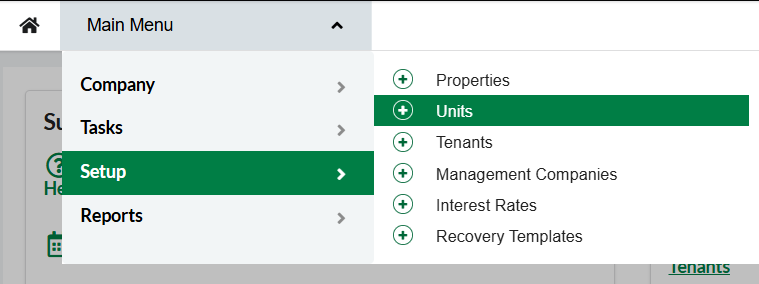
Testing Steps:
-
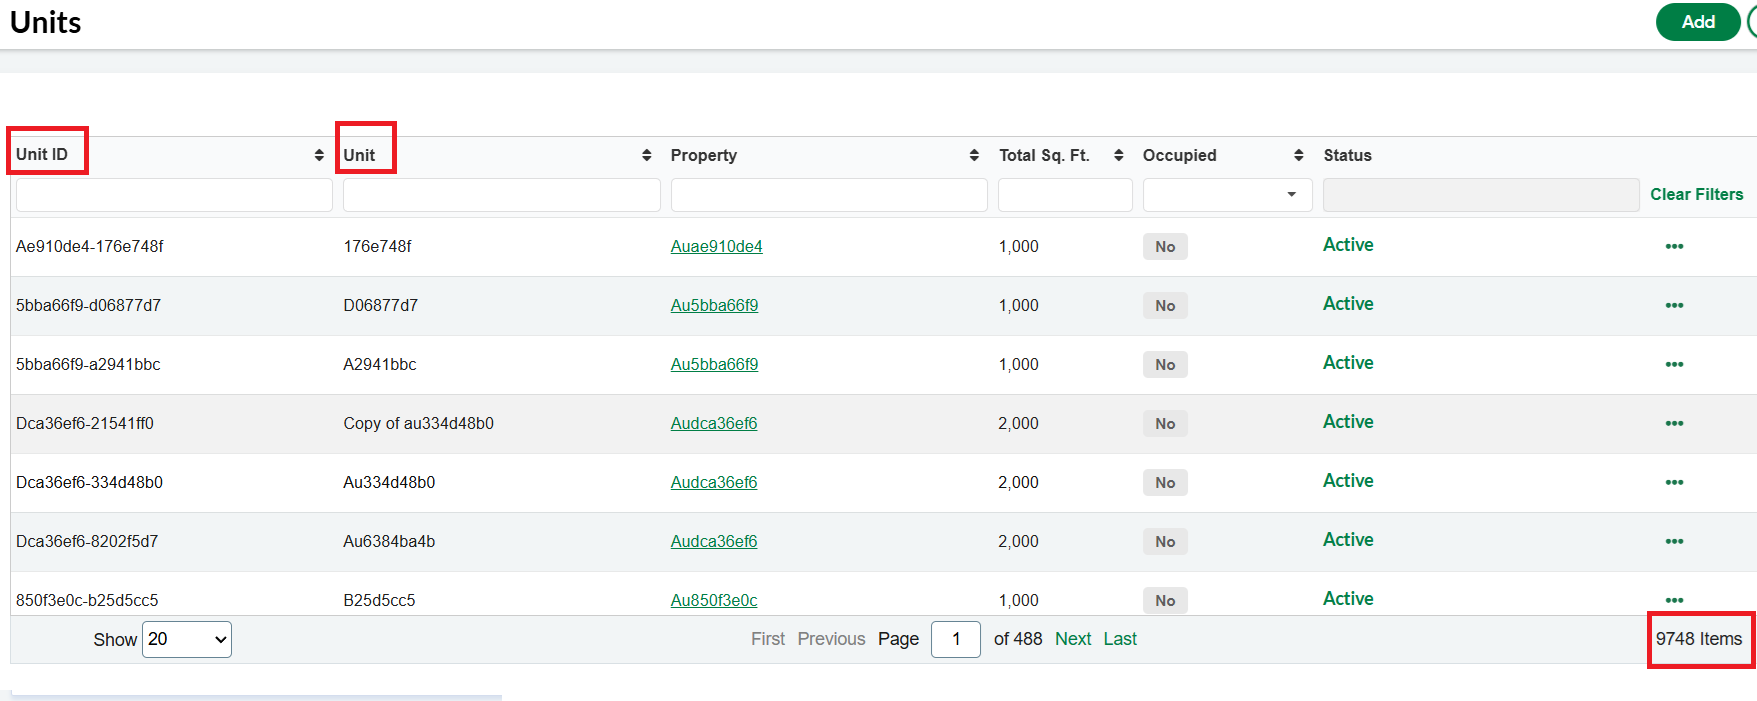
2.1 Verify Unit list, Names and IDs
-
Navigate to the Units list.
-
Check that the name and unique ID for each unit are correct.
-
Confirm that the total number of units in the system matches your portfolio.
-
-
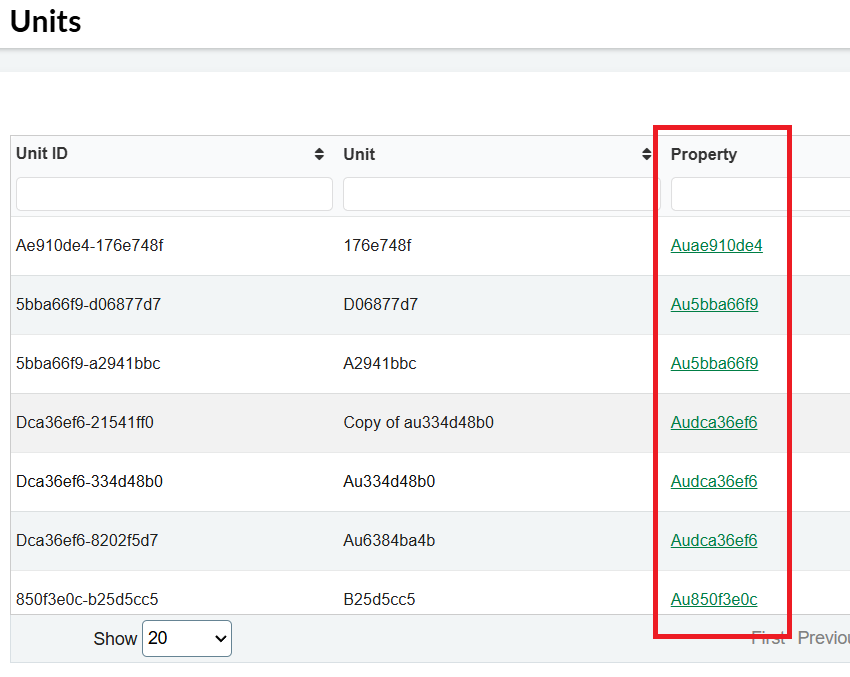
2.2 Verify Unit and Properties Relationship:
-
From the unit list, verify that the unit is correctly associated with the correct Property.
-
-
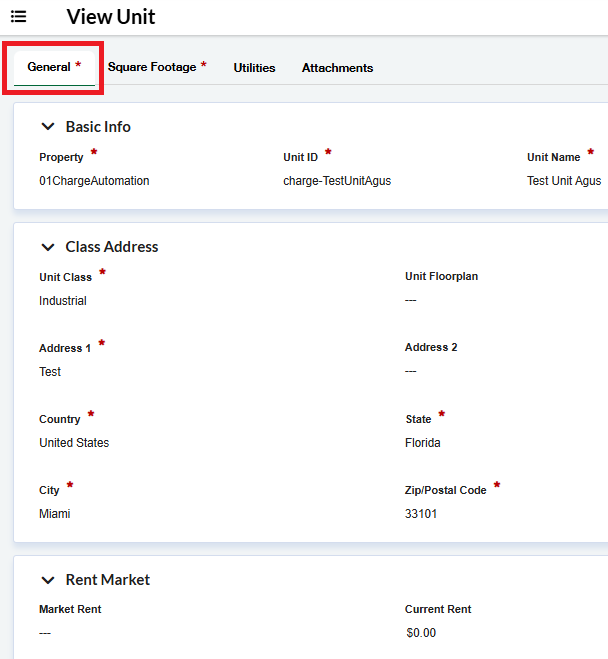
2.3 Verify Unit Attributes:
-
Review the detailed information for several units.
-
Confirm the General and Square Footage fields are all accurate.
-
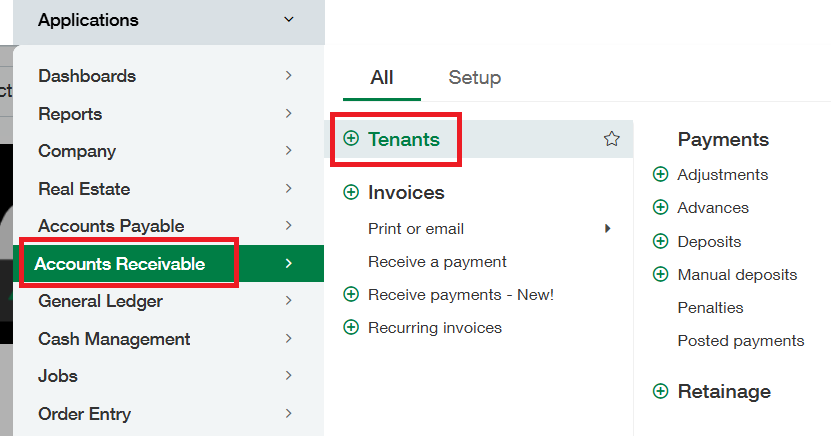
3. Tenants
Objective: Confirm that all tenant information has been migrated accurately.
Testing Steps in Real Estate Module:
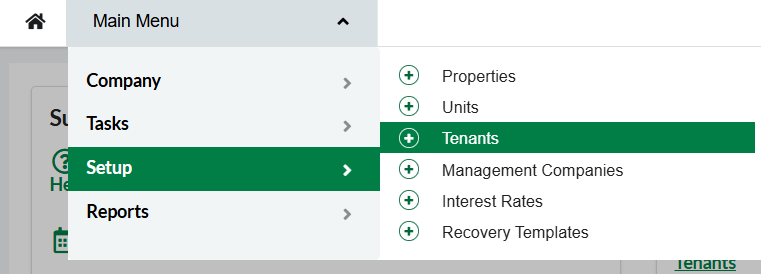
Navigation: Real Estate Module > Main Menu > Setup > Tenants
-
3.1 Verify Tenant list, Names and IDs
-
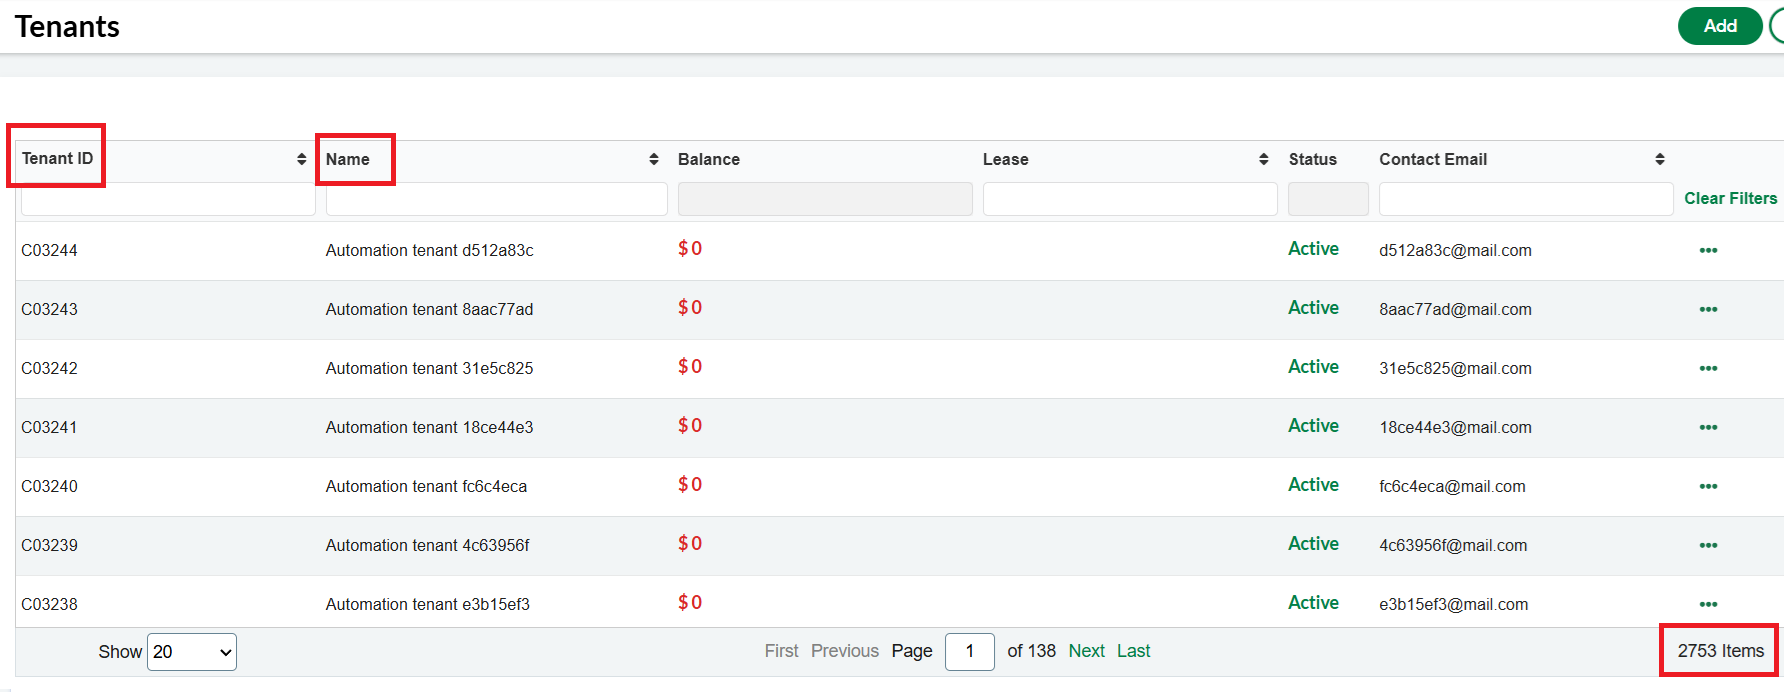
Navigate to the Tenants list.
-
Check that the name and unique ID for each Tenant are correct.
-
Confirm that the total number of tenants in the system matches your portfolio.
-
-
3.2 Verify Tenant Attributes in Real Estate Module:
-
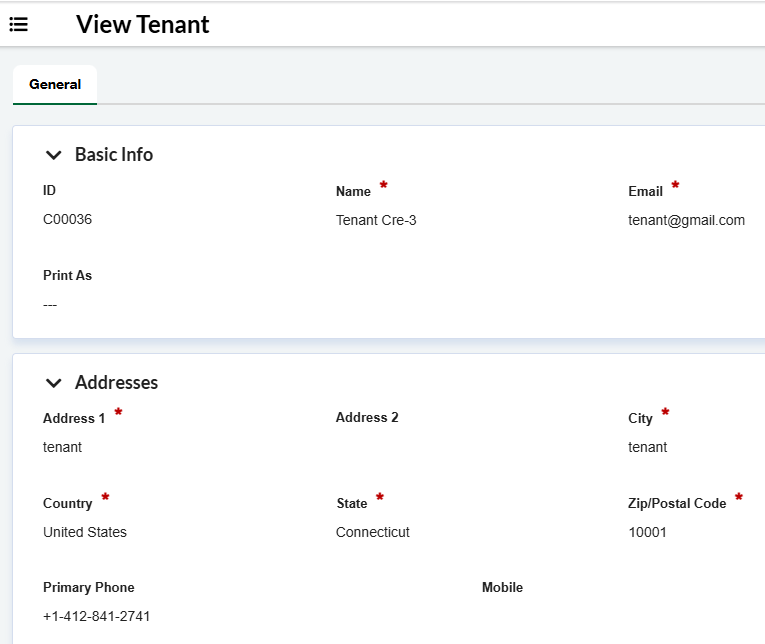
Search for and open a few tenant profiles.
-
Verify that all tenant attributes in the Real Estate module are correct (Basic info and Addresses)
-
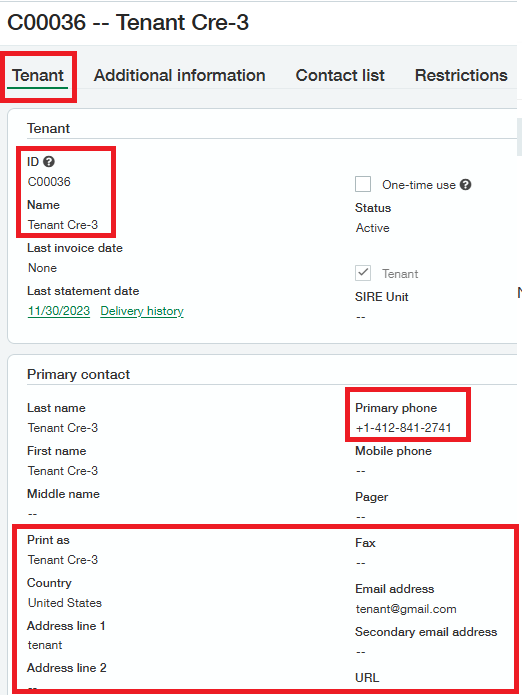
Testing Steps in Intacct:
Navigation: Accounts Receivable > Tenants-Customers
-
3.3 Verify Tenant Attributes in Intacct:
-
Search for and open a few tenant profiles.
-
Verify that all tenant attributes in Intacct are correct, including names, contact information, and status.
-

4. Leases
Objective: Validate that all leases records and attributes are correctly loaded.
Navigation: Real Estate Module > Main Menu > Tasks > Manage Leases > Leases
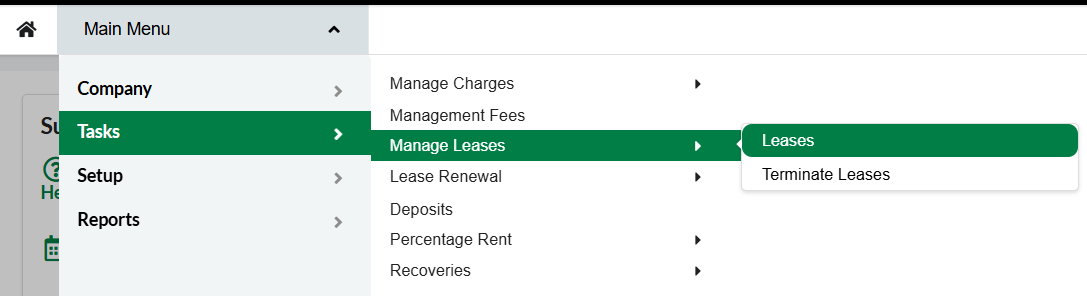
Testing Steps:
-
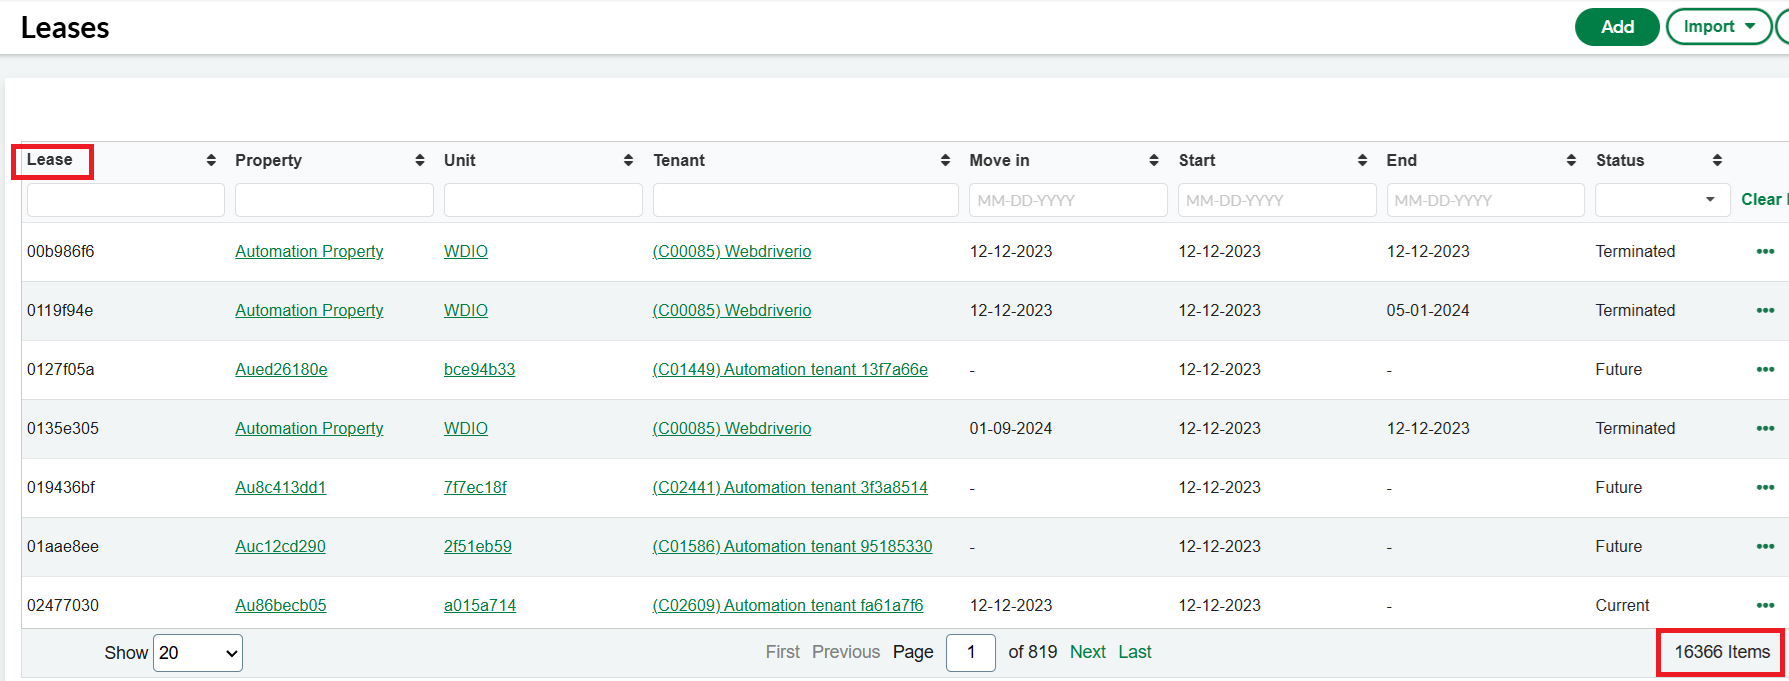
4.1 Verify Lease list and Names
-
Navigate to the Leases list.
-
Check that the Lease Names are correct.
-
Confirm that the total number of Leases in the system matches your portfolio.
-
-
4.2 Lease Verification for 5 Leases*:
-
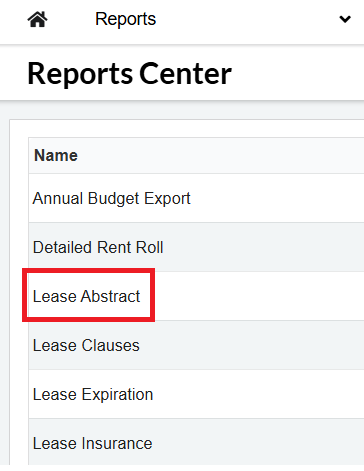
Select at least five different leases to review. Choose a variety of leases if possible. *We recommend to verify Lease data using the Lease Abstract report. To open the report go to Real Estate Module --> Main Menu--> Reports --> Report Center --> Lease Abstract
-
-
-
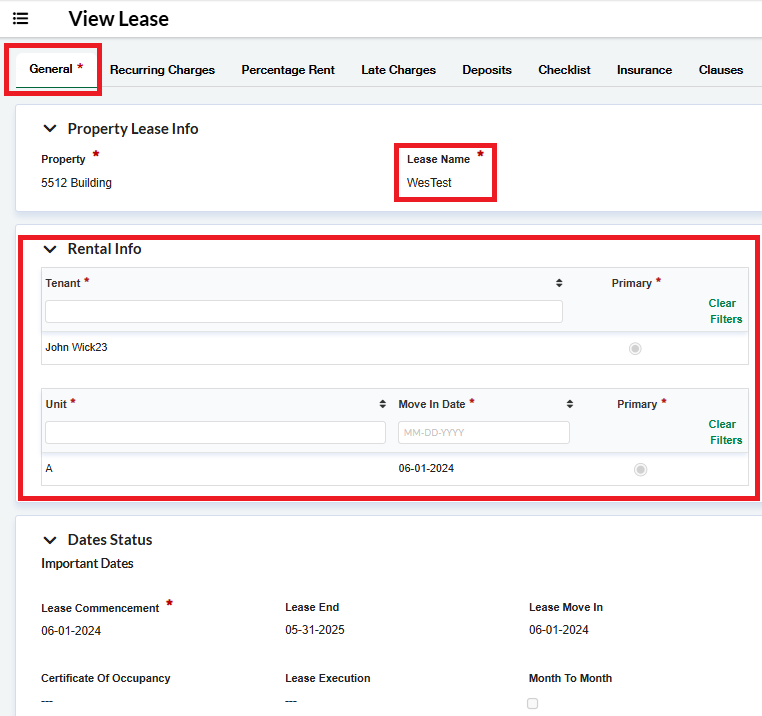
4.2.1 Verify Lease Name, Unit(s) associated, Primary Unit, Tenant(s) associated and Primary Tenant:
-
Confirm the lease name is accurate. Check that the lease is tied to the correct unit(s), and the primary unit is designated properly. Confirm the correct tenant(s) are associated with the lease, and the primary tenant is designated properly.
-
-
-
-
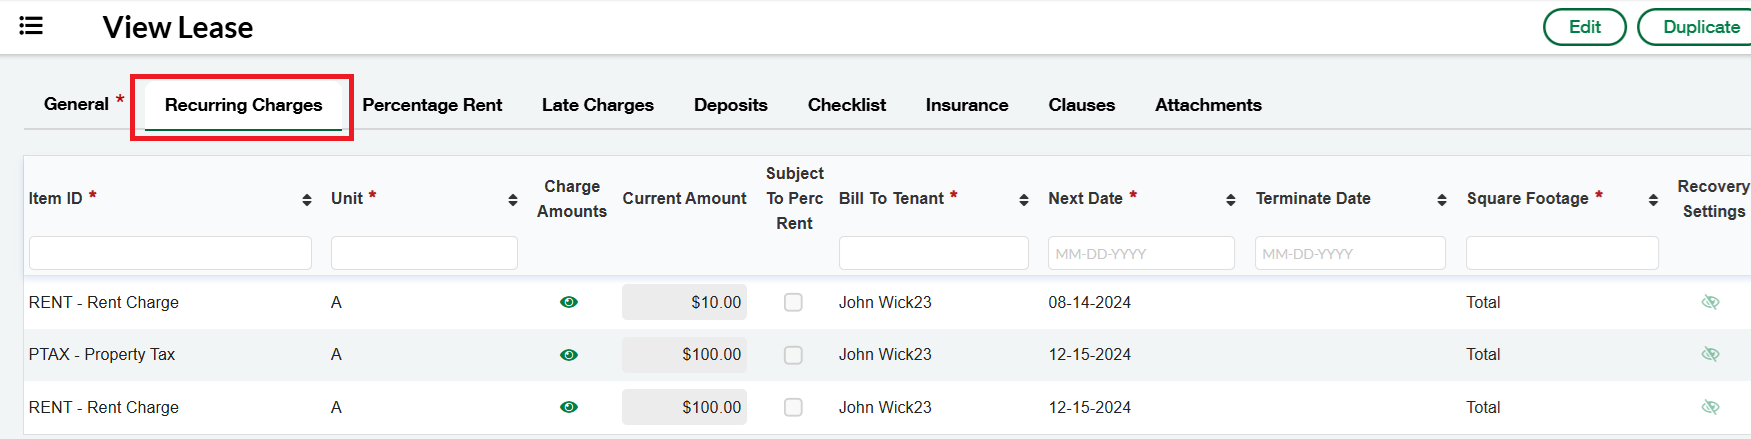
4.2.2 Verify Recurring Charges:
-
Click on the Recurring Charges tab within a lease: Check that the Recurring Charges and Item IDs are correct. Verify the correct Tenants and Units are assigned to the recurring charges. Ensure the Next Date and Terminate Date are accurate.
-
-
-
-
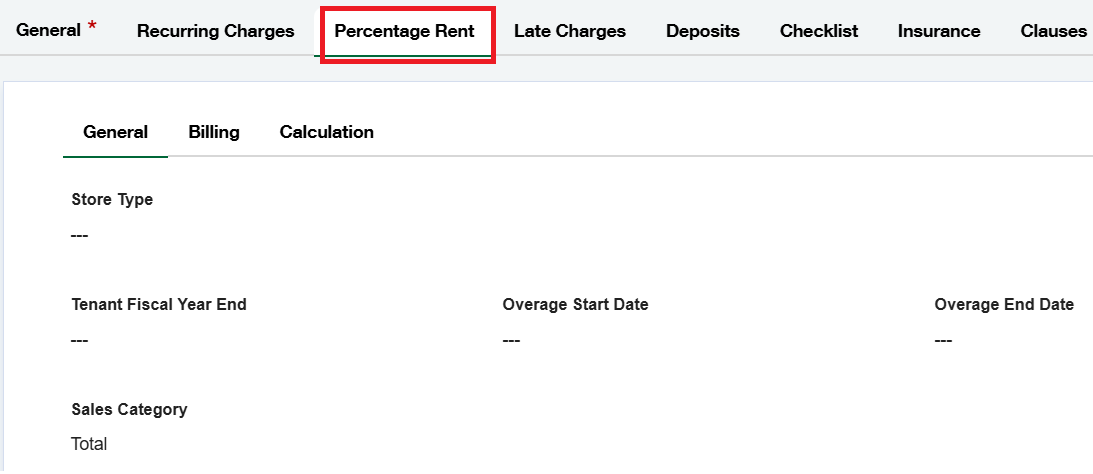
4.2.3 Verify Percentage Rent Lease Configuration:
-
If applicable, click on the Percentage Rent tab. Verify that the Percentage Rent lease configuration is correct.
-
-
-
-
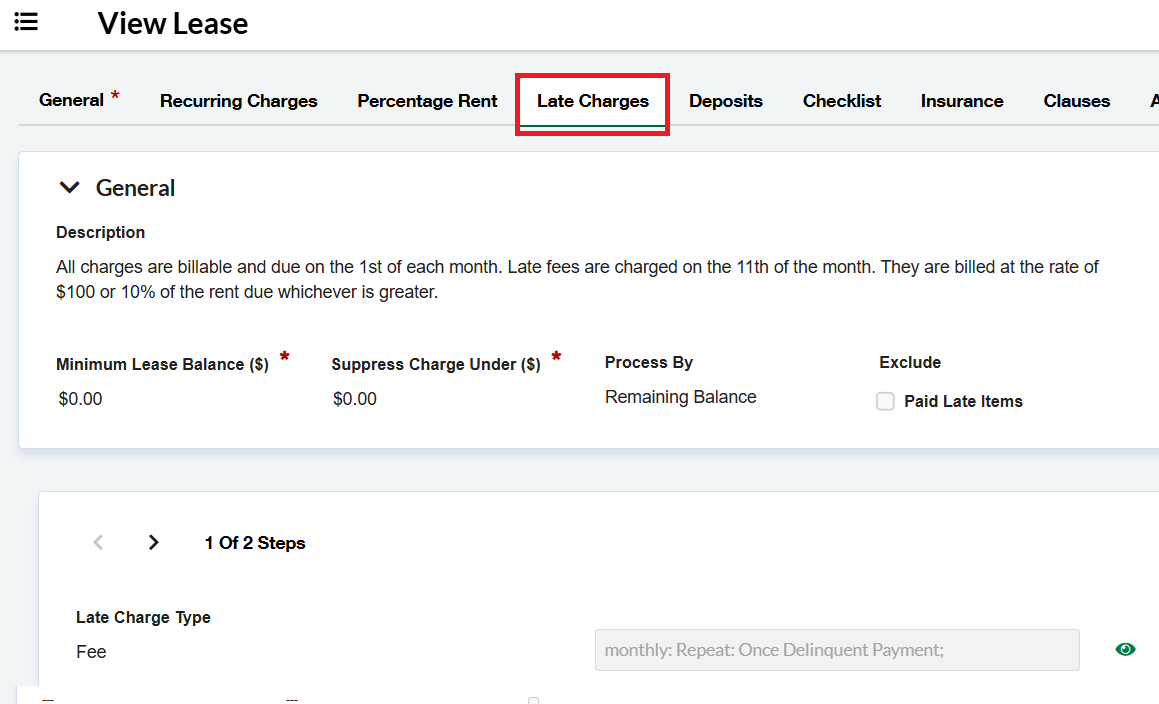
4.2.4 Verify Late Charges Lease Configuration:
-
If applicable, click on the Late Charges tab. Verify that the Late Charges lease configuration is correct.
-
-
-
-
4.2.5 Verify Deposits:
-
If applicable, click on the Deposits tab. Verify that the Deposits loaded are correct.
-
-
-

-
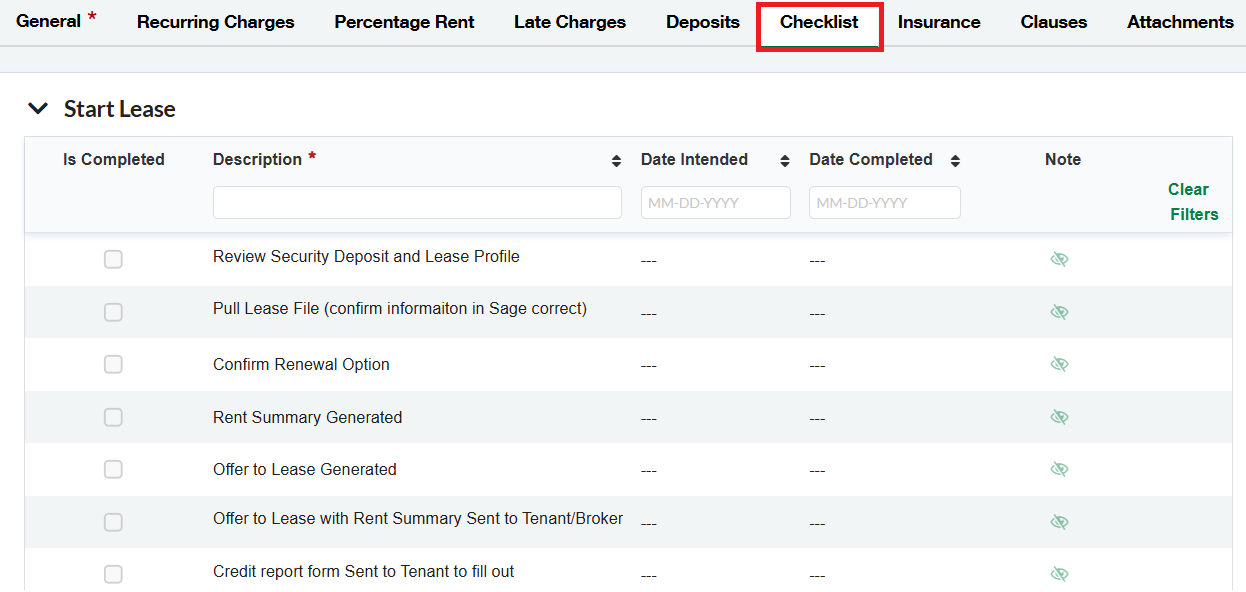
4.2.6 Verify Checklist:
-
If applicable, click on the Checklist tab. Verify that the Lease Checklist is correct.
-
-
-
-
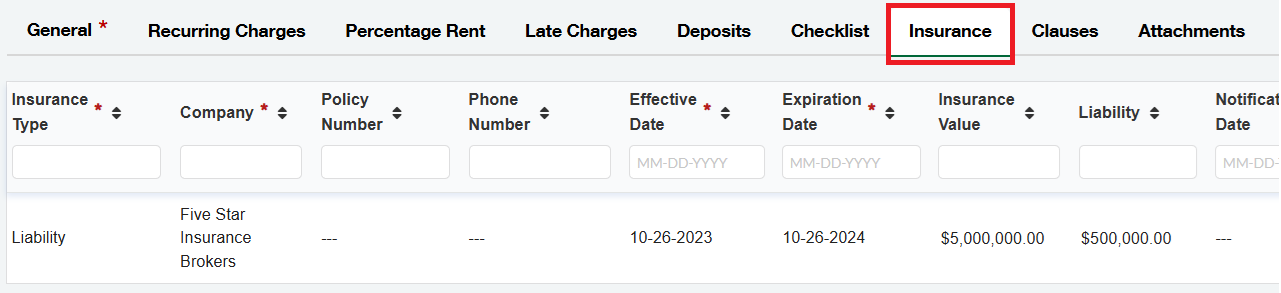
4.2.7 Verify Insurance:
-
If applicable, click on the Insurance tab. Verify that the Lease Insurance information loaded is correct.
-
-
-
-
4.2.8 Verify Clauses:
-
If applicable, click on the Clauses tab. Verify that the Clauses (Options) lease information loaded is correct.
-
-

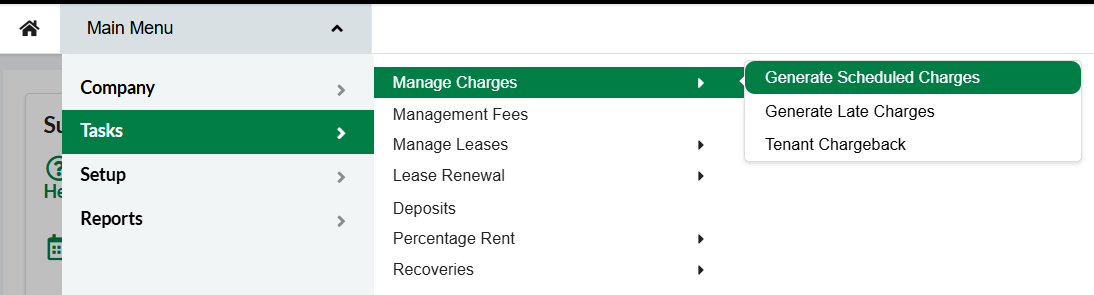
5. Generate Scheduled Charges
Objective: Preview the generation of scheduled charges to ensure they are calculated correctly.
Navigation: Real Estate Module > Main Menu > Tasks > Manage Charges > Generate Scheduled Charges
Testing Steps:
-
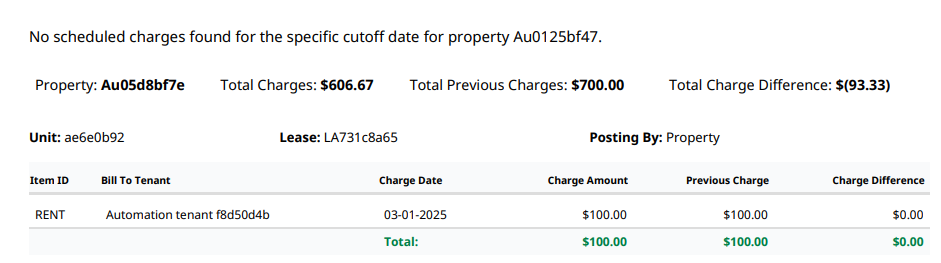
5.1 Generate Scheduled Charges Preview:
-
Select two or more properties.
-
Generate a preview of the scheduled charges. Do not commit them.
-
Review the preview to ensure all expected charges are present and the amounts are correct.
-
6. Percentage Rent Sales & Billing
Objective: Verify that sales volume can be entered and percentage rent can be billed successfully.
Navigation:
-
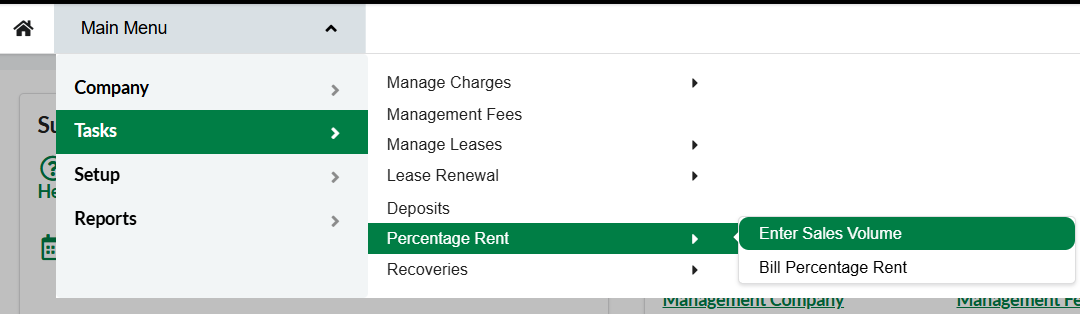
Real Estate Module > Main Menu > Tasks > Percentage Rent > Enter sales volume -
Real Estate Module > Main Menu > Tasks > Percentage Rent > Bill Percentage Rent
Testing Steps:
-
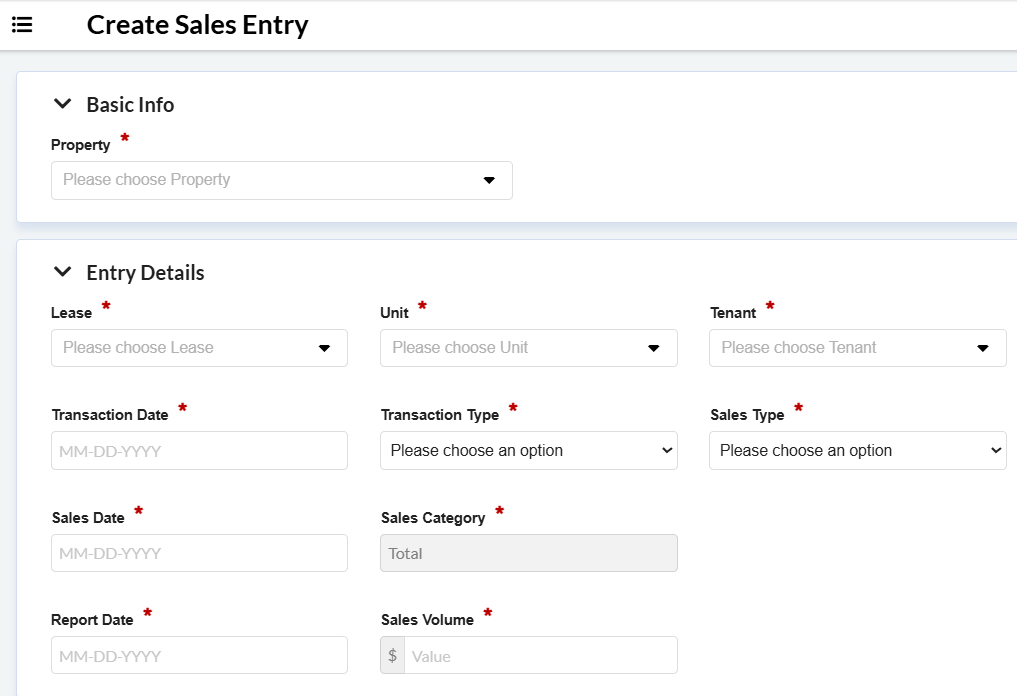
6.1 Verify Sales Entries:
-
Enter last year's sales entries for at least two leases.
-
-
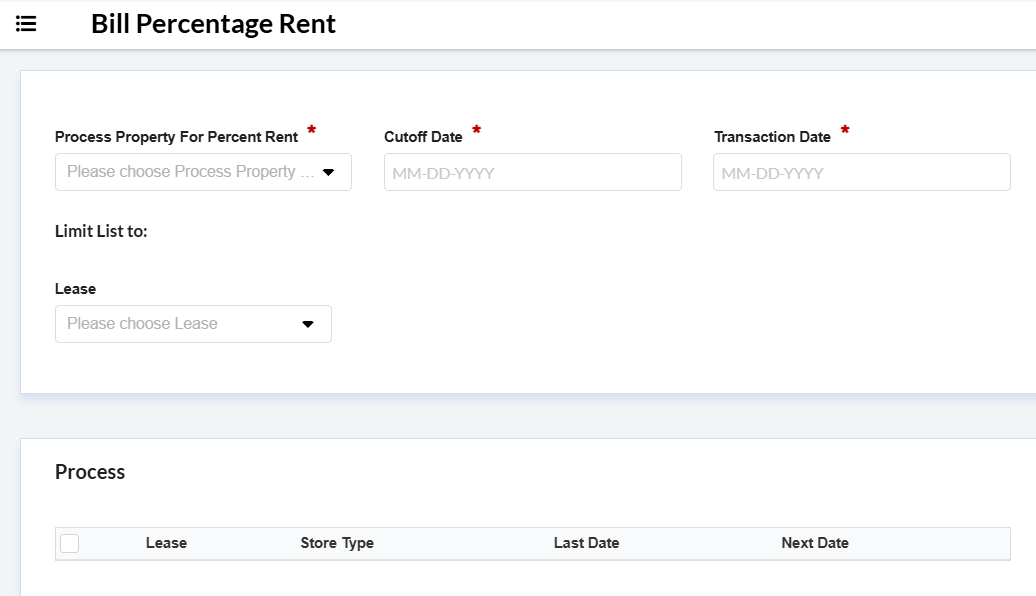
6.2 Bill Percentage Rent:
-
Initiate a billing run for percentage rent for at least two properties.
-
Review the generated invoices to confirm the calculations are accurate.
-
7. Late Fees
Objective: Confirm that the system can generate late fee charges correctly.
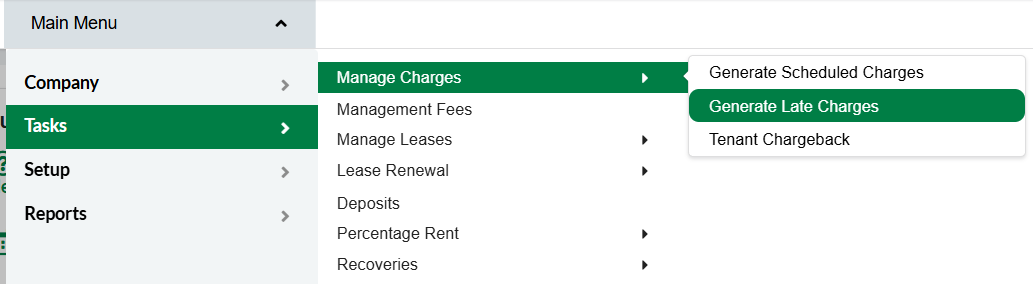
Navigation: Real Estate Module > Main Menu > Tasks > Manage Charges > Generate Late Charges
Testing Steps:
-
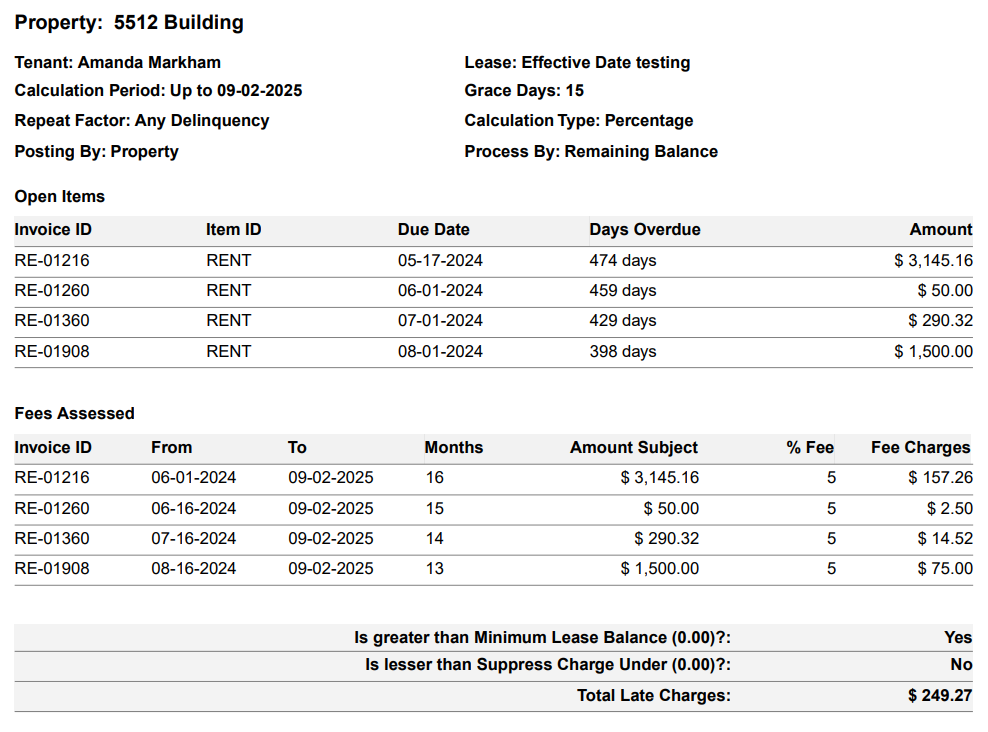
7.1 Generate Late Fee Charges Preview:
-
Select two or more properties.
-
Generate a preview of the late fee charges. Do not commit them.
-
Review the preview to ensure they apply to the correct tenants and for the correct amounts.
-
8. Deposits
Objective: Test the functionality for managing security deposits.
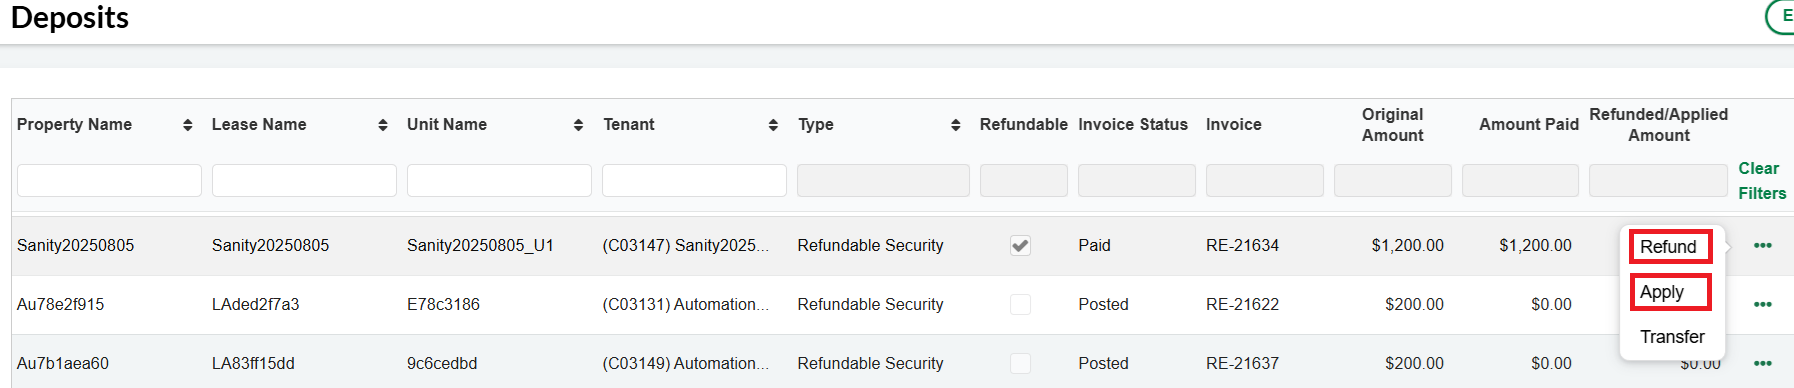
Navigation: Real Estate Module > Main Menu > Tasks > Deposits

Testing Steps:
-
8.1 Refund and Apply Deposits:
-
Select at least three deposits.
-
Test the ability to both refund and apply these deposits to tenant ledgers.
-
Reporting Issues and Final Confirmation
-
If you find an issue: Report to your project manager or the implementation/data conversion team. Please include the Test item, the module, the specific data record (e.g., Property Name: "123 Main St"), and a clear description of the problem.
-
If all data is correct: Once you have completed all tests and verified the data, please inform your project manager or the implementation/data conversion team. Your approval and sign off is a crucial final step before the data can be migrated to the live production environment.
Thank you for your help in ensuring a successful data migration!