Overview
The CPI Rent Increase feature streamlines the process of applying Consumer Price Index (CPI) escalations to recurring charges on leases. This allows property managers to automatically adjust rent and other item IDs based on official CPI index values, addressing the need to maintain rent values in line with inflation. By automating what was previously a manual and time-consuming process, the feature aims to save users' time, increase accuracy, and help property managers and owners remain competitive. This feature provides a preview journal for reviewing adjustments before applying them, automated email notifications to tenants, and tools for managing CPI templates.
Step 1 - Configuring CPI Settings on a Recurring Charge
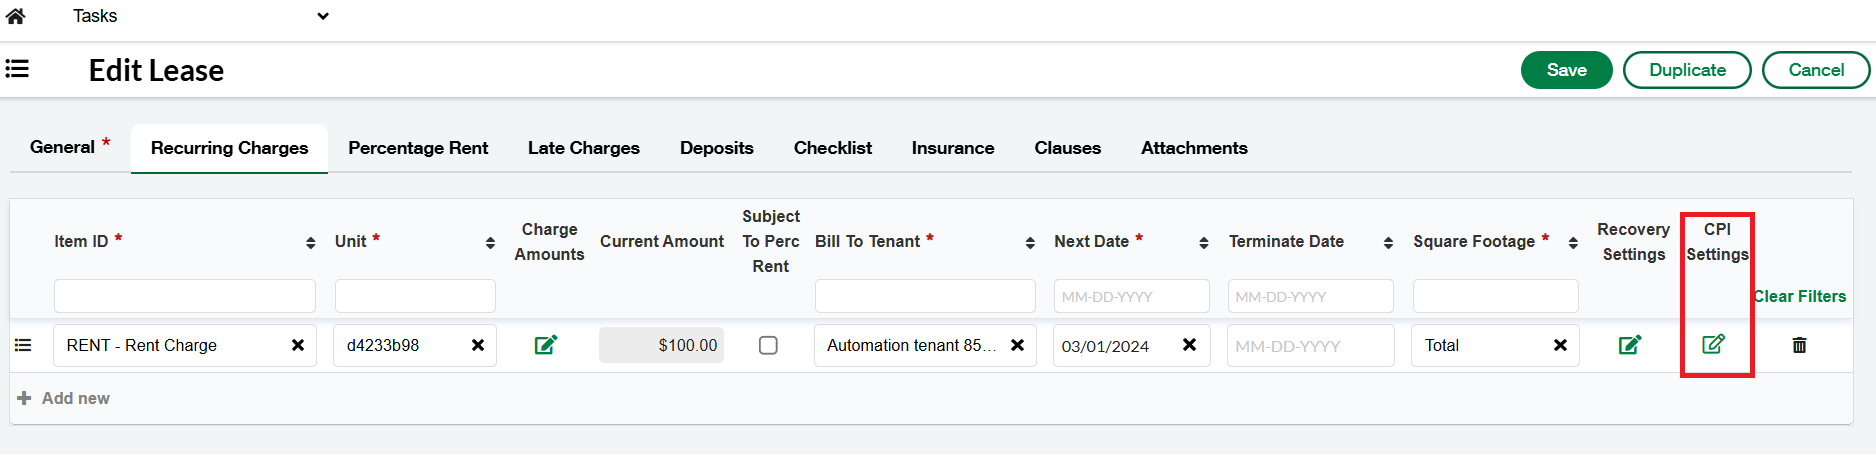
To apply CPI adjustments to a specific recurring charge, you must first access and configure its individual CPI settings. Only users with edit rights on a lease or charge can view or edit these settings.
-
Navigate to a lease.
-
Select the "Recurring Charge" tab.
-
Locate the desired recurring charge.
-
Click the "CPI Settings" link next to "Recovery Settings." This will open the CPI Control Template for that recurring charge.
Step 2 - Configuring the CPI Control Template
The CPI Control Template allows for flexible configuration of CPI escalations. You can create a new template from scratch or base it on an existing one, setting specific controls, calculation methods, base year parameters, and various calculation components.
-
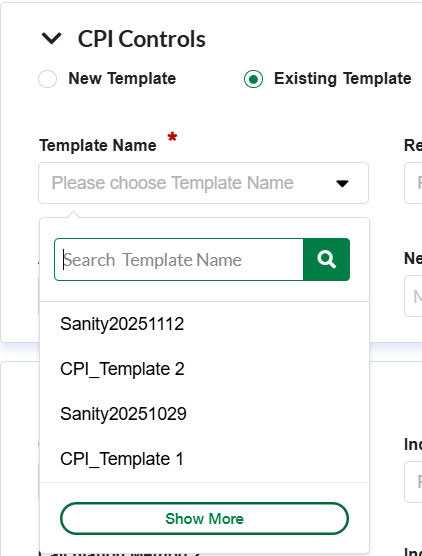
Template Selection
-
New Template: Selected by default. Fill in all required fields to create a new template.
-
Existing Template: Select this option to choose an existing template from the dropdown list. Upon selection, all fields will populate with the configuration of the selected template.
-
-
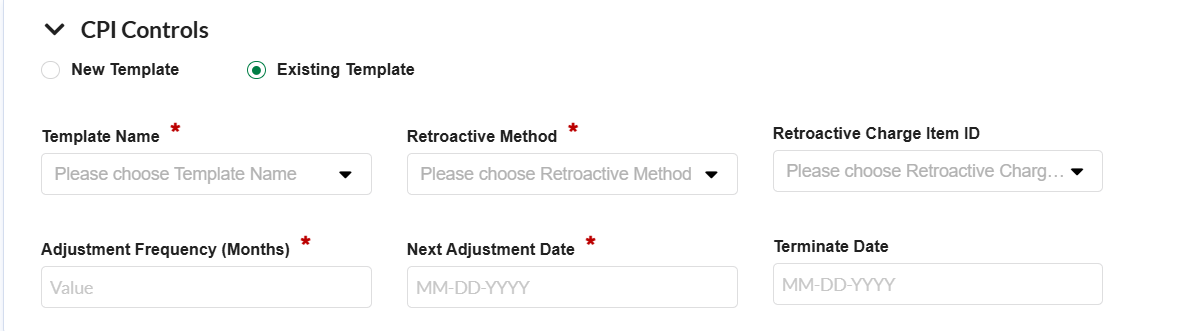
CPI Controls
-
Retroactive Method: Select how retroactive charges are handled:
-
No Retroactive (default)
-
Create a Charge: If selected, choose the appropriate Retroactive Charge Item ID from the dropdown list. This Item ID will be used when generating any retroactive invoice charges.
-
-
Adjustment Frequency (months): Enter how often (in months) CPI adjustments occur (e.g.,
12for annual). This field is required. -
Next Adjustment Date: Select the date for the next CPI adjustment. This field is required and is updated automatically by escalation tasks after an adjustment.
-
Terminate Date (optional): Select the date to stop CPI escalations.
-
-
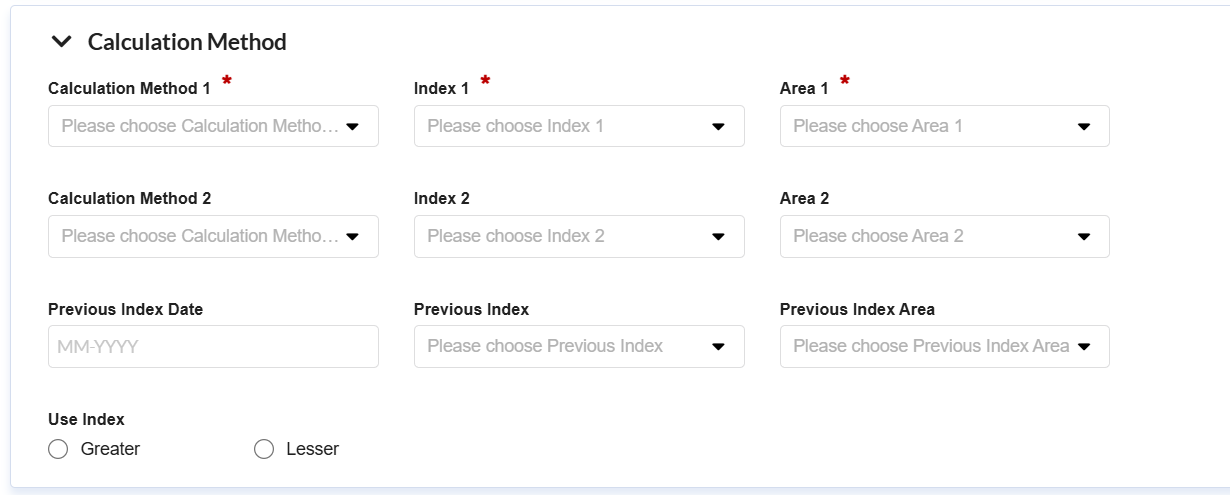
Calculation Method
-
Calculation Method 1 (required): Choose the primary method for calculation:
-
Current Year against Last Year
-
Current Year against Base Year
-
-
Index 1 (required): Select the CPI Index Type from the Bureau (e.g., CPI-U, CPI-W, Core CPI).
-
Area 1 (required): Select the geographic area for the index. This field supports searching and filtering.
-
Previous Index Date: Required if Calculation Method 1 is set to Current Year against Last Year.
-
Previous Index: Required if Calculation Method 1 is set to Current Year against Last Year.
-
Calculation Method 2 (optional): Choose an optional secondary calculation method.
-
Index 2 (optional): Select a secondary CPI Index Type from the Bureau.
-
Area 2 (optional): Select the geographic area for the secondary index.
-
Use Index: If both Index 1 and Index 2 are specified, choose which value to use for the final adjustment: Greater (default) or Lesser.
-
-
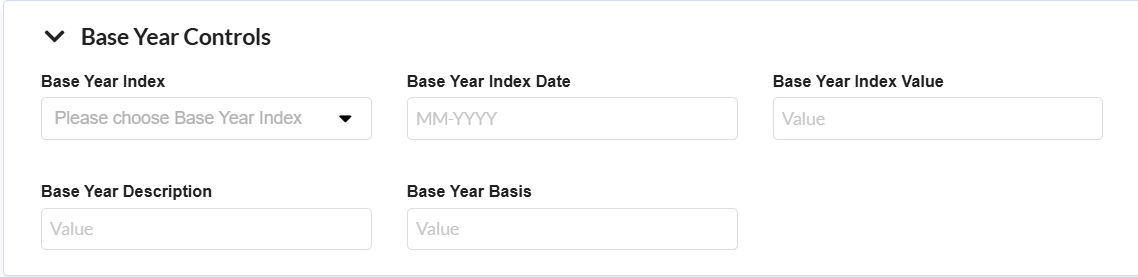
Base Year Controls
-
If Calculation Method 1 is Current Year Against Base Year and an Index and Area are selected, the Index Type will pre-populate in this section.
-
Base Year Index: Required for base year calculation.
-
Base Year Index Date: This field becomes mandatory when Current Year Against Base Year is selected.
-
Base Year Description: Text to describe the base year period. This field is not used in the base year calculation.
-
Base Year Index Value: Enter the numeric value of the index for the base year, supporting up to 3 decimal places.
-
Base Year Basis: Numeric field used as the basis for the base year calculation.
-
-
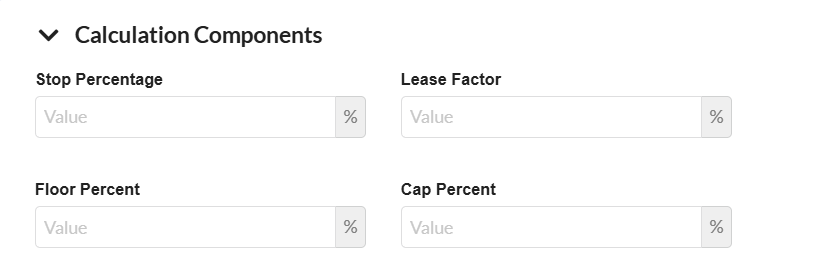
Calculation Components
-
For all percentage inputs (Stop Percentage, Cap Percentage, Floor Percent), entering a value like
25will correctly interpret it as25%(not2500%). -
Stop Percentage: A percentage that defines a deductible; the tenant is responsible for the percentage increase in excess of this stop (e.g., if a 25% Stop is applied, the tenant pays 75% of the increase).
-
Lease Factor: A multiplier applied to the CPI increase to determine how much the rent should go up. This field behaves as a percentage (e.g., a 33% Lease Factor means the tenant pays 33% of the increase).
-
Floor Percent: A minimum percentage that the rent must increase, even if the CPI is lower or negative (e.g., a 5% Floor means the rent increases by at least 5%).
-
Cap Percentage: The maximum percentage of increase that the tenant will be required to pay.
-
Step 3 - Managing CPI Templates
Manage your CPI templates from a centralized listing screen, offering options to view, edit, or delete them.
-
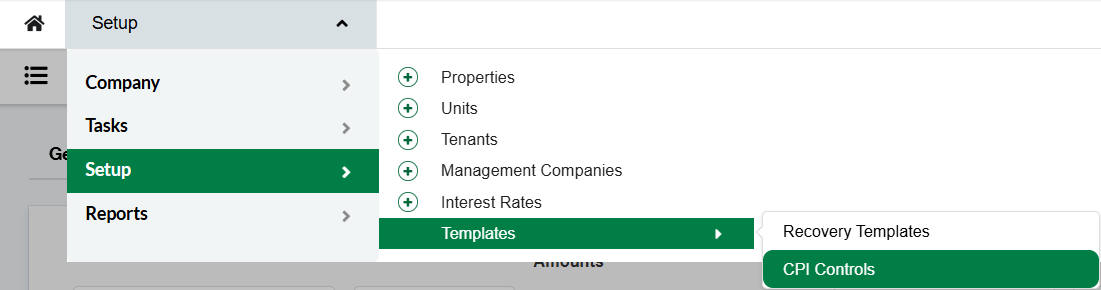
Accessing the Template Listing Screen
-
Open the Setup menu.
-
Click Templates.
-
Select CPI Controls.
-
-
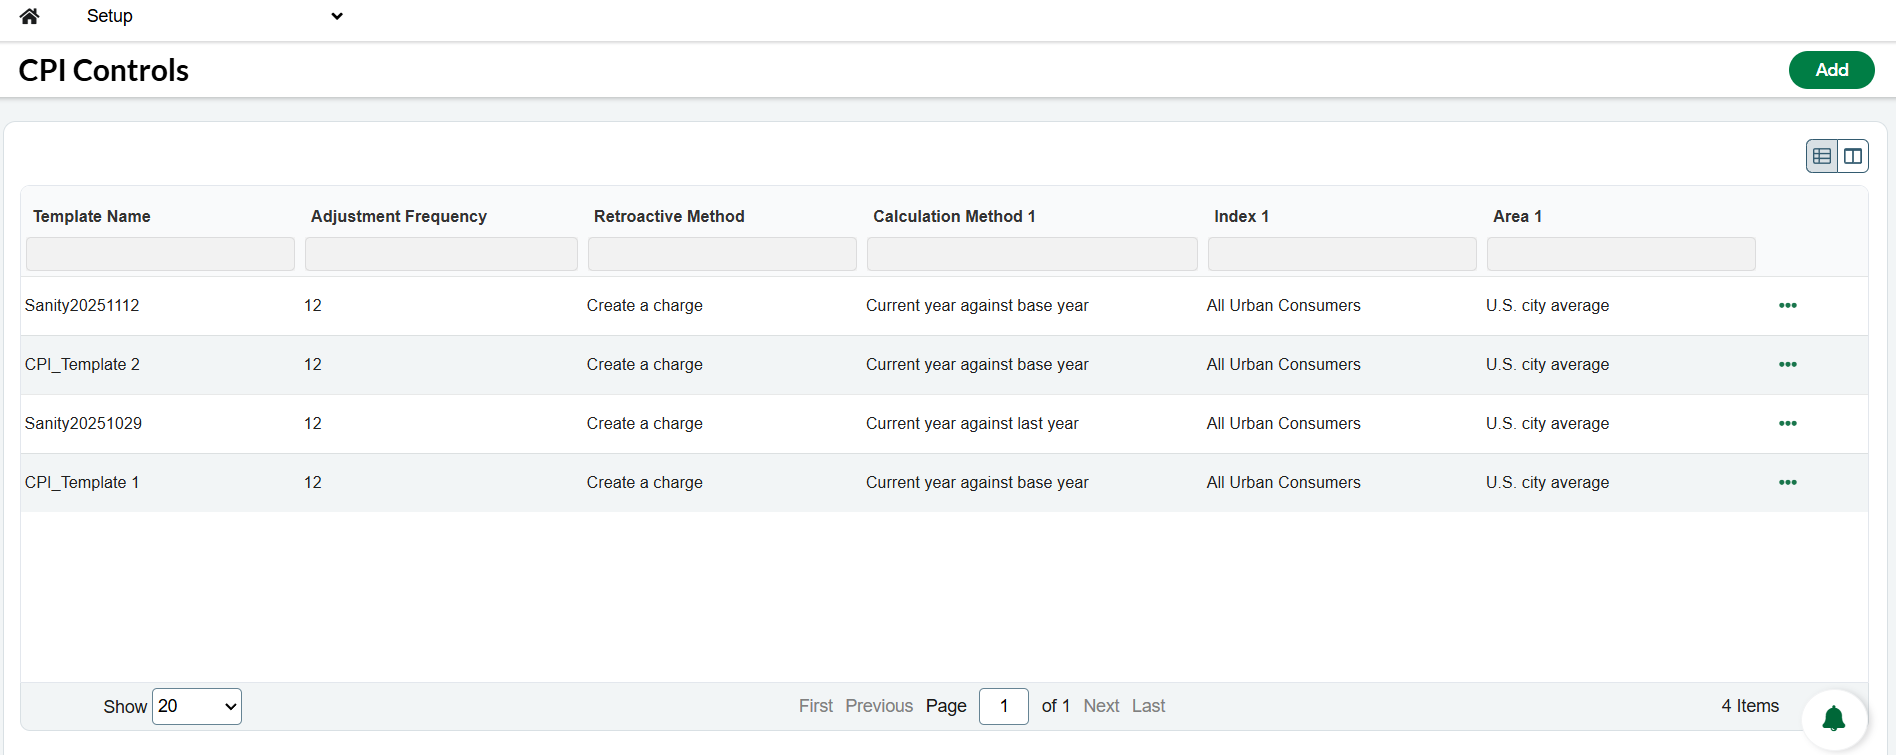
Template List Screen
-
A table displays all previously created CPI templates with the following columns: Template Name, Adjustment Frequency, Retroactive Method, Calculation Method 1, Index 1, and Area 1.
-
Add button: Located at the top-right of the screen. Clicking it navigates to the "Create New CPI Template" form.
-
3-dot menu: Available for each row, offering the following actions:
-
View: Opens the template in a read-only detail page or modal.
-
Edit: Navigates to an editable form page for the template.
-
Delete: Displays a confirmation dialog and permanently deletes the template upon confirmation. Permissions will determine access to these actions.
-
-
Step 4 - Accessing the CPI Escalations Screen
The CPI Escalations screen provides a centralized view for generating and managing CPI adjustments across your properties.
-
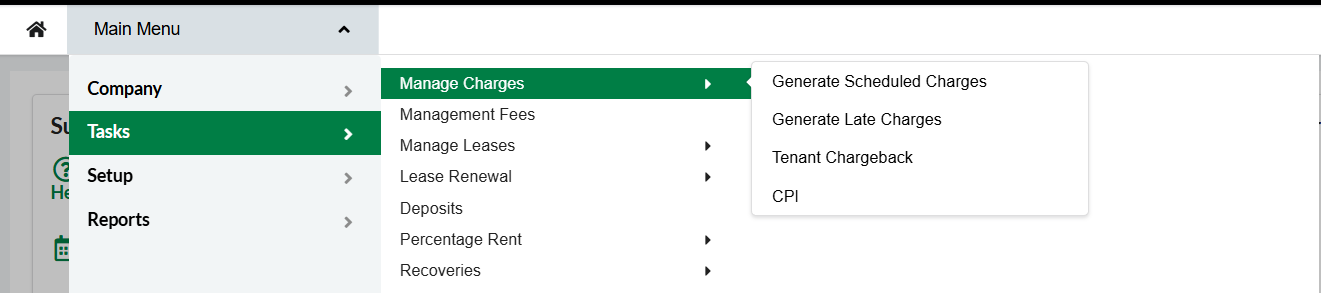
Navigate to the main menu.
-
Select Tasks/Manage Charges.
-
Click CPI. This will lead to the CPI Escalations screen, where you can filter and generate preview journals.
Step 5 - Generating the CPI Preview Journal
After setting your CPI escalation criteria, generate a preview journal to review all proposed rent adjustments before committing them.
-
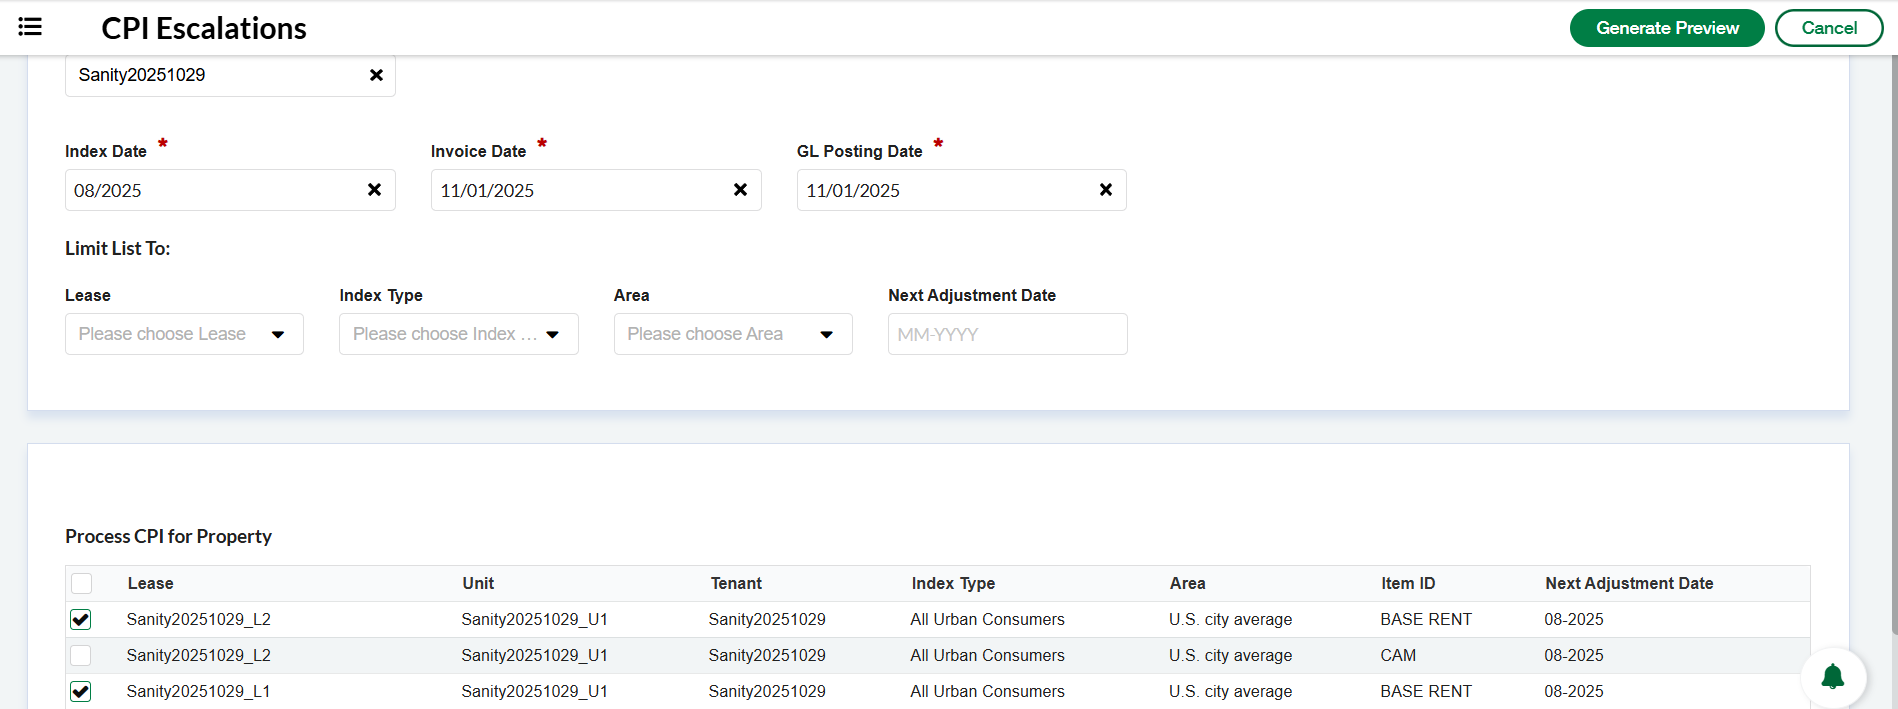
Set the necessary filters on the CPI filter screen, including the Next Adjustment Date (see Step 6).
-
Select the Property from the dropdown
-
Enter an Invoice Date
-
Enter a GL Posting Date
-
Limit list To fields are optional filtering: Lease, Index Type, Area, and Next Adjustment Date.
-
Process CPI for Property: Gives the user the ability to only select certain Leases to run CPI , or all at once.
Filtering CPI Escalations
To quickly find specific CPI records, use the filters available on the CPI Escalations screen.
-
On the CPI Escalations screen, a new filter field "Next Adjustment Date" is available.
-
Use the month/year picker to select a specific MM/YYYY.
-
The list of CPI items will automatically filter to display only those records with a matching Next Adjustment Date.
-
Clearing the filter will reset the list to show all items. This filter can be combined with other existing filters. If no results are found, a "No records match this Next Adjustment Date" message will display.
-
Click "Generate Preview."
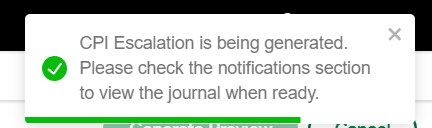
Popup message that indicates that the Preview Journal is being generated:
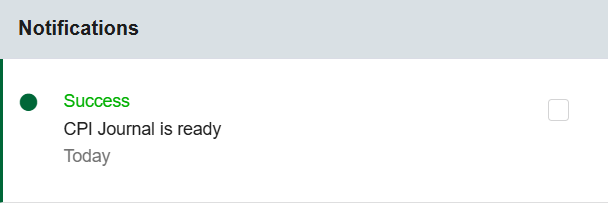
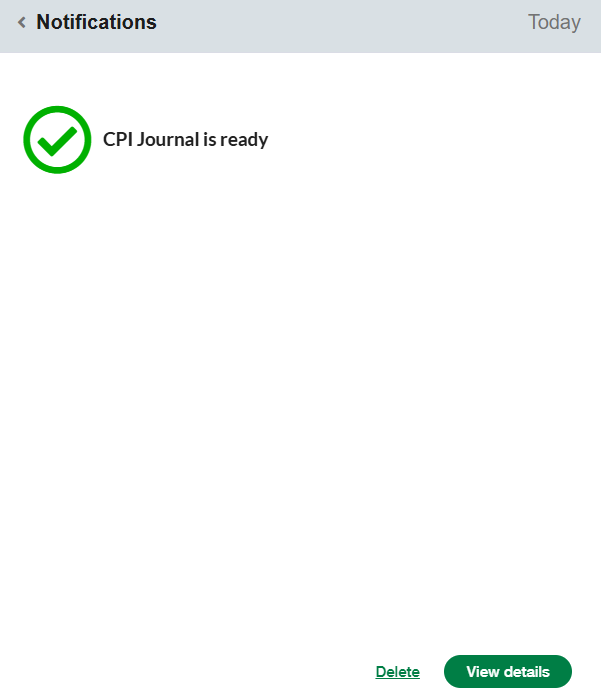
The Notification Section would display a new Notification once the Preview Journal is created and ready
-
Clicking on View Details the PDF is displayed
-
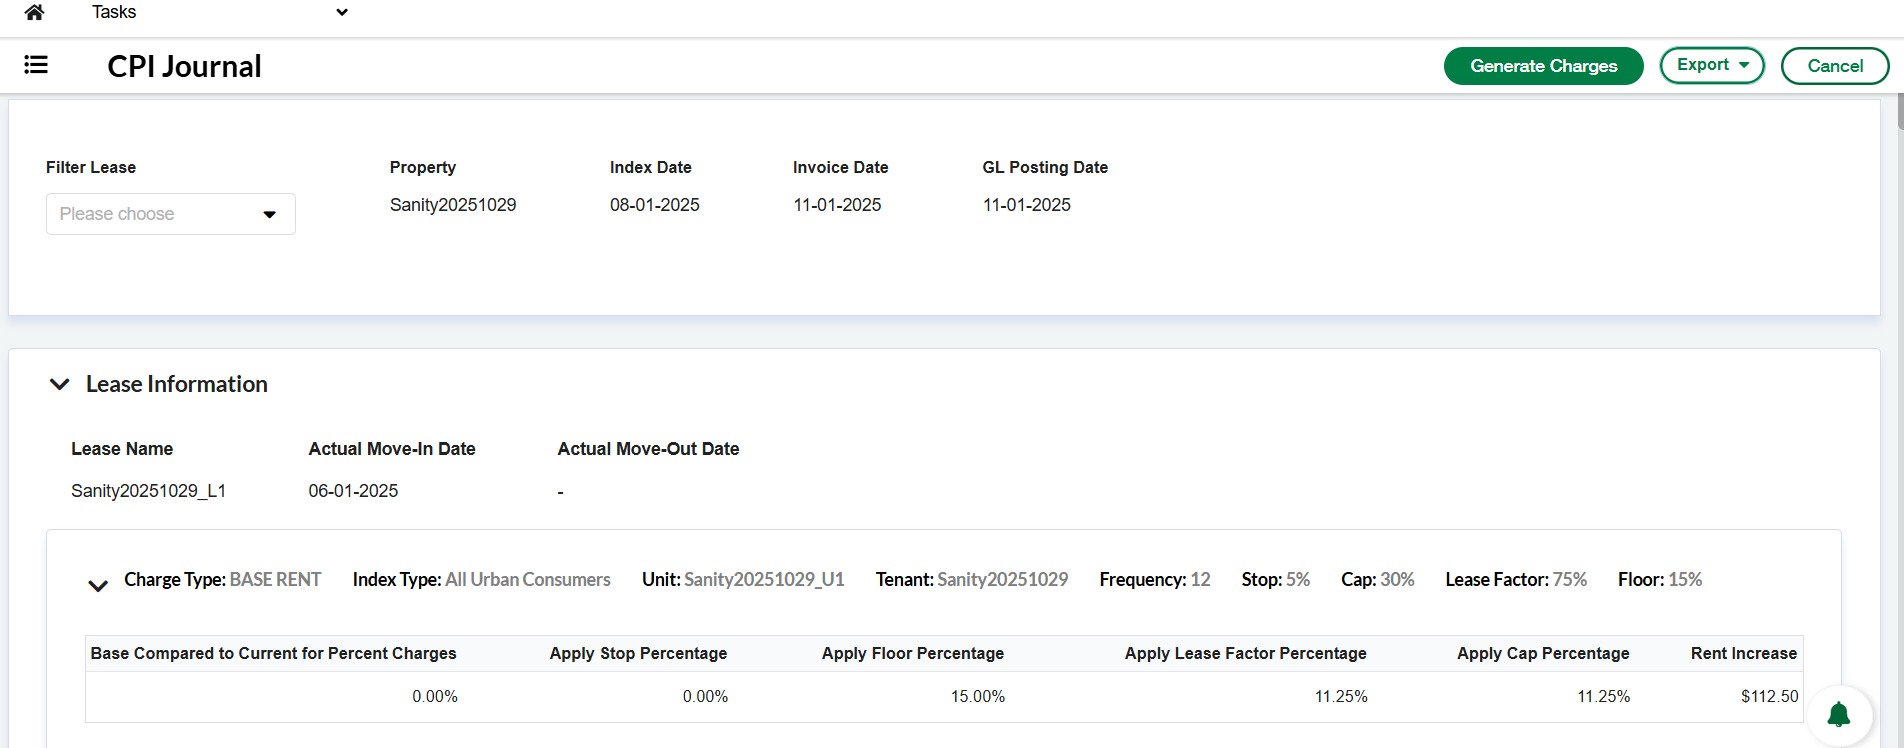
CPI Journal Header
-
Title: CPI Journal
-
Action buttons:
-
Generate Charges: Creates new charges (and retroactive invoices, if applicable).
-
Export: Provides options to export the journal to Excel or PDF.
-
Cancel: Cancels the process and returns to the CPI filter screen. A confirmation modal will appear.
-
-
First Level Journal Header (for the selected property)
-
Leases: Displays the list of leases included in the preview.
-
Property: The name of the property selected (only one property per process).
-
Index Date: The month and year of the index date (MM-YYYY), which determines the base CPI rate.
-
Invoice Date: The invoice date (MM-DD-YYYY) selected by the user, used for retroactive invoices.
-
GL Posting Date: The GL posting date (MM-DD-YYYY) selected, used for retroactive invoices.
-
-
-
Lease/Unit/Tenant Section
-
The journal is grouped by Unit, and within each group, Lease-level sections are displayed, which can be collapsed or expanded.
-
Top-left (for each Lease section):
-
Lease: Lease Name.
-
Actual Move In Date: Date in MM-DD-YYYY format.
-
Actual Move Out Date: Date in MM-DD-YYYY format (displayed only if available).
-
-
Top-right (for each Lease section):
-
Displays only the Calculation Components fields (e.g., Stop Percentage, Lease Factor, Floor Percent, Cap Percentage) that were explicitly set by the user, formatted as percentages where applicable.
-
-
Center Section (for each Recurring Charge with CPI settings):
-
Charge Type: The Item ID of the recurring charge.
-
Index Type: The CPI index selected.
-
Unit: The unit associated with the recurring charge.
-
Tenant: The tenant of the recurring charge.
-
Frequency: The adjustment frequency from CPI settings.
-
Base compared to current for percent charges: Shows the change between the Previous CPI and Current CPI, calculating the Percent Change using the formula:
((Current CPI - Previous CPI) / Previous CPI) * 100. -
Apply Stop: Shows the Stop Percentage applied.
-
Apply Floor: Shows the Floor Percentage applied.
-
Apply Cap: Shows the Cap Percentage applied.
-
Apply Lease Factor: Shows the Lease Factor applied.
-
Rent Increase: The calculated increase.
-
-
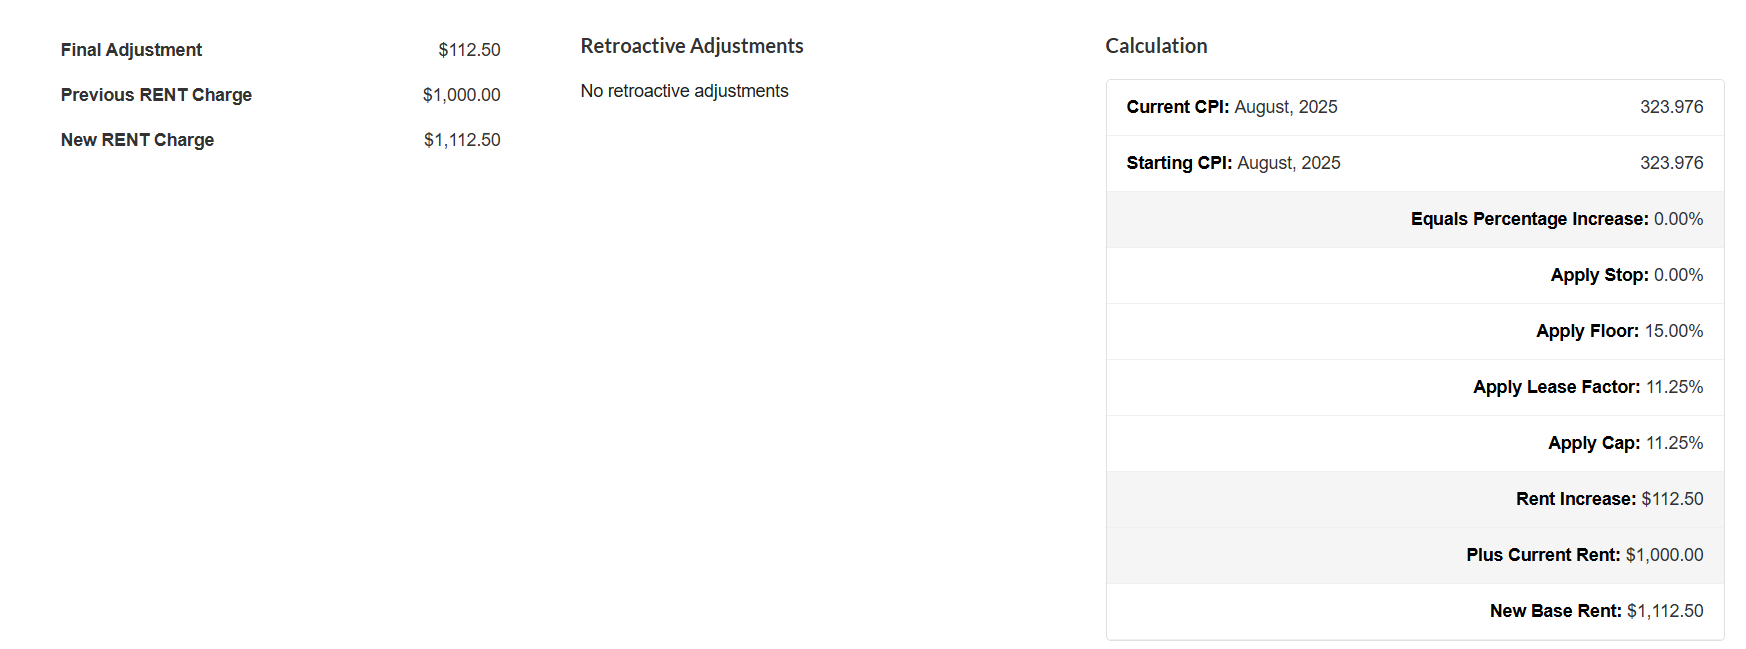
Summary Line: The New Charge Amount is displayed at the bottom of the charge section, along with the Final Adjustment Amount, and the old charge amount.
-
-
-
Error Messages
-
If no charges are found with CPI settings for a lease: "No CPI charges found for this lease."
-
If CPI data is missing or cannot be calculated: A warning icon will appear with a note such as "CPI data unavailable for this charge. Please check the index type and reference date."
-
-
Export Functionality
-
The PDF export replicates the on-screen structure and formatting of the CPI Preview Journal, with lease-level grouping.
-
The Excel export contains all CPI Preview data in a flat table format (one row per charge), with auto-formatted currency, percentages, and dates. Column headers are bolded.
-
File names follow the convention:
CPI-journal-YYYY-MM-DD.pdf
-
Step 6 - Executing CPI Rent Increases
Once the CPI Preview Journal is reviewed, you can execute the increases, generating new charges and, if configured, retroactive invoices.
-
Click the "Generate Charges" button on the CPI Preview Journal.
-
Notifications
-
Success: A notification will display: "New CPI Charges have been generated."
-
Error: A notification will display: "New CPI Charges have failed to generate, please review the details."
-
-
Charge Generation Process
-
The system will read the Preview Journal data and process each entry.
-
It calculates the CPI percentage change:
((Current CPI - Previous CPI) / Previous CPI) * 100. -
Calculation components (Stop Percentage, Cap Percentage, Lease Factor, Floor Percent, Multiplier) are applied in the specific order: Stop → Cap → Lease Factor → Floor → Multiplier.
-
New charge records (invoice lines) are created for valid CPI data and active leases. Each charge includes the Lease, Unit, Charge Type (Item ID), Final Amount (formatted to 2 decimal places), Applied Percentage, and a reference to the CPI Preview Journal.
-
If the calculated increase is below the Floor Percent, the Floor percentage will override the calculation.
-
If the calculated increase exceeds the Cap Percentage, the Cap percentage will apply.
-
The system ensures idempotency, preventing duplicate charges if the same journal is executed multiple times.
-
-
Retroactive Charges
-
When Retroactive Method = Create a Charge, the system can generate retroactive CPI charges for missed adjustment periods. Retroactive charges are created only when the Property Last Scheduled Charges Date is less than or equal to the Recurring Charge Next Date. The retroactive period is calculated between the CPI Next Adjustment Date and the Recurring Charge Next Date. Retroactive entries are generated as separate charge records using the configured Retroactive Charge Type and do not modify historical invoices. If a partial billing period exists, the retroactive amount is prorated according to the recurring charge schedule rules.
-
Step 7 - Reviewing CPI Journals and Notifications
After executing CPI rent increases, tenants are automatically notified, and the generated CPI Journal is readily available for review.
-
Automated Email Notifications to Tenants
-
Upon clicking "Generate Charges," an automated, customized CPI rent adjustment email is sent to each affected tenant.
-
The email uses a predefined template, populated with dynamic fields such as [Company logo], [Propertyname], [Propertyaddress], [Property Contact Phone], [Property contact email], [Tenant Print As], [Tenant address], [Tenant City, State, CP], [Unit Name], [Tenant Name], and [New Commencement date for the new charges MM/DD/YYYY].
-
Emails are sent from the Property email address derived from the invoice type and are logged in the tenant’s communication history.
-
-
CPI Journal Attached to Leases
-
After generating charges, a PDF version of the CPI Journal is automatically attached to the corresponding Lease → Attachments section.
-
If multiple charges are generated for the same lease in one CPI execution, they are consolidated into a single CPI Journal file.
-
The attached file includes metadata: ID (system-generated), Name (e.g.,
CPI Journal - [LeaseID] - [TenantName] - [ChargePeriodStart]-[ChargePeriodEnd].pdf), and Description (e.g.,CPI Journal generated during CPI process for Lease [LeaseID] / Tenant [TenantName] covering period [ChargePeriodStart] - [ChargePeriodEnd].). -
Users can view or download the journal directly from the lease attachments.

-
-
CPI Journal Attached to Invoices
-
When Charge Retroactive Adjustments are enabled and new invoices are generated for past periods, the specific CPI Journal section corresponding to the Unit and Tenant is attached to each new invoice.
-
If you have any questions or require further assistance with this feature, please contact our support team.